Become a Patron!


 |
| by Monolith Edition |
Blüdhaven's Favorite Son
Hey, there, Gothamites! Welcome back to Painting Poorly, the blog where I, Mike Meeple, teach you how to paint your miniatures up to a tabletop quality that is sure to impress your friends, but won't cost you a million dollars or a million hours.
Last time we took a trip to Gotham, we took a look at how to paint my favorite member of the Bat-Family, Red Hood. Today, we're taking a look at his predecessor, Dick Grayson himself: Nightwing.

So, my son's middle namesake (yes, Toddler Nightwing Meeple) is a surprisingly easy mini to get ready for the table, and a great jumping on point for anyone who hasn't painted much, or AT ALL before.
If you haven't done so already, you'll want to check out my general tips section, and read through those blog posts, in order to familiarize yourself with some of the techniques and terms I'll be using.
Let's get to it!
1. Gameplan, Prep, and Prime
So, we'll be basing our interpretation of Nightwing off of the (now) classic Denny O'Neil and Chuck Dixon run of his solo series from the 90's.

You'll notice, black suit with blue accents that go all the way through his middle and ring fingers and a black mask.
I've assembled the following colors to help us get there:

Vallejo
Basic Skin Tone
Handmade Modern
Cornflower (light blue) and Slate (standard grey)
Ceramcoat
Black, White, and Mediterranean Blue (bright electric blue)
You'll also notice the pale blue color Blue Heaven by Ceramcoat in the picture above, but I ended up not using it.

I primed Nightwing with some spray on black primer by The Army Painter and that'll be doing most of the heavy lifting for us. Alternatively, if you don't have black primer, you can always prime white and then basecoat the entire mini with black to achieve the same effect.
2. Basecoats
The first thing we will be doing is a light drybrush with our slate or standard grey. For drybrushing, we'll want to use a wedge or chisel brush like this:

Normally, we thin all of our paints during the basecoat and highlight stage, however, for a drybrush, you want the paint to be a little, well, dry...
Load up a bit of your standard grey paint on your wedge brush and then brush that paint off onto a paper towel until there's just about NO PAINT left on the brush.

You'll now take the brush with the remnants of the grey paint on it and give it a gentle brush all over the figure. As you can see, the grey paint catches on all of the detail of the mini, giving us a rudimentary highlight.

This should give you an idea of what the back of the mini should look like (dat ass, tho!). If you've left too much paint on your brush, the detail of the muscles and whatnot will not show up as distinct as the above images, and you can always repaint it black and try again.

Once you've properly drybrushed the figure, you can take your mediterranean/electric blue and paint the blue portions of the costume. From this point on, remember to thin your paints with equal parts water.
For the blue, don't be afraid to apply multiple coats, as you want it to be an even application, without any of the black primer showing through, and don't forget the carry the blue all the way through his fingertips on his ring and middle fingers.

Here's an example of how the back should look. There are two little notches of blue that stick out towards the top of the "V" on either side of the front and back of the figure. Make sure that you paint those tiny details as well.

After that, we'll be tackling the face. Use your basic skin tone and paint the face, remembering to get the ears and neck on the right side. Because basic skin tone is a relatively lighter paint, you may have to apply multiple coats.
Don't worry about avoiding the mask, just paint over it with the skin tone, let it dry and paint over it for the mask with a mixture of 1 part black and 1 part white using your smallest brush.
Painting the mask will be THE toughest thing you have to do on this mini. Just go slowly, and focus on staying within the lines, like a coloring book, and reference the source material a lot in order maintain the shape.
Once the mask is painted, finish basecoats by painting the batons with your 1 to 1 black and white mix and once it dries, you'll be ready for shades!
3. Shading
Okay, so for shading, we will be using 3 washes by The Army Painter:

Flesh Wash, Blue Tone, and Dark Tone.
The first of these that we'll be applying will be the flesh wash.

Simply apply a thin layer to the face, don't worry too much about getting it on the mask, as it won't really show up.

Next, apply the blue tone to the blue area of the costume. Again, simply apply a thin layer of the wash, and don't allow the wash to pool in any area too much.
You can also apply a little bit of blue tone to the hair to give it that "Comic Book Blue Hair Highlights" if you want.

The last thing we'll be doing will be applying the dark tone to the rest of the mini. All of the black suit and the batons.
Once that all dries, we can move onto highlights!
4. Highlights and Finishing Touches
So, the first thing we'll be highlighting will be the face.

Using your basic skin tone, paint the center of the forehead, chin, nose, and cheekbones that you can see. Overall, his facial sculpt isn't great, so do the best that you can.

From the side profile, highlight the jaw bone, neck muscle and earlobe. There's also another section of cheekbone that you can highlight as well to help the face pop.
Now, take a little bit of your white and highlight the top of the hair. The initial drybrush process will give you a pretty good idea of where to apply the highlights, but just focus on the top most portions of the hair, and try to paint the individual locks of hair.
If this looks too bright, or blends together, you can always apply more dark tone to mute it and add more depth to the hair.

After that, take your electric blue and apply highlights to the center of each muscle within the blue section. You want to avoid the creases, or where the muscles meet each other, as those areas should remain darkened to maintain depth.

Here's an idea of how it should look on the arm, you can see I've highlight the two blue knuckles, tricep, and forearm muscle.

This is how you should paint the back, focusing on the shoulder blades.

Now, you could stop there, and have a perfectly highlighted miniature, but I'm going to be adding an additional level of highlights in order to maximize the color dynamic of a relatively monochromatic figure.
Take your cornflower blue, or light blue, and apply a VERY small highlight to the center of the portions you've already highlighted. You can see in the example above, the cornflower blue highlights is little more than a small dot at the top of the shoulder, tricep and forearm.
There's no right or wrong way to do this, just experiment to find a good idea of where you'd like to put your second level highlights (if any at all) and remember that if you don't like a section, you can always repaint it with your electric blue and try again.

The last thing you'll be highlighting will be the edges of the batons with a little white, just to give it a little bit of a reflective look.

Okay, so I don't normally do eyes, like, AT ALL, usually because they never look good and end up looking like your mini needs corrective lenses, but Nightwing just didn't look right without his.
Take your smallest brush, roll it to the finest tip you can get, and just dab on tiny lines in the middle of the mask. Nightwing's eyes are typically hidden behind these opaque white lenses in his domino mask, so the white lines are really all you'll need to do, even if you have to add a few layers to get them to look the way you want.

So, for basing, with Red Hood we tried for a concrete look, and with Nightwing, we're going with asphalt.
I love using the Vallejo textures, and I'll be using Valllejo Black Lava to help simulate that asphalt look.

Spread it on the base thinly, just enough to leave enough of a thin layer of grit on the base.

Once the texture's dry, you can drybrush on some standard grey to add depth to the base, and paint whatever street feature you want, such as driving lanes before you spray it with your matt finishing spray to seal all the paint.
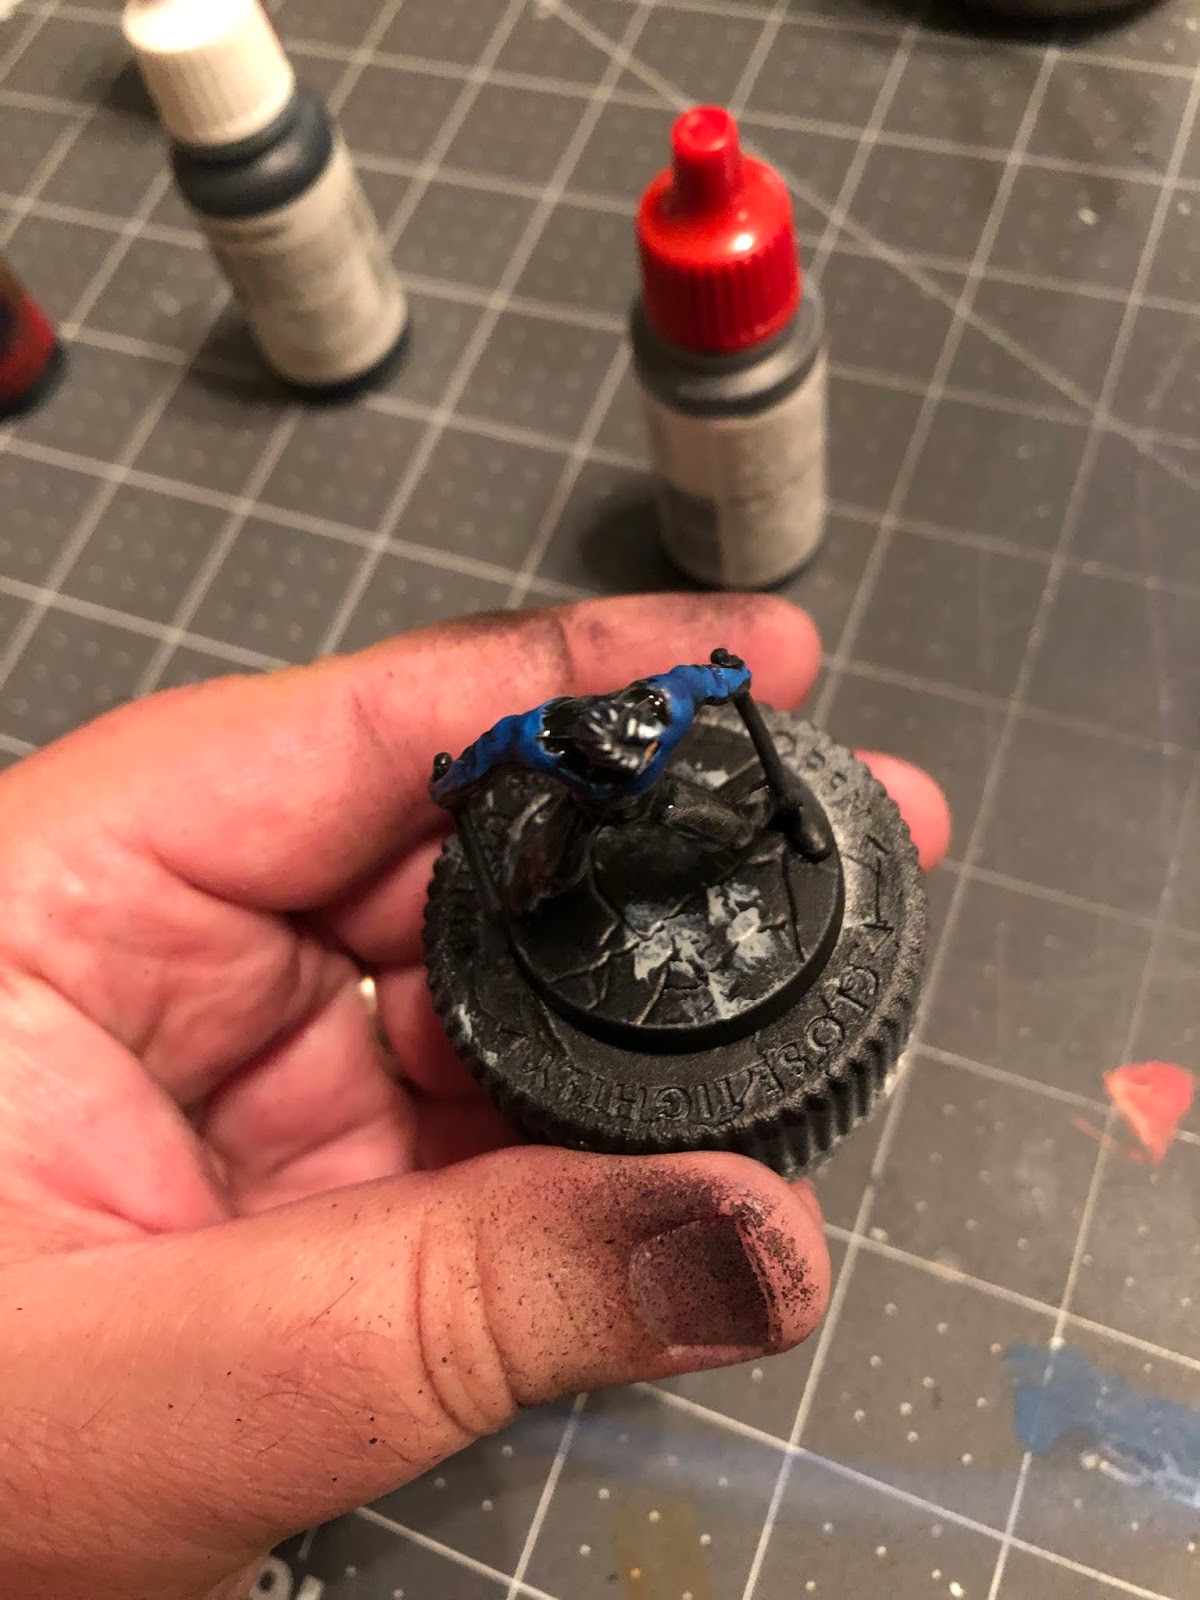
When that's dry, we're going to add a little more detail in the form of rocks.

This was a bag of ballast that I got from the model railroad section of my local hobby store for about five bucks. It makes for great rocks/broken up concrete.

Dab a little super glue in a few select areas of the base and sprinkle that ballast on there. The rocks will stick and create a nice effect like there are broken chunks of concrete or rocks in the street.
5. Defend Blüdhaven!

That's it, Gothamites! Batman's first adopted son (but hardly his last) is painted up and ready to fight the plastic underworld of cardboard Gotham.
This, along with my other tutorials for Batman: Gotham City Chronicles can be found on my blog for reference, and if you found this guide helpful, I ask you to please consider becoming a Patron. It's only a dollar a month, and every dollar helps me keep creating quality, ad-free content for you on a consistent basis.
Comments
Post a Comment