Become a Patron!


 |
| by CMON Games |
"Ours is the Fury..."
Hey there, Westerosi! I know it's been awhile, but I'm still here. I took a detour to paint some superheroes and some street fighters, but my first and foremost love is A Song of Ice and Fire, so today, we're taking a look at one of the newer factions, the Baratheons, specifically looking at their standard foot soldier, the Baratheon Wardens.

Not only do these guys come packed into the Baratheon Starter Set, they are actually a pretty easy paint job, and if you're new to painting miniatures, but you really wanted to play as everyone's favorite character, Shyra Errol, and the rest of the Baratheons, this is a good unit to learn with.
Let's jump in!
1. Gameplan, Prep, and Prime
Okay, so for these guys, we're going to be going with a pretty straightforward interpretation of the in game art:

Plate metal with some gold accents here and there. For this, I've assembled the following paints.
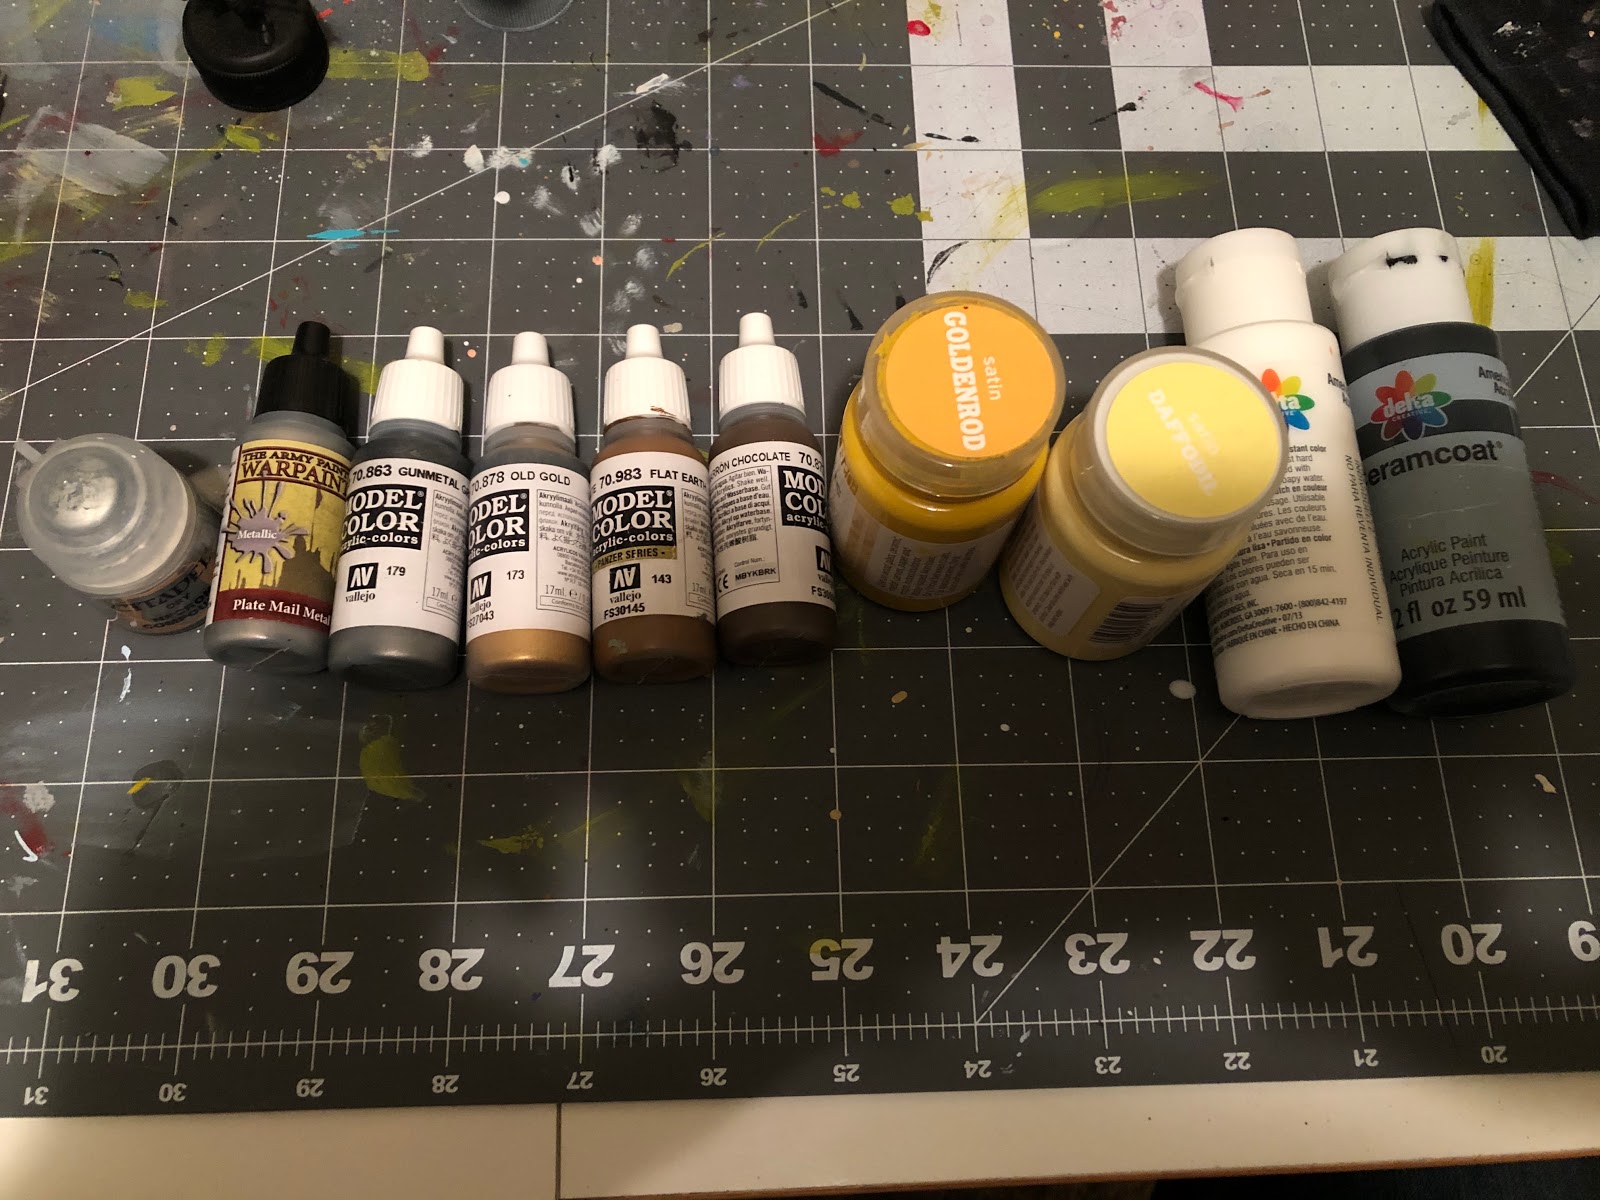
Citadel
Army Painter
Vallejo
Handmade Modern
Goldenrod, Daffodil (light yellow)
Ceramcoat
Black, White

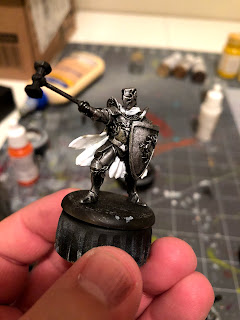
As you can see, I've already primed all of my Wardens black using my airbrush and Stynylrez Black primer. Once this is all dry, it's time to jump straight into basecoats!
2. Basecoats

The first thing you're going to do is perform a liberal dry brush with your necron compound. Don't be afraid to "Overdo It" either, because we want that shiny look. By doing this over your black primer, it'll give us the bright metallic/chrome finish that we're looking for, but also maintain a high level of contrast and shading, minimizing the amount of wash that we'll need to use later on.

After that, you'll take your black and white and mix them together in a 50/50 mix, thinned with equal parts water, and paint the tunic/skirt of the Wardens.

For the Standard Bearer, it appears that his skirt is actually scale mail sticking out from underneath his armor, so I ended up using straight gunmetal grey for this, though it is optional.

After that, you'll take your white, thinned with equal parts water, and paint over any cloth that might be yellow later on. For instance, the Master Warden's cloak, or the actual flag on the standard bearer.
Since we'll be covering this up with yellow later on, it doesn't have to be perfectly even, though you should go over it a few times to make sure that none of the black is showing through.

Next, take your old gold and paint the shields. Don't thin your old gold with water, just put it straight on out of the bottle.

Once you're done with that, you can also use the old gold to paint the stag insignia on the breastplate, and any filigree, such as the embellishments on the side of the knees or pauldrons.

After that, take your chocolate brown, thinned with equal parts water, and paint the handles of the hammers, the extraneous leather straps, and the belts as well as the flagpole of the standard bearer.

Once the white is dry, take your goldenrod, again thinned with equal parts water, and paint any cloth that you're going to be making yellow. With the white basecoat, you shouldn't need to apply a second coat, but don't be afraid to if necessary.
This is also the time to paint the yellow field on the flag as well.

Now you'd take your plate mail metal and paint the hammer heads, pommels, belt buckles, and the ornament at the end of the flag pole.
You can also use this cover up any mistakes you made on the plate armor.

Hopefully you've still got some of that 50/50 black/white mix because now we're going to be using it to paint the stag insignia on the shields. A good tip for this would be to load up your brush with paint and turn it to the side to drag it along the raised detail of the stag, almost like a dry brush.
If you do mes up, however, don't worry, as black is easily covered up by the gold.

The last thing we'll be basecoating will be the stag insignia on the flag, along with the flag's border.
Again, just like with the shield, you're better served by using the side of the brush to paint the stag, opposed to using the tip.
Once that's all dry, it's time for some shades!
3. Shading

Today, I only have two for you: Light Tone by The Army Painter, and Nuln Oil by Citadel.

You'll only apply the light tone to the sections of the miniature that you painted yellow, so the cloak of the master warden and the flag.

You don't want to apply too thick of a layer, just a thin coat will do to help deepen the details.

After that, you'll take your nuln oil and apply it to the shield, hammers, and belts of the models, along with any of the filigree that you painted gold. Again, nothing too heavy, just a thin layer should help accentuate the details and really make the mini pop.

You'll also want to apply the nuln oil to the stag crest on the breastplate and the black skirts.
Once that's all dry, it's time for highlights!
4. Highlights and Finishing Touches

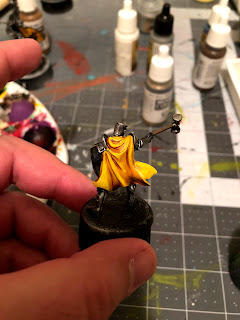
Not too much to highlight here, actually, but we're going to be starting with our yellow portions. Take your goldenrod and paint each fold in the cloak/flag. Anywhere the fabric would bulge outwards towards you.

For the flag, it would really just be a few lines here and there.

Next, we'll take our daffodil and paint the thinnest of lines on the portions that we just highlighted, as you can see above. Keeping these secondary highlights thin, and only covering a smaller surface area than what we most recently highlighted.

To finish up, take your flat earth and use it to paint a small line of highlight down the back of each hammer handle and across the top of the belts.
You'll also make another black/white mix, this time two parts white and one part black, in order to highlight the black portions you painted earlier. For the skirts, simply follow the folds in the clothing, and for the stags, paint a line along the top of the insignia, similar to how we highlighted the belts.
5. Hammer Time!

That's it, Westerosi! Thanks for giving this a read, and remember that this, along with the rest of my A Song of Ice and Fire tutorials can be found on my blog for future reference. Hopefully, this helped you out, and if you found this helpful, please consider becoming a Patron. Every dollar truly helps me bring quality content to you on a regular basis.
Hello there! I was wondering is there a vallejo substitute for daffodil and goldenrod and also the black and white from ceramcoat?
ReplyDeleteYou can use Deep Yellow by Vallejo instead of daffodil. And any kind of black and white will work.
Delete