Become a Patron!


 |
| by Atomic Mass Games |
"Hulk... SMASH!!!"
Hey, there, True Believers! So, I am CRAZY excited about the release of Marvel: Crisis Protocol by Atomic Mass Games! This new tabletop miniatures game has players building their best squad of heroes (or villains) in order to battle for victory! So, with the release of the game only slightly in the rear view, we're taking a look at starting a brand new Painting Poorly series for the game! And today, we're starting with the Hulk.

The Hulk is one of two character packs releasing with the base game, but he's actually a fairly simple paint job, and we'll get to practice some more advanced techniques on a larger miniature.
Before we start, I want to preface any new readers that I don't believe that I'm the best painter in the world. I have more of a "Yan Can Cook" vibe. If I can get these kind of results, so can you. I also try to use as little money as possible, so while you will definitely see me using some Vallejo and Army Painter, I'm a firm believer in using whatever you have, including whatever craft paint you can find at the bottom of your wife's box o' paints.
My tutorials are designed for beginner painters, and if you've never painted anything before in your life, you might want to check out my General Tips entries so you can get a grasp of the basics.
Let's get to it!
1. Gameplan, Prep, and Prime
Okay, so we're going to model our Hulk's look off of the box art, which is his classic bright green skin with some purple pants. In order to pull off this look, I've assembled to following paints:

Vallejo
Citadel
Ceramcoat
White, Lime Green, GP Purple
Handmade Modern
Leaf
If you don't have the exact name brand colors, feel free to find something comparable. Handmade Modern is the Target brand of acrylic paint, and Ceramcoat has got to be the cheapest paint brand I've ever encountered, so if you want to replace it with the good stuff, be my guest.

Before we get started, we can use some Liquitex Matte Medium to fill in some of the gaps that are left after assembling the model, just use your brush and brush them into the gaps, and allow it to dry before you prime it.

So, as you can see, I primed with my airbrush and some Stynylrez primer. Regardless of how cheap you're wanting to go, I always suggest spending money on good primer. It's worth it.
The technique I've used is known as zenithal priming, using three different colors to simulate lighting and shadows, and if you're unable do this technique, you can get away with just using a white or grey primer.
2. Basecoats
Quick statement: during the basecoats and highlights steps, make sure that you thin your paints with equal parts water unless I say otherwise. This helps keep the paint from clumping on and catching your brush strokes on the miniature.

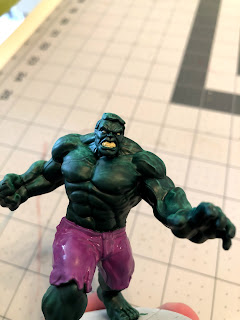
We're going to start with our caliban green and paint the skin and hair. Don't worry about painting over the teeth or the eyes, we'll be repainting those, just focus on getting a nice even basecoat.

Next, take your purple and paint the pants. Again, nothing too special about this, though you may have to apply multiple coats to get an even coverage, but if you do, ensure that the first layer's completely dry before you apply your second, or the paint will smudge.

The last thing we'll be basecoating will be the eyes and teeth using our dark sand. Use your smallest brush to paint these details and don't be afraid to repaint the green if you mess up.
Once that's all dry, it's time for shading!
3. Shading
So, today we're going to keeping it simple and only using three different washes:

We'll be using Soft Tone, Green Tone, and Purple Tone all by The Army Painter, and they can all by found in the Wash Set which is an absolute value.

Start off with applying soft tone to the teeth. Just a single drop will be more than enough. Simply brush a thin layer of wash over the teeth to give it some depth and make the details pop, and try not to let the wash pool up in any particular area.

Next, we'll apply green tone to the skin and hair. Again, just a thin layer over all the green will help deepen the recesses and bring out some of the detail.

Last portion to shade will be the purple tone over the pants. Nothing too fancy and don't let the purple tone pool too much in any particular area.
Make sure that all of the washes are COMPLETELY dry, and don't move it around the model too much after you apply it.
Once that's all dry, it's time to move onto the highlights!
4. Highlights and Finishing Touches

The first thing we're going to highlight will be the hair. Using your park green flat, paint the top of the hair, trying to highlight each lock of hair, and leaving the recesses, such as where the hair parts.

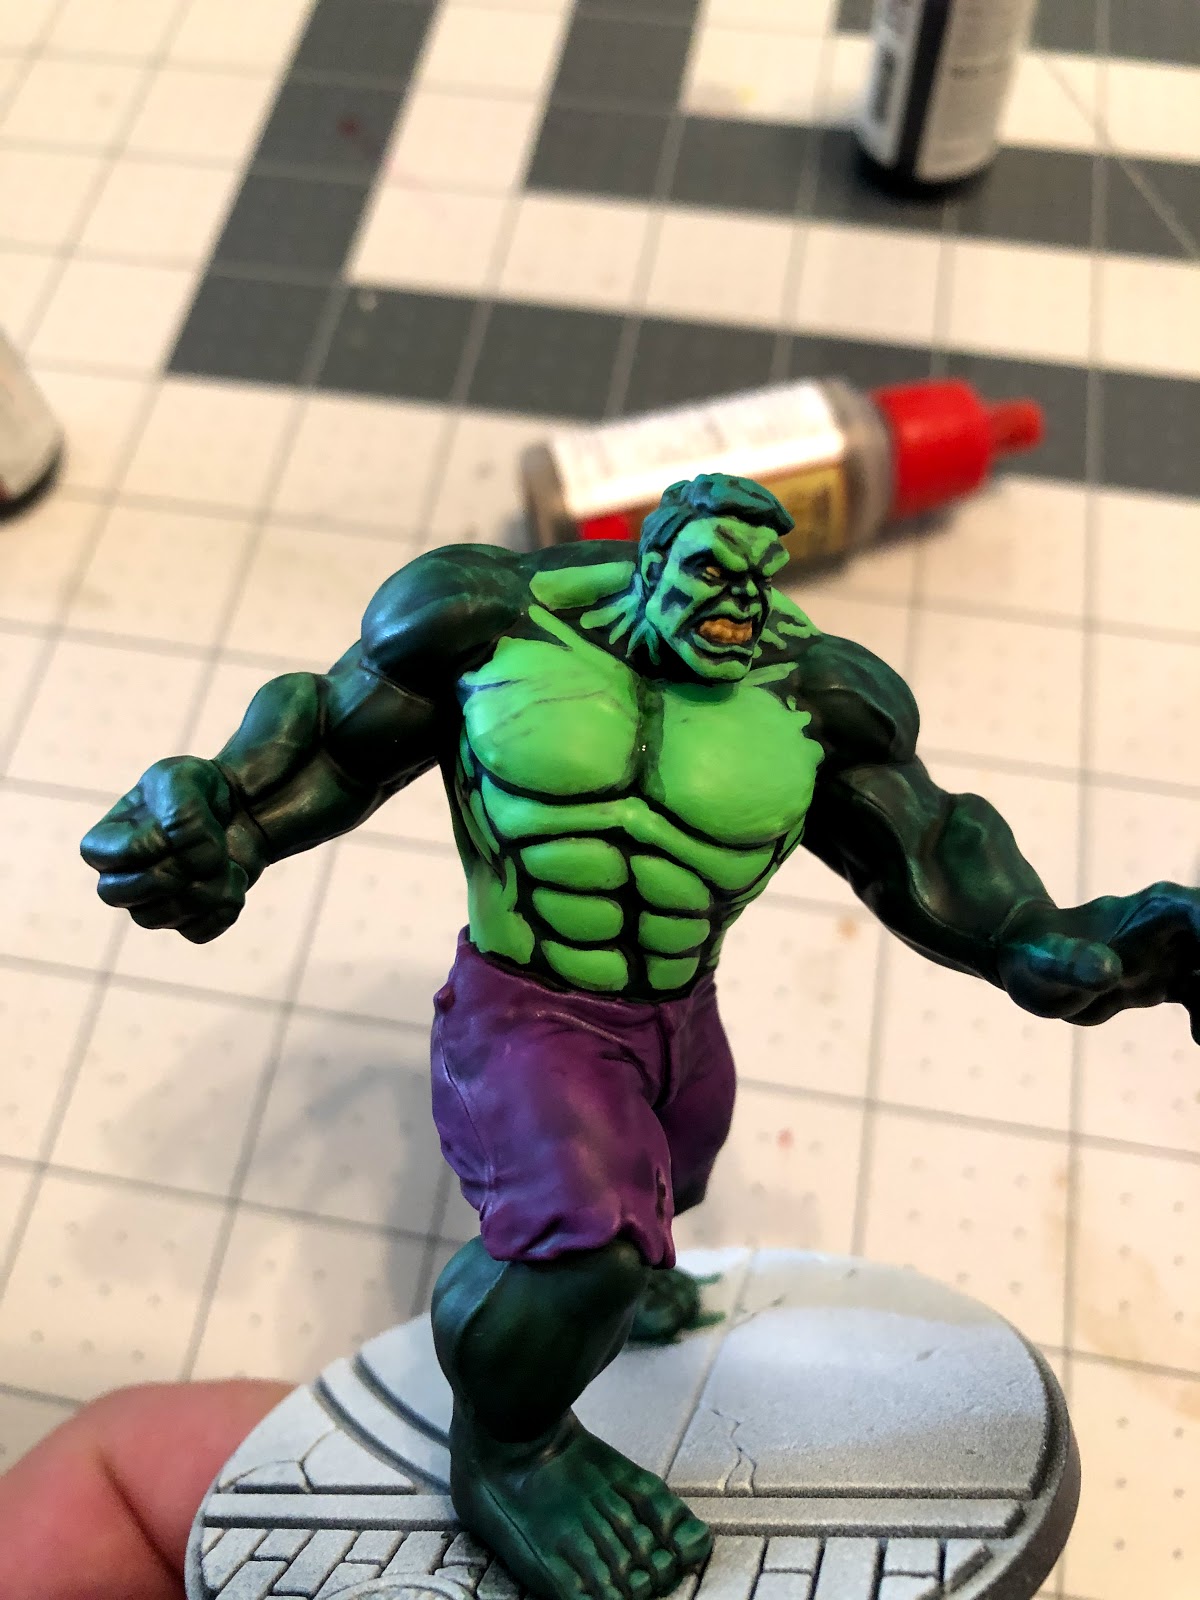
Next, we're going to move onto what's going to take you the most time: highlighting the green skin. Using your lime green, we're going to paint all the portions of Hulk's face that are sticking out, leaving the recesses dark green. This helps give it a comic book/drawn feeling to the miniature.
Try to follow this pattern for painting up the face, highlighting the eyebrows, cheeks, lips, chin, forehead, and folds at the side of the mouth.

Here's an idea of how to paint the side of Hulk's face, highlighting the jaw and side of the head. Don't worry if you over paint or highlight a section that should be dark still, you can always apply another coat of green tone to the section and start over.
After that, you're going to start applying the same style of highlights to the whole body. Painting a highlight on each individual muscle and the tendons around the neck. Paint as much of the muscles as you can, leaving just a thin line in the deepest recesses between each muscle.
When you're done practicing on the chest (because it has VERY distinct musculature that's easy to pick out) you can move onto the rest of the body.

Resulting in something that should look like this in the front. Notice that I've also highlighted the palm of the left hand.

And this in the back. Again, if you start to feel the paint is getting away from you, you can always reapply some green tone to deepen the recesses again, and try highlighting again.

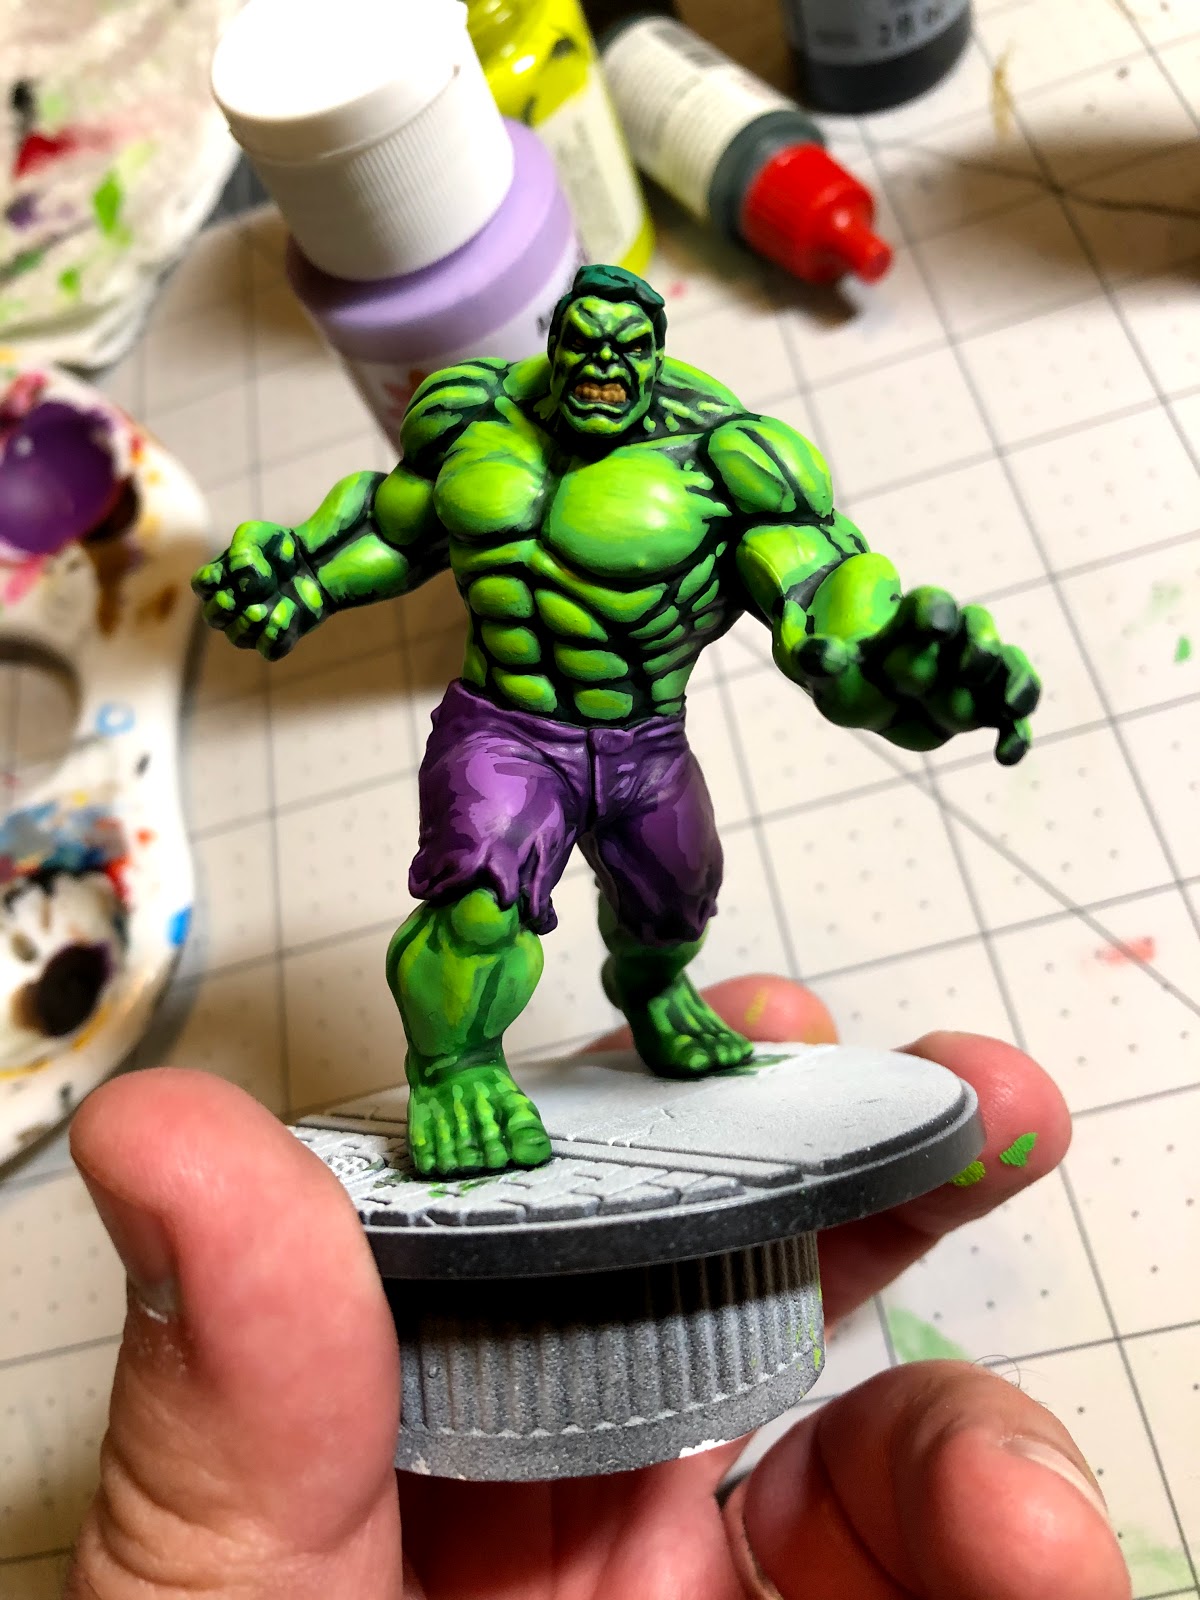
After that, we're going to mix some colors up. Take your leaf (it's a yellowish green) and your lime green that we were just highlighting with and mix them into a 50/50 mix (thinned with equal parts water of course).
Use that mix to highlight the portions of muscle that you've already highlighted, but only covering about half of the surface area that you had already highlighted. You can get an idea of where to place them by seeing where I drew the yellow highlights above.
It should end up looking something like this...

After you've highlighted all of the skin, we can move onto the pants.

Using your purple, highlight the pants. Paint all the portions that billow outward, such as the muscles popping through the pants and each of the folds near the hips.

Here's an idea of how the back of the pants would look.
Now, mix up equal portions of your purple and gp purple (light purple) in equal portions and do the same thing you did with the skin, and add a secondary level of highlights to the pants.

Again, only paint about 50 percent of what you had previously painted. This is an idea of what the front would look like...

While this gives you an idea of the back.

After that, we're going to use a little caliban green to dot your eyes. This is INCREDIBLY DIFFICULT and requires a LOT of brush control, but try to just make a TEENY TINY dot in the center of each eye with your smallest brush, just barely using the tip. Roll your brush to make sure the tip is as sharp as you can make it, say a little prayer, and do your best.
At this point, we can also use the white to make TEENY TINY dots on each tooth to give the teeth a highlight, though this is pretty much optional.
Before you completely finish, though, take your park green flat and paint the finger and toenails.

After that, we're going to mix some colors up. Take your leaf (it's a yellowish green) and your lime green that we were just highlighting with and mix them into a 50/50 mix (thinned with equal parts water of course).
Use that mix to highlight the portions of muscle that you've already highlighted, but only covering about half of the surface area that you had already highlighted. You can get an idea of where to place them by seeing where I drew the yellow highlights above.
It should end up looking something like this...

After you've highlighted all of the skin, we can move onto the pants.

Using your purple, highlight the pants. Paint all the portions that billow outward, such as the muscles popping through the pants and each of the folds near the hips.

Here's an idea of how the back of the pants would look.
Now, mix up equal portions of your purple and gp purple (light purple) in equal portions and do the same thing you did with the skin, and add a secondary level of highlights to the pants.
Again, only paint about 50 percent of what you had previously painted. This is an idea of what the front would look like...

While this gives you an idea of the back.

After that, we're going to use a little caliban green to dot your eyes. This is INCREDIBLY DIFFICULT and requires a LOT of brush control, but try to just make a TEENY TINY dot in the center of each eye with your smallest brush, just barely using the tip. Roll your brush to make sure the tip is as sharp as you can make it, say a little prayer, and do your best.
At this point, we can also use the white to make TEENY TINY dots on each tooth to give the teeth a highlight, though this is pretty much optional.
Before you completely finish, though, take your park green flat and paint the finger and toenails.
5. Unleash Gamma Rage!

Well, that's about it, True Believers. Paint the base however you like, spray it with your matt spray, and call it a day!
Hopefully, you guys out there found this useful, and remember that this, along with all of my Marvel: Crisis Protocol painting tutorials will be able to be found here on my blog for future reference. And if you found this entry useful, I ask you to please consider becoming a Patron. Every dollar helps to bring you quality content.
Comments
Post a Comment