Become a Patron!


 |
| by Blacklist Games |
The "King" of the Jungle...
Welcome back, Global Gladiators! Today, we're starting back in our journey through Street Masters by taking a look at how to paint my favorite fighter (so far), the luchador turned vigilante: Tiger Azules.

This tiger masked grappler bears a striking resemblance to a particular jaguar headed "Iron Fist" tournament participant, but that's neither here nor there.
While not necessarily the most difficult paint job in the world to do, it does involve a few different colors, and we're going to be using some new techniques, including everything that we already used form the Kyoryu tutorial.
Let's get to it!
1. Gameplan, Prep, and Prime
Okay, so we're going to be basing our paint job off of the above picture, and I've assembled the following paints to help me:

Citadel
Army Painter
Vallejo
Medium Flesh, Basic Skin Tone, Bright Orange, Chocolate Brown, Dark Sand (not pictured above)
Handmade Modern
Goldenrod, Dark Lapis
Ceramcoat
Mediterranean Blue, White, Black
There's a lot to unpack there, but we're going to be using a lot of these colors to add multiple levels of highlights to the miniature.

As you can see, I've gone ahead and primed the miniatures with Matt White Spray on Primer by The Army Painter, which, if I recommend you spending more money on anything, make sure it's your primer. The wrong primer can gunk up and obscure the details of the sculpt.
Once your primer's dry, it's time for basecoats!
2. Basecoats
Okay, so just a reminder, unless I say otherwise, remember to thin all of your paints for the basecoat stage with equal parts water.

We're going to start off with your medium flesh. You'll paint the arms along with the small part of the chest and neck that's exposed between the tiger mask and the tank top. DO your best not to get any on the mask itself, as we want to keep it white.
You may have to do multiple coats of the medium flesh, just remember to let the first completely dry before you go over it again, to avoid smudging the paint and to get a nice even coat.
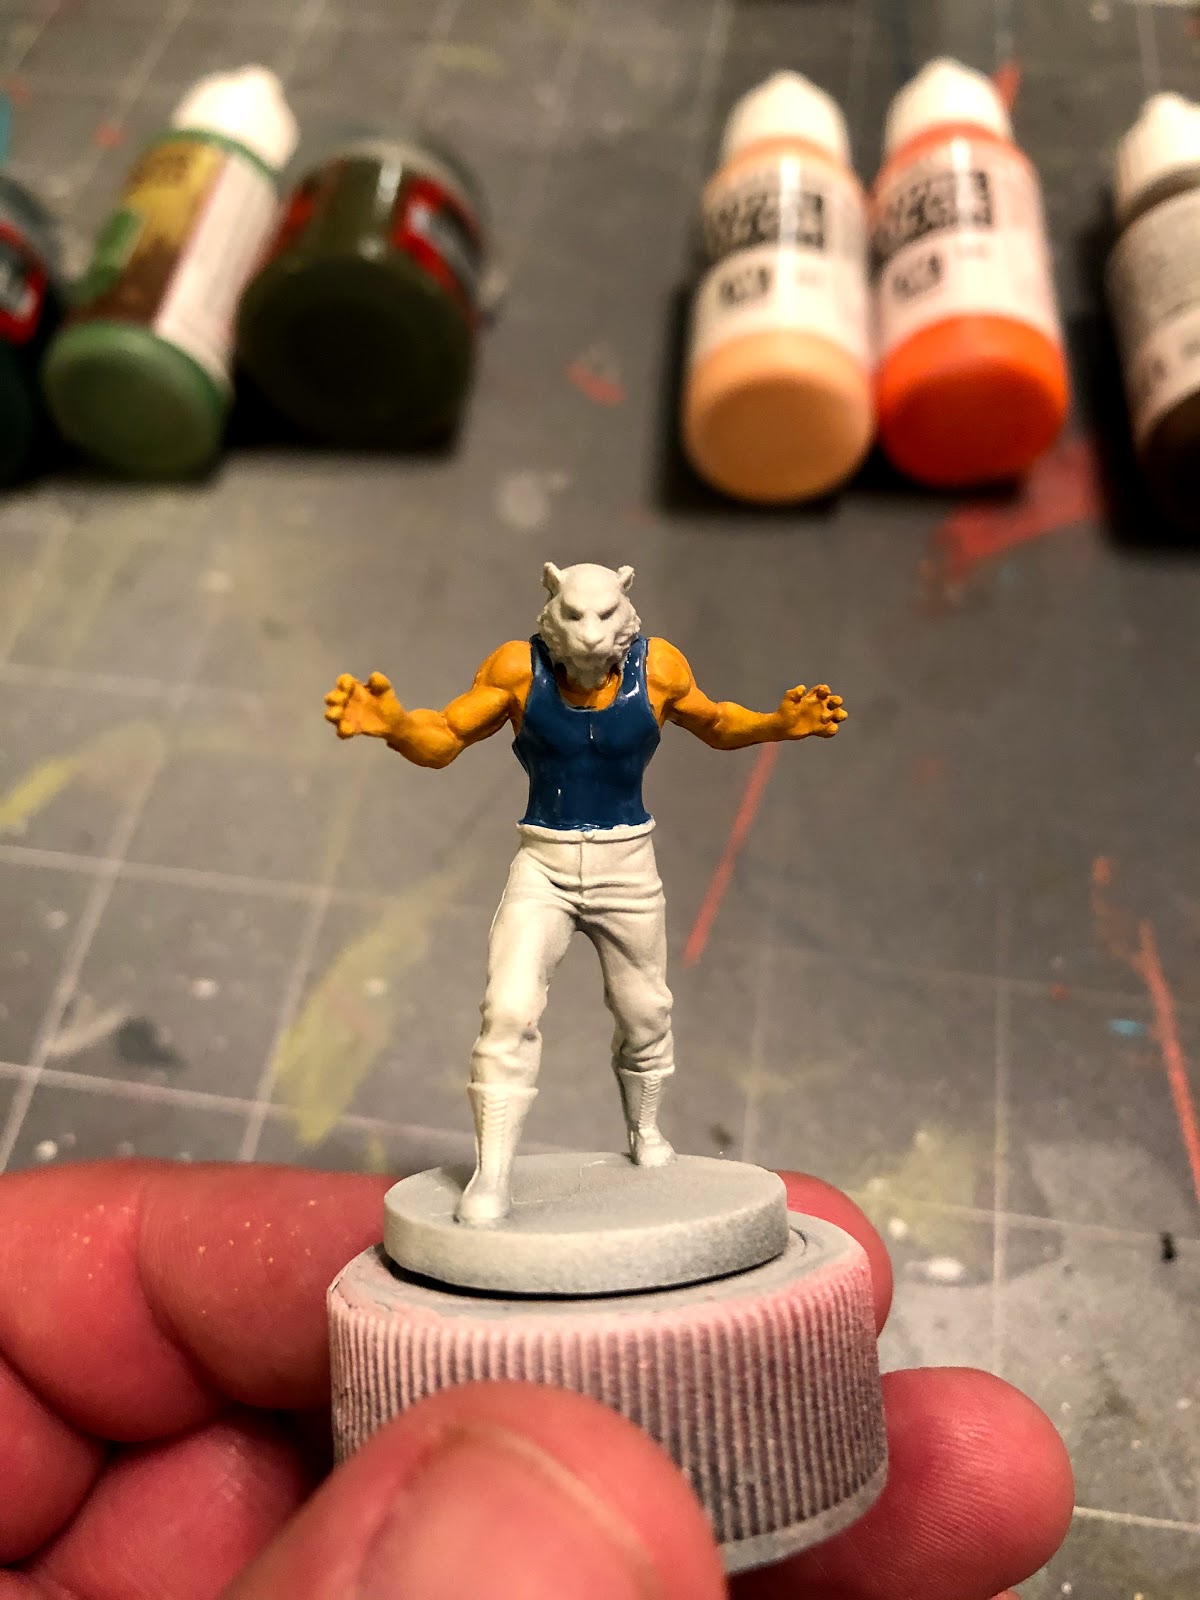
After that, take your dark lapis, or any kind of dark blue really, and paint the tank top. Do your best to avoid the mask, and don't be afraid to use your detail brush to paint the straps as they go over Tiger Azules's shoulders.

Next, take your bright orange and paint the face of the tiger mask, but be sure the leave the tufts below the cheeks and the muzzle around the mouth white.
This means you'll be painting the ears, the nose, the top of the snout, and all the way down the back of the mask as well.

After that, we'll be using the castellan green to paint the pants. This is a nice dark camo/military fatigues-type color, which will make a great base point for the pants.

Next, mix up equal parts black and white (along with equal parts water) and paint the boots. Just like I mentioned in the Kyoryu tutorial, you don't want to paint black things with black, as it limits the amount of contrast and depth you can get.

After that, we're going to take our caliban green, which is darker and greener than the castellan green, and make a few splotches all over the pants. This is the start of the camouflage pattern.
Try not to make them in a line, or anything like that, just try to make it as random, and as randomly shaped as possible.

Then, you'll take your goblin green and make those color splotches near to where you had made the caliban green splotches. Again, try to make it as random as possible. Have some next to the other splotches, other above or below, just to break it up.

Now, take some of your dark sand and paint those tan splotches near to your other groupings of splotches. As you can see from the picture above, this tan color really starts to tie the whole look of the camo pants together.

The final thing you'll be basecoating is actually totally optional. You can use some of your Mediterranean blue to paint the laces of Azules's boots. Again, totally optional, but I think it adds a good level of pop to the lower half of the body.
3. Shading
Once it's all dry, we move onto shading, and again, I always say that you should spend the money on real shades and washes. It does make a difference.

We're going to be using four today: Soft Tone, Flesh Wash, Blue Tone, and Military Shader.
You can find them all in the Army Painter Wash Set which is just an absolute value and necessity.

We're going to start off by using our flesh wash on all the skin. Nothing too fancy, just apply a thin layer to the skin to add depth, and don't let it pool up too much, especially around the arm pits and the palms of the hands.
If you do start to see it start to pool up too much, you can wick some of the wash away with a dry brush.

After that we're going to apply some soft tone to the tiger mask, and I mean, the entire tiger mask, even the white portions. Again, don't let it pool too much, but you should start to see the appearance of darkened eyes and ears.

Then you'll be applying the blue tone to the shirt and boot laces if you chose to paint them blue.

The last wash we'll be applying will be the military shader, and we'll be applying a thin layer to the pants. This is a dark green wash, and helps mute some of the louder colors of the pants, and tie our camo pattern together.
Once that's all dry, it's time for highlights!
4. Highlights and Finishing Touches

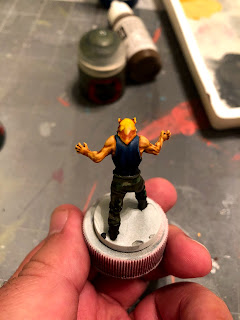
The first thing we'll be highlighting will be the skin. Take your medium flesh and paint the where all the muscles bulge out, while avoiding the recesses. Once that's dry, we're actually going to be adding ANOTHER level of highlights to the skin to really make it pop.

Add a drop of basic skin tone to your medium flesh and paint only about 50% each muscle that you had previously highlighted, such as the top of the shoulder and small portions of the bicep and forearm muscles. When you're finished, it should look something like above.

After that, you'll take your goldenrod and highlight the tiger mask. Here's an idea of how you'd apply the yellow to the top of the head, ears, and the bottom edge in the very back.

And here's an idea of what the front would look like. Notice the yellow extends all the way down the top of the snout through the nose, and I've also highlighted the entire forehead and the cheekbones with this color as well.

Next, take your white and highlight the muzzle, upper and lower lips, and tufts of fur. Just like with the muscles, try to stay in the middle of each section, and avoid the areas that were darkened most by the washes.

After that, mix up a 50/50 mix of your dark lapis blue and your Mediterranean blue and highlight the muscles on the tank top. Really, what we're focusing on is painting the center of each muscle, and the straps of the shirt near the shoulders, as that's where the light would hit.

Here's an idea of how you might highlight the back muscles.

Now take your castellan green and mix it with equal parts dark sand, to get a nice lighter color, and you'll be highlighting the pants with this. Again, focus on the folds of the pants below the knee and around the thighs, along with the right thigh and knee, as the light would hit those portions the most.
Do the same for the back, and just remember that you really want to hit any fabric that's billowing outward or folded/bunched up.

The last thing we're doing is taking our chocolate brown and our SMALLEST brush and painting the tiger stripes on the head. Just paint a thin line down the middle up to the nose (but NOT ON the nose/snout) and make a few "V" or "U" shapes along that line.
Don't forget to also paint the very tip of the nose with this color.
5. Go for the Pin!

Welp, that's it for today, guys! Base this guy however you like, spray him with your Matt Spray, and call it a day! Again, this along with all of my other Street Master painting tutorials can be found on my blog for future reference.
If you found this tutorial helpful at all, I humbly ask that you consider becoming a Patron. Every dollar helps me provide you with quality content on a regular basis, and you'll get special entries into fun stuff like drawings and painting contests, along with access to surveys to help guide the path of my blog.
Until next time!
Remember to Share, Comment, and Subscribe!
Comments
Post a Comment