Become a Patron!


5.

 |
| by Blacklist Games |
Totally NOT Ryu or Goku
Hey there, Global Gladiators! Mike Meeple just got a new game, and I'm super excited to play it and paint it up! It is the super exciting Street Masters by Blacklist Games!
Today I'm going to start off by painting arguably, the MAIN character of the game, someone who is DEFINITELY NOT Ryu or Goku... Today, we're going to be painting Kyoryu!

For those of you who are new, and this is the first installment of Painting Poorly that you've checked out, you might want to check out my General Tips before we get started, and remember that I'm not the best painter, and I never said I was. These are just the methods that I use to help get my minis looking good for the table. Hopefully they'll be helpful to you, too! Let's jump in!
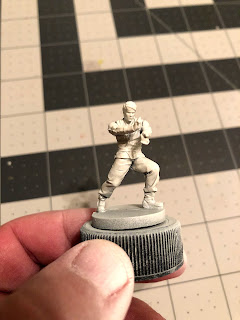
1. Gameplan, Prep, and Prime
Okay, so I'm not going to do anything truly crazy with Kyoryu. I'm just going to work on getting him looking as close to the card art as possible.

Pretty simple. Orange gi, black headband and belt, dark brown hair. Pretty straightforward stuff, but that lightning coming off the hands... We'll see about that.

I assembled the following paints to help me get there:
Vallejo
Bright Orange, Sunny Flesh, Basic Skin Tone, Chocolate Brown, and Flat Earth
Ceramcoat
Black and White.
You don't have to use Vallejo or Ceramcoat if you don't want, but I always try to spend as little money as possible.

Again, though, the number one thing that I will NEVER skimp on is primer. I've already primed this white with spray on matt white primer by The Army Painter, though any miniature primer will work just as fine.
2. Basecoats
Just a quick reminder that during the basecoat step, you should be thinning all of you paints with equal parts water unless otherwise told so. It's always better to have to put on multiple thin coats than to worry about a super thick coat that's obscuring the detail of the miniature.

We're going to start off with the bright orange and painting the gi. Nothing too difficult here, though, don't be afraid to do two or three coats to achieve an even layer, just remember to wait until the previous coat of paint is completely dry before you add another, otherwise it'll smudge and actually wipe off that previous coat of paint.

Next, take your basic skin tone and paint all of Kyoryu's skin. His arms, chest, face, and hands. Nothing too special here, and don't worry too much about getting the skin tone on the unpainted areas, as flesh tone is pretty easily covered.

After that, you'll mix up equal amounts of your black and white paint, to create a VERY dark gray, and paint the wristbands, boots, belt, and head band.
The reason we don't use PURE black is because that doesn't leave us anywhere to go in terms of darkening areas, so we mix in a little white to offset it.
For the headband, try to pick out the areas that aren't covered by the hair, and really just do the best that you can. It can be tricky, but you can always repaint it.

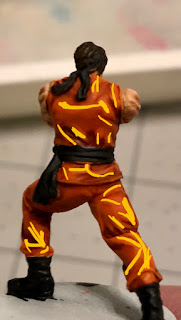
This is just an idea of how the back of the figure should look at this point.

The last thing we're going to basecoat will the the hair. Using your chocolate brown and your smallest brush, paint in the hair. This is also a good time to figure out exactly how you want your hair to fall over the headband, and repaint the headband where necessary.
Once that's all dry, it's time for shades!
3. Shading
So, for Kyoryu, we're going to be keeping it simple. Only three different shades:
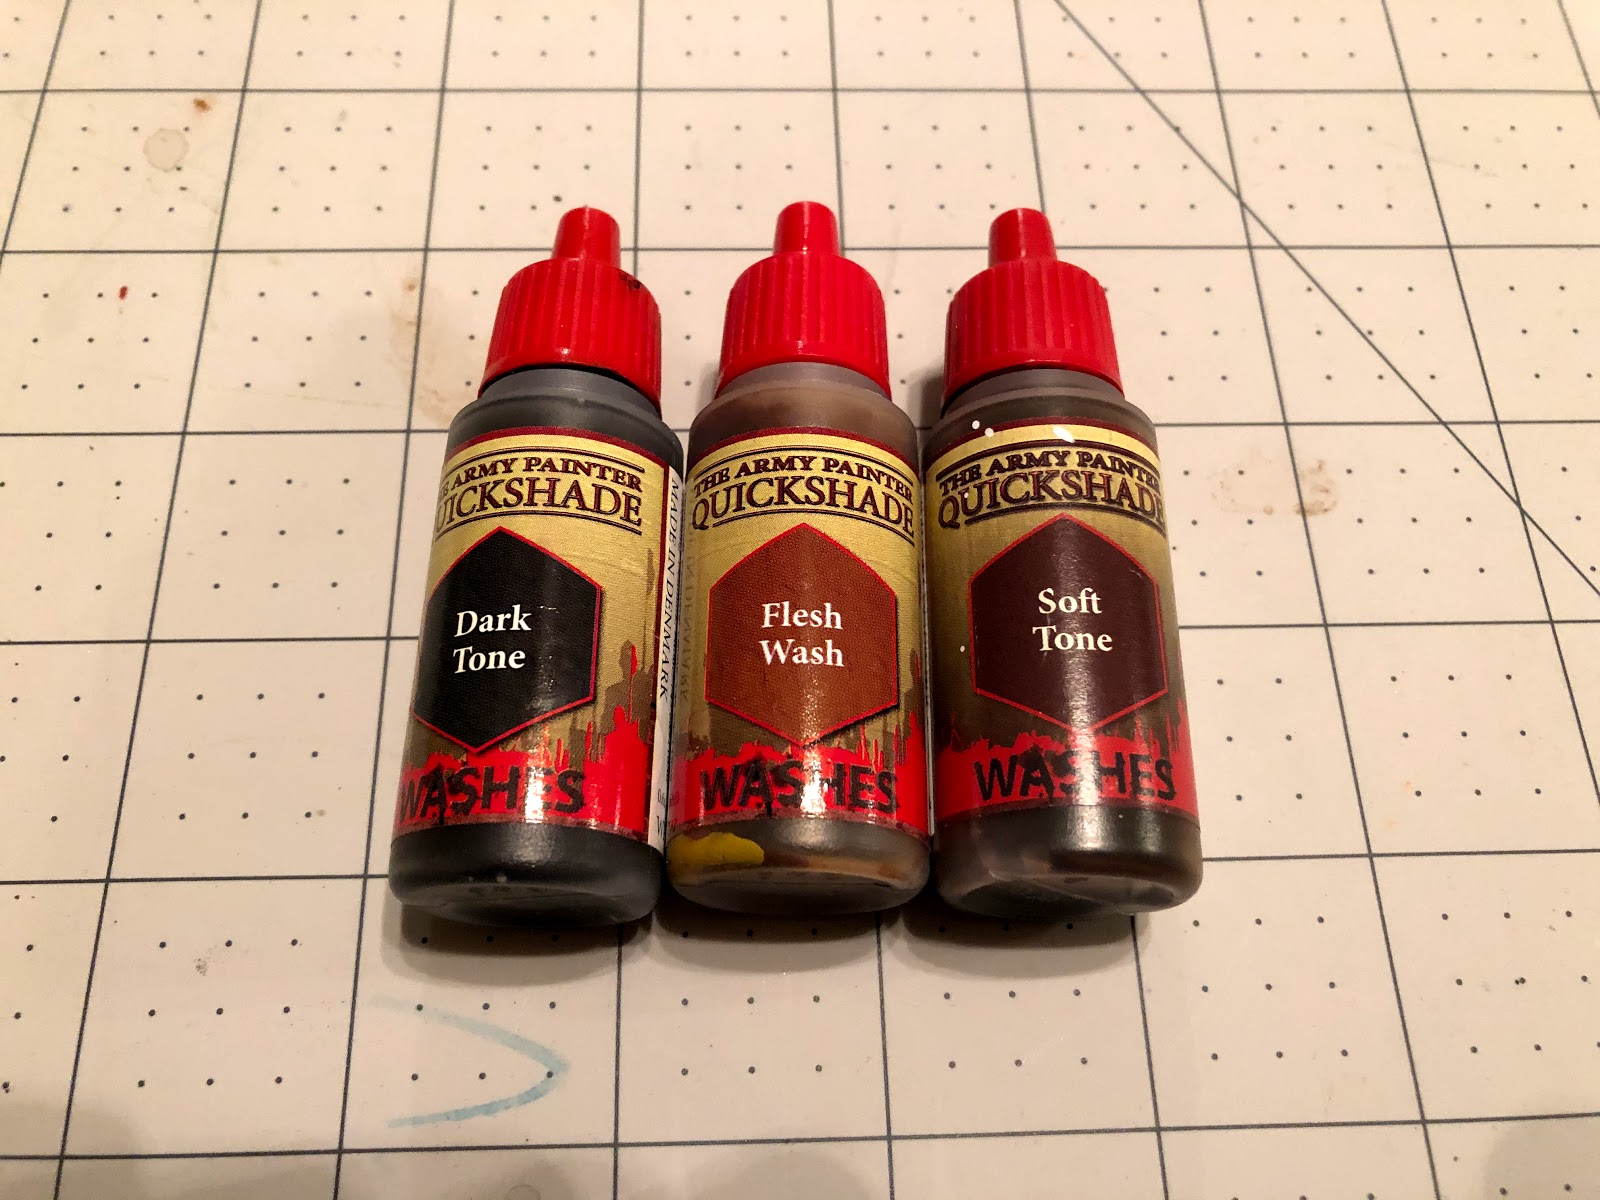
Dark Tone, Flesh Wash, and Soft Tone, all by The Army Painter.

We'll start off by washing the skin with our flesh wash. Just a thin layer over all of the skin will add just enough depth. Be careful not to let it pool up too much in any given area. It should just be enough that it helps you see the detail that much better.

After that, you can use the soft tone on the gi and a little dark tone on the hair. Again, following the same rules, try not to let wash pool up too much in any one particular area, and just using a thin layer of it will be more than effective. Once that's all dry, it's time to get into highlights!
4. Highlights and Finishing Touches

The first thing we'll be highlighting will be the skin. Using your basic skin tone, the same as before, you're going to be painting a highlight on all of the bulging muscles, while leaving the areas that were darkened by the shade as is. This includes the top of the hand/thumb and fingertips. You can see the lighter portions that have been highlighted in the picture above.

Also, take this time to highlight the face by using the basic skin tone to highlight the forehead, nose, cheekbones, and chin. Use your smallest detail brush for this, as the details of the sculpt are quite small.
Once you're done with that, mix a drop of white into your basic skin tone, and add another highlight the palms and inside fingers of his hands. This will lighten that portion of his skin up further, and give a nice glow for when we're doing the electricity hands.

Next, we're going to take our bright orange and highlight the gi, specifically the whole top of the left knee, the shoulders, and really anywhere the gi billows outwards or folds out, such as the folds above the boot. Just try to paint a line along those portions, again leaving the darkened areas as they are.
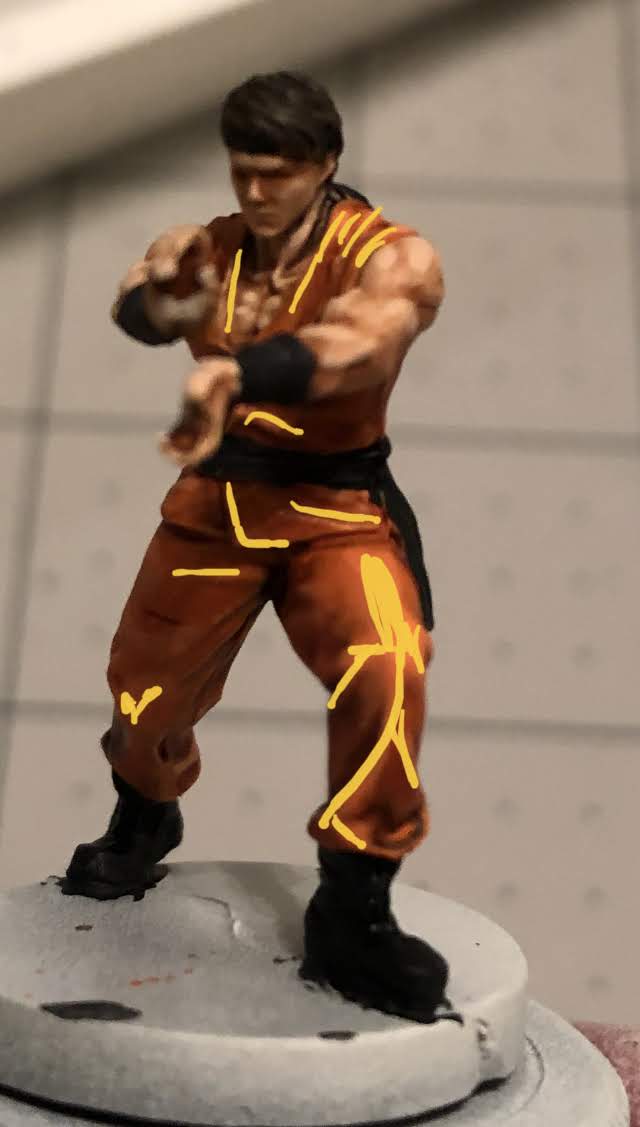
Once that layer of bright orange is dry, mix a drop of sunny skin tone into it, to lighten it up ever so slightly, and paint ANOTHER highlight, this time only half as thick as the last one. You can use the yellow highlights that I added to the above picture for reference if you like.

Here's an idea of where you'd add highlights on the back.

If done properly, it should end up looking something like this.
Once done with the gi, use your flat earth to add some highlights to the hair. Just try to paint each lock of hair as neatly as possible, and if you mess up, you can always repaint it with chocolate brown and dark tone before trying again.
Okay, so now that we're pretty much done, it's time to address the electrical elephant in the room. To create the electrical hands effect, we're going to be using this:

Transparent Blue by Vallejo.
We're going to be thinning it with about 15 parts water to a single part of transparent blue, and we're going to be applying it to the palms of his hands.

You can apply as many layers as you want, but be aware that the more layers you add, the darker it'll get, which means the glow effect might not be as strong as you'd like.
5. Hadoken! Ora Bakudan!

That's it, guys! Base him however you like, hit him with some matte spray, and get him on the board! This, along with all of my Street Masters tutorials can be found on my blog for later reference.
And if you liked what you saw, please consider becoming a Patron. Every dollar helps me to bring you quality content on a regular basis, along with awesome contests and giveaways, such as entry into my A Song of Ice and Fire Giveaway below.
Until next time, Global Gladiators!
Builder Scorpion Crew Unit Box United States Giveaway!
And if you liked what you saw, please consider becoming a Patron. Every dollar helps me to bring you quality content on a regular basis, along with awesome contests and giveaways, such as entry into my A Song of Ice and Fire Giveaway below.
Until next time, Global Gladiators!
Remember to Share, Comment, and Subscribe!
Comments
Post a Comment