Become a Patron!


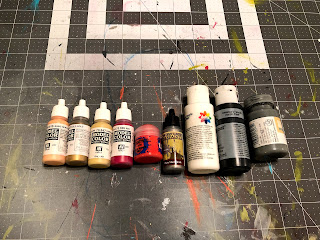
Okay, so for this piece, here are the paints we'll be using:


 |
| by CMON Games |
“Burn the Villages, Burn the Farms. Let them Know What it Means to Choose the Wrong Side...”
There are certain characters that have a presence when they appear in a book, show, or film. When they enter a scene, you just know $#^# is about to go down. Q from Star Trek the Next Generation. Sauron in Lord of the Rings, brief as it was. The Green Ranger from Power Rangers. The figure we're covering today most definitely falls into this category, Papa Lannister himself: Tywin Lannister.

Every time Charles Dance appeared onscreen as this father of the year, I made sure to pay attention. This character intimidated ME. The VIEWER. And I’m going to be honest. This sculpt can be just as intimidating with its gold and red lacquered armor.
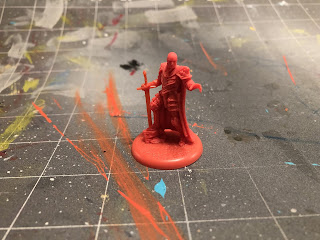
I’m not going to lie. This one’s gonna be a little advanced. Hopefully you’re up to the challenge.
1. Gameplan, Prep, and Prime
Okay, so everyone knows that I typically base all of my painting colors from the HBO series, whenever possible, but I'll be honest on this one... The bad guy from the 1980's action comedy classic The Golden Child...

Ain't got nothing on the badass look of the in-game art...

Maybe if he looked a little more like he did in The Last Action Hero...
But honestly, they're not TOO different, but the black armor with the gold trim of HBO Tywin just doesn't look as cool as the red armor with silver trim of card art Tywin, so I'm going to merge them to create my ULTIMATE TYWIN.
 |
| FUSION! |
Okay, so for this piece, here are the paints we'll be using:
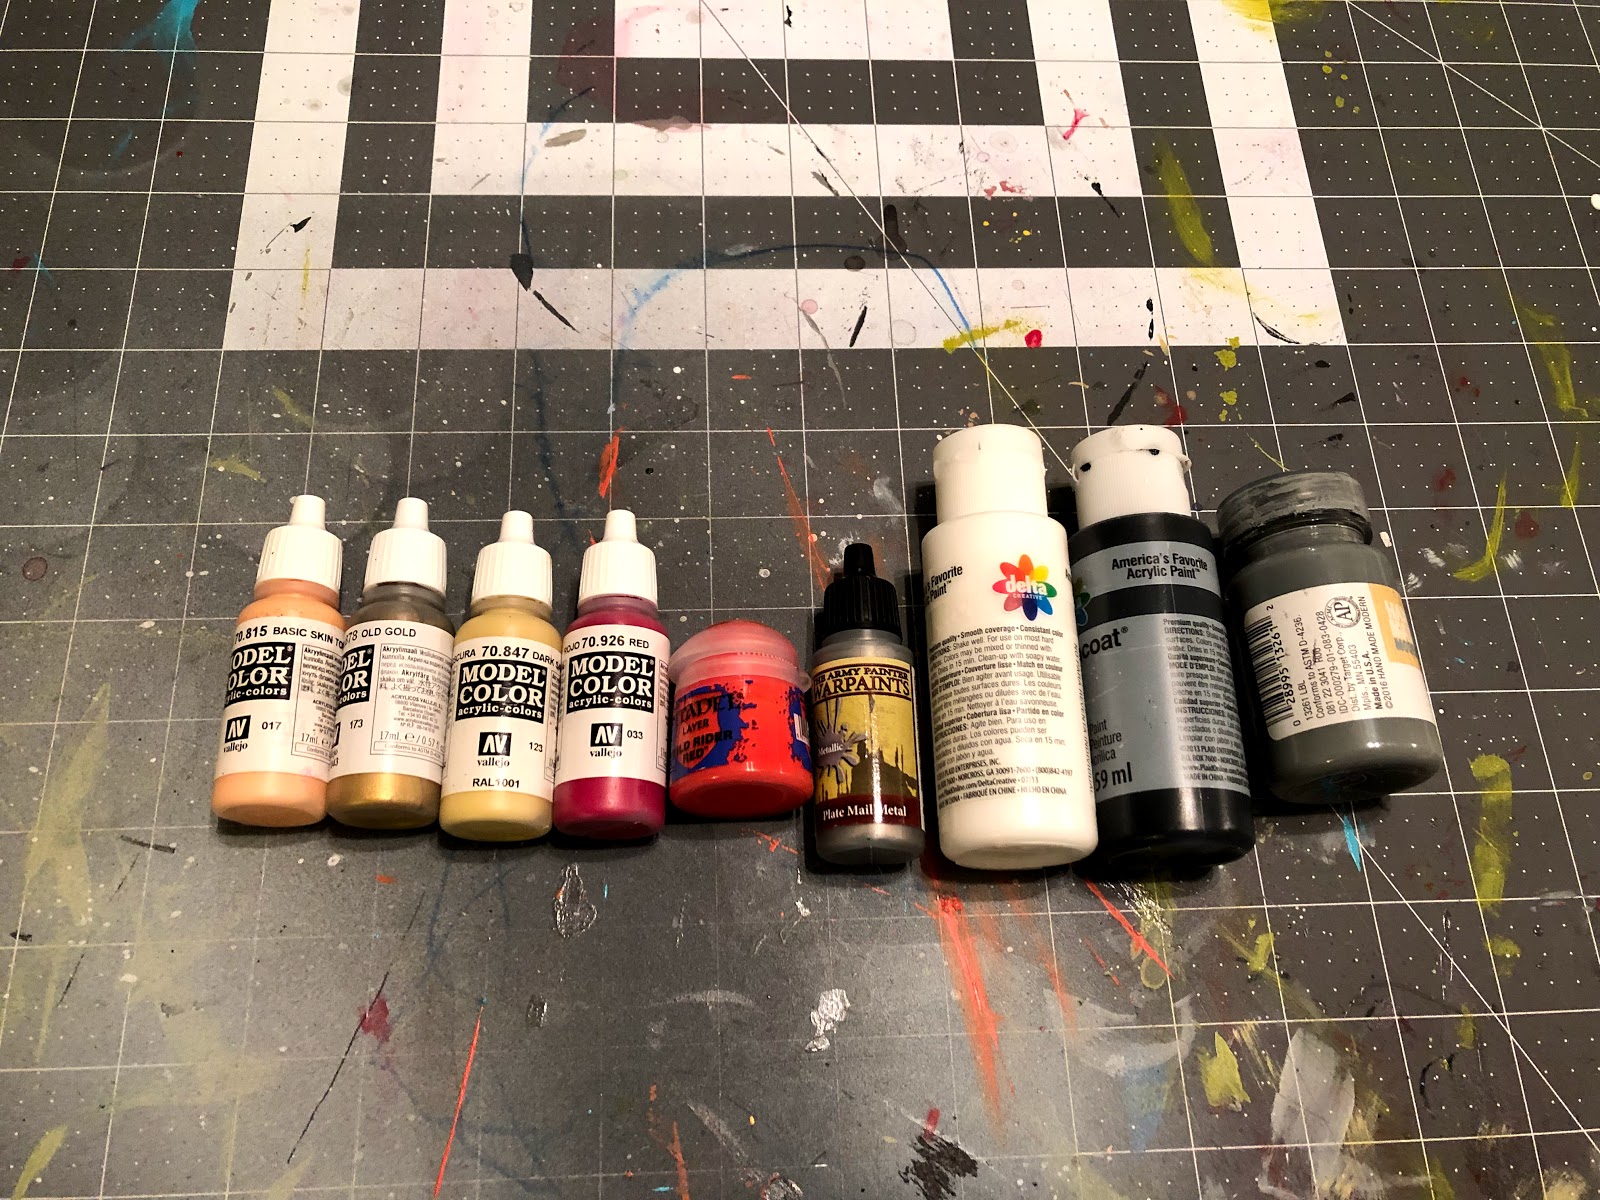
Vallejo
Basic Skin Tone, Old Gold, Dark Sand, Red
Citadel
Wild Rider Red
Army Painter
Plate Mail Metal
Ceramcoat
Black and White
Hand Made Modern (Target Brand)
Slate (Standard Grey)
Okay, so there's not actually that many colors that we'll need to use, but we're going to be using them in some very small details, so that's why I'm not using the cheap red and I splurged on the good stuff.

So, as you can see, I've primed my figure with what I call my "Poor Man's Zenithal", where I start with a matt black spray on primer (this time I used The Army Painter) and then I sprayed it with a good amount of matt white primer from directly above once the black layer was dry (again, I used The Army Painter). As you can see, this gives you an idea of some of the shadows and highlights, and provides a better surface for the gold paint to stick to.
2. Basecoats
Okay, so we're going to actually start with a paint that we're not actually going to thin. We're going to start with our old gold.

Taking your old gold, unthinned, paint up all the armor and the hilt and handle of the sword. The zenithal highlights will help add depth to the armor, and the black picks up the gold REALLY well.

From here on out, we'll be thinning all of our paints, and we'll be moving onto the red, using it to paint the cape. You'll probably want to apply a second (and possibly a third) basecoat of red once the first dries completely to you can get a nice even coat.

Here's a view of the front portions you'll want to paint red. Be sure to avoid the gold lion in the middle of his chest.

After that, you'll use your standard grey to paint the rock. Nothing too special here, just try to get an even coat, and don't worry about getting some on the blade of the sword, we're going to be painting over that.

Next, take your basic skin tone and paint the face and neck. Again, due to the darkness of the black undercoat, you might want to apply multiple coats to get even coverage.

After that, mix up one part black and one part white with equal parts water and paint the belt and scabbard.

Once that's dried, take your plate mail metal and paint the sword blade, belt buckle, and metal studs on the belt. You'll want to use your smallest brush as the space between the sword blade and Tywin's leg/rock is very small, and it could easily get paint on it.

Now, using your dark sand and detail brush, paint his mutton chops. They go all the way up to the top of his ear, so make sure you get all of them.
Okay... TRUTH TALK.
You can end basecoats here. It looks fine, but that's the problem... It looks FINE. So we're going to get a little complicated here.
Get your detail brush, your red, and just get ready...

You'll take that red and you'll paint all of the recessed areas of the armor. As you can see, I started with the tassets (thigh armor) myself.
I recommend starting with a small area, such as the tassets, to see if this is something that you even WANT to do/have the patience for. But if you DO want to do it...
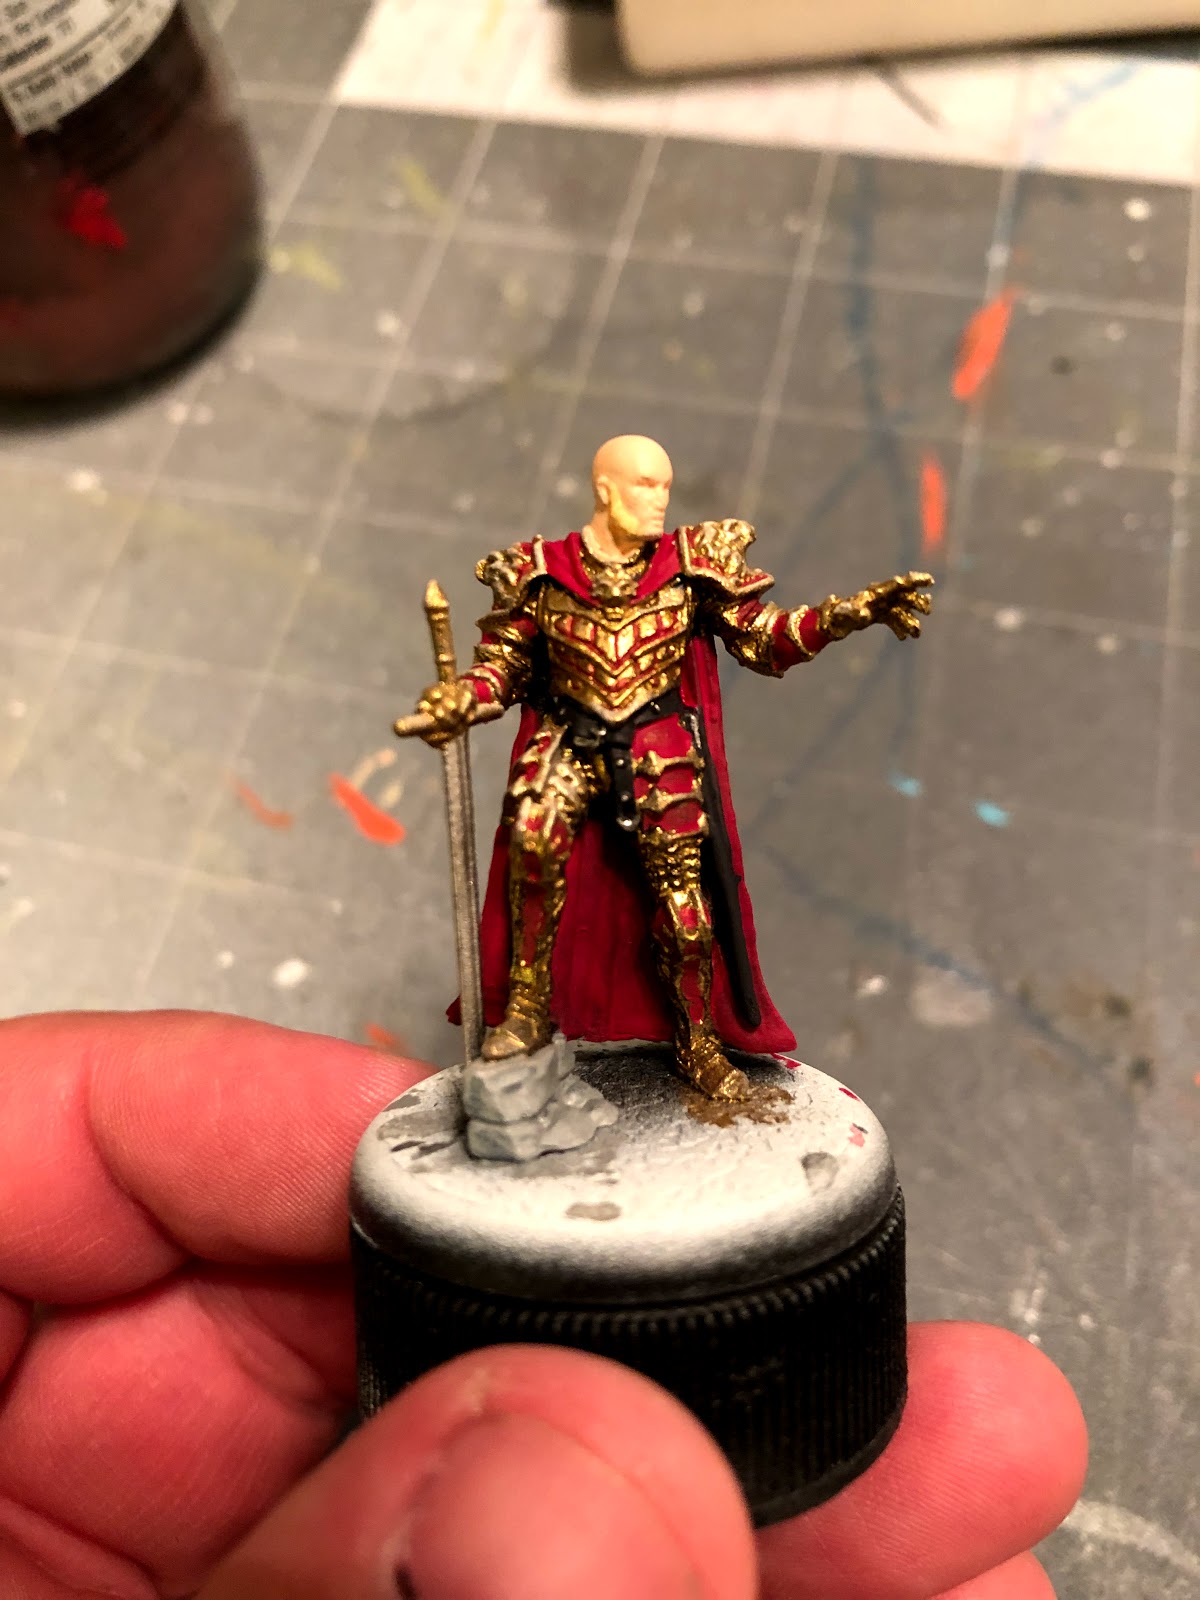
You can continue with all the rest of the recesses, such as the ones on his arms, boots, pauldrons, and even his breastplate. If you get any red on the ridges of the armor (which is almost impossible not to with the breastplate) you can always paint over it with some more old gold.
Once that's all dry, it's time for shades!
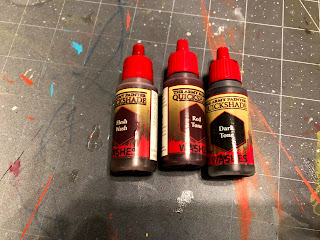
3. Shading
We're not doing too much with shades for Tywin:

We're looking at Flesh Wash, Red Tone, and Dark Tone, all by the Army Painter.

So, we're going to start by using flesh wash over the head, face, neck, and even the mutton chops.
Try not to let the wash pool too much in any one particular area.
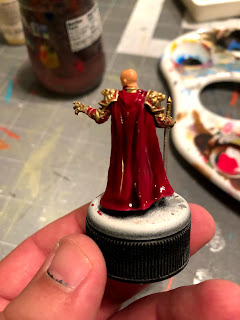
Next, take your red tone and apply it to the cape, front and back. Again, nothing too fancy here, but try your best not to get any on the armor.

The last thing we'll be shading will be, well, everything else with your dark tone. This means the armor, the belt, the rock, and the weapon. Make sure that this is a thin layer of wash, and by all means, use a spare brush to soak up any excess. You don't want the wash to completely change your red detail work on the armor to black. You should still see the red tint showing through, even on the breast plate.
Once this is all dry, it's time for highlights.
4. Highlights and Finishing Touches
We're going to start with the head:
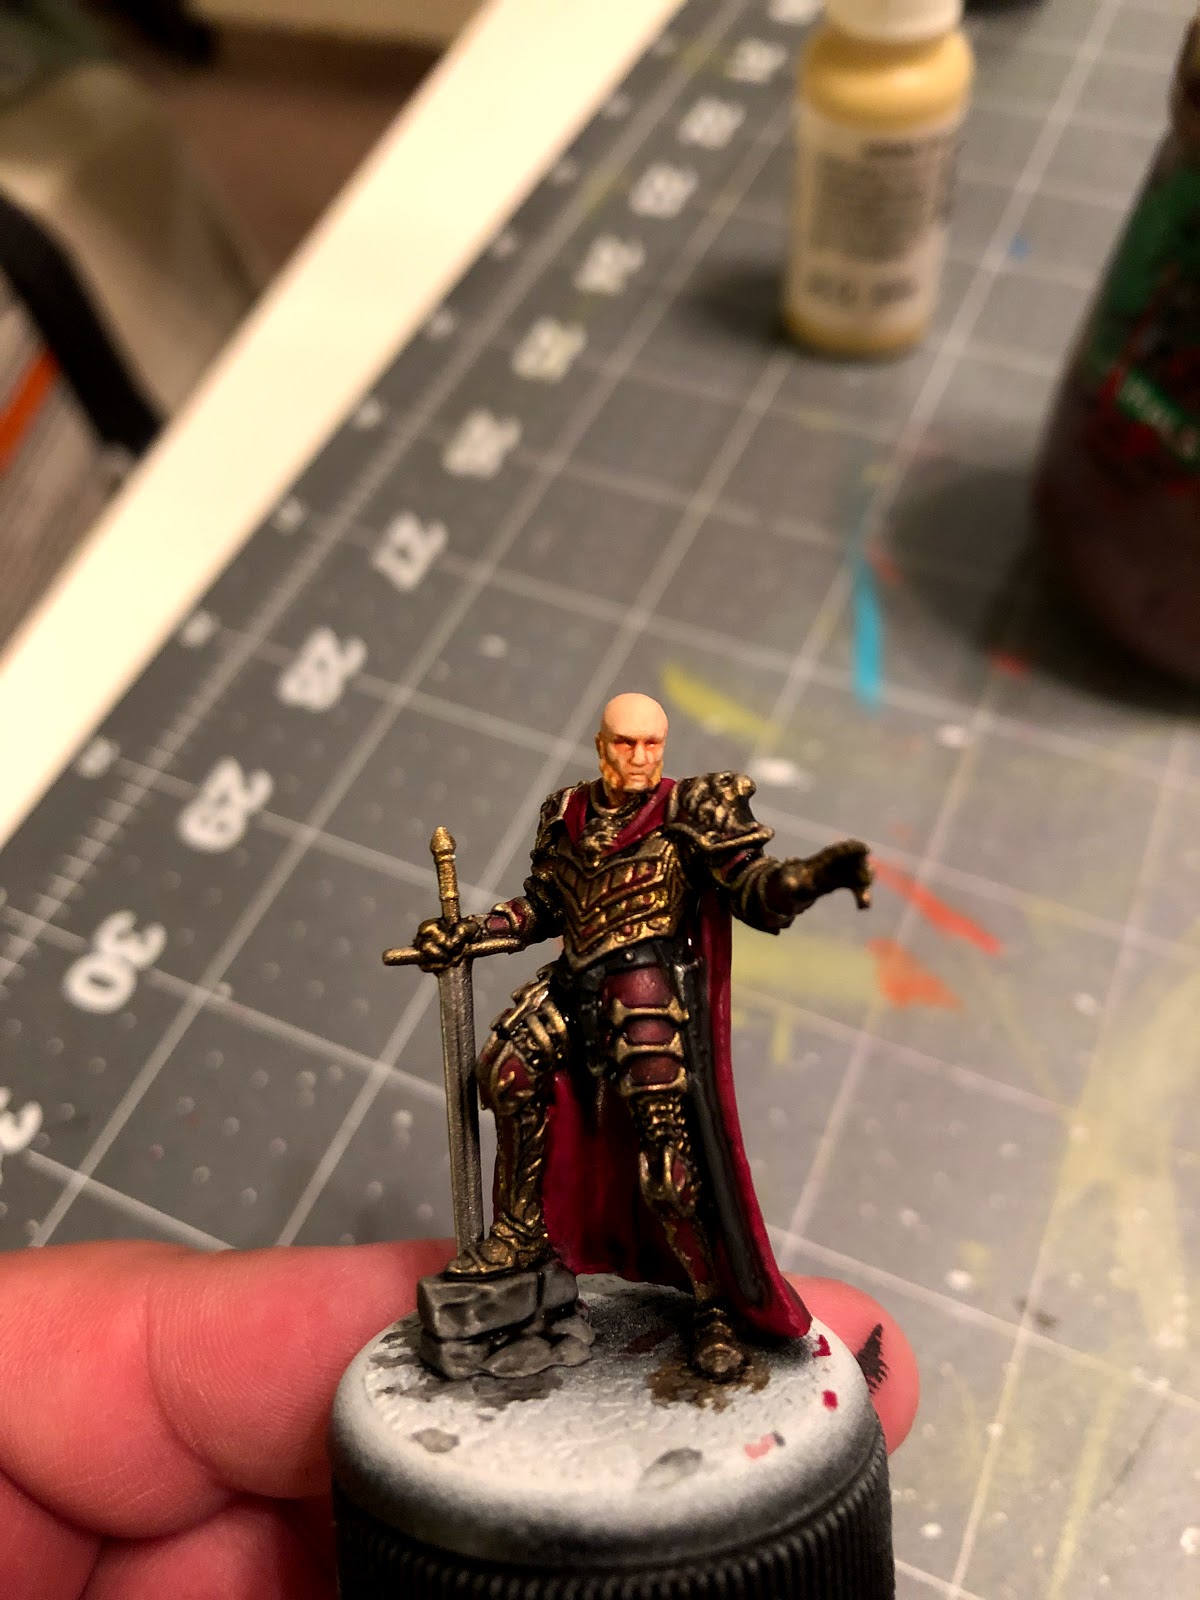
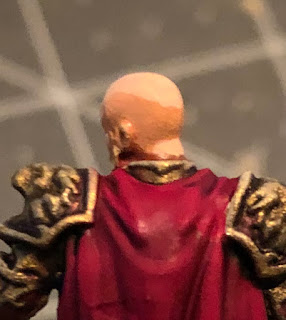
Using your basic skin tone, highlight the top of the head, forehead, nose, chin, and cheekbones.

As you can see, they've even sculpted in some of those old man folds between the nose and cheeks. Try to hit that with a highlight to add just another level of detail.

You'll also want to take this time to highlight the back of his neck.

Next, use your dark sand and highlight the mutton chops. Just pick out a few specific tufts of hair in order to leave some depth to the side burns.

After that, take your red and highlight the folds in the cape. Anywhere the fabric billows outward, just make sure that red pops. You can also do an edge highlight along the bottom of the cape for extra measure.

Keep that red out, though, because we're going to be highlighting the red recesses of the armor. Simply focus on painting the center of each red area, and avoiding the edges, where the wash darkens where it meets the gold.
But because we REALLY want to make his red pop, we're going to add a second level highlight to all of the red portions.

Using your Wild Rider Red, you'll apply a small second level highlight to the center of the red portions you've already highlighted. It doesn't take much, as you can see, just a small dot in the middle is usually enough to sell the effect.
You can also use this color to add a second level highlight to the cape if you choose to do so.
5. Rule Casterly Rock!

That's it, Westerosi! Hit him with your matt spray, base him out however you like, and get this guy out there making enemies and influencing people.
Hopefully, you found this tutorial helpful, and as always, this tutorial, along with all my other A Song of Ice and Fire painting tutorials can be found on my blog for future reference. And if you have found this, or any other tutorial of mine helpful, I humbly ask you to consider becoming a Patron. It's only a dollar a month, and it all goes to giving you, the readers, the best ad-free content possible. Not to mention you get fun stuff like the ability to vote on the finalists of my Painting Competition.
Until next time, Westerosi!
Remember to Share, Comment, and Subscribe!
Comments
Post a Comment