Become a Patron!


 |
| by CMON Games |
"The Only Difference Between Us and the Wildlings is That When That Wall Went Up, Our Ancestors Happened to Live on the Right Side of It..."
It's been a long time since we went North of the Wall, and I figured if I was gonna go, I was gonna do as much as I could while I was up there.
Today, we're taking a look at how to paint three different Free Folk infantry units: the Raiders, Trappers, and Spearwives.

I decided to lump them all together because the technique for painting all of them is pretty much the same, so might as well do it all in one.
Let's go!
1. Gameplan, Prep, and Prime
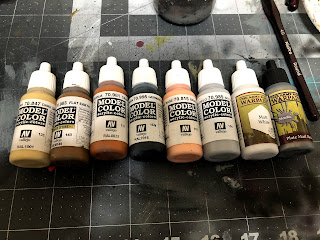
The gameplan here is a little different. We're going to be trying to paint as many figures as easily as we can, so we're going to be using some colored primer, and drybrushing techniques to do most of the heavy lifting for us. Here are the paints we'll need:

Vallejo
Dark Sand, Flat Earth, Brown Orange, German Grey, Basic Skin Tone, Sky Grey, Light Brown (not pictured above)
Army Painter

I used Stynylrez grey primer to prime all of my Freefolk this round. Normally, I use my airbrush to apply this primer, but I wanted to show you all how good and versatile this primer really is, so I just brushed it on with my paint brush, and you can see, it still does a great job.
Once that's all dry, it's time for basecoats!
2. Basecoats
Okay, so we're going to start off with some drybrushing, so don't thin your paint just yet...

Start off with your sky grey and do a good amount of drybrushing all over the mini. You'll start to see quite a bit of highlight and detail popping.

After that, you'll want to take your white and give the model another drybrush, but this time mostly focusing on the top of the model, such as the shoulders, face, and knees that are exposed, like the right knee in the picture above.
Once we're done with drybrushing, we get to the point where we start to thin our paints with equal parts water.

I started by painting the skin with some basic skin tone. This includes the faces, hands, and sometimes necks of the models.

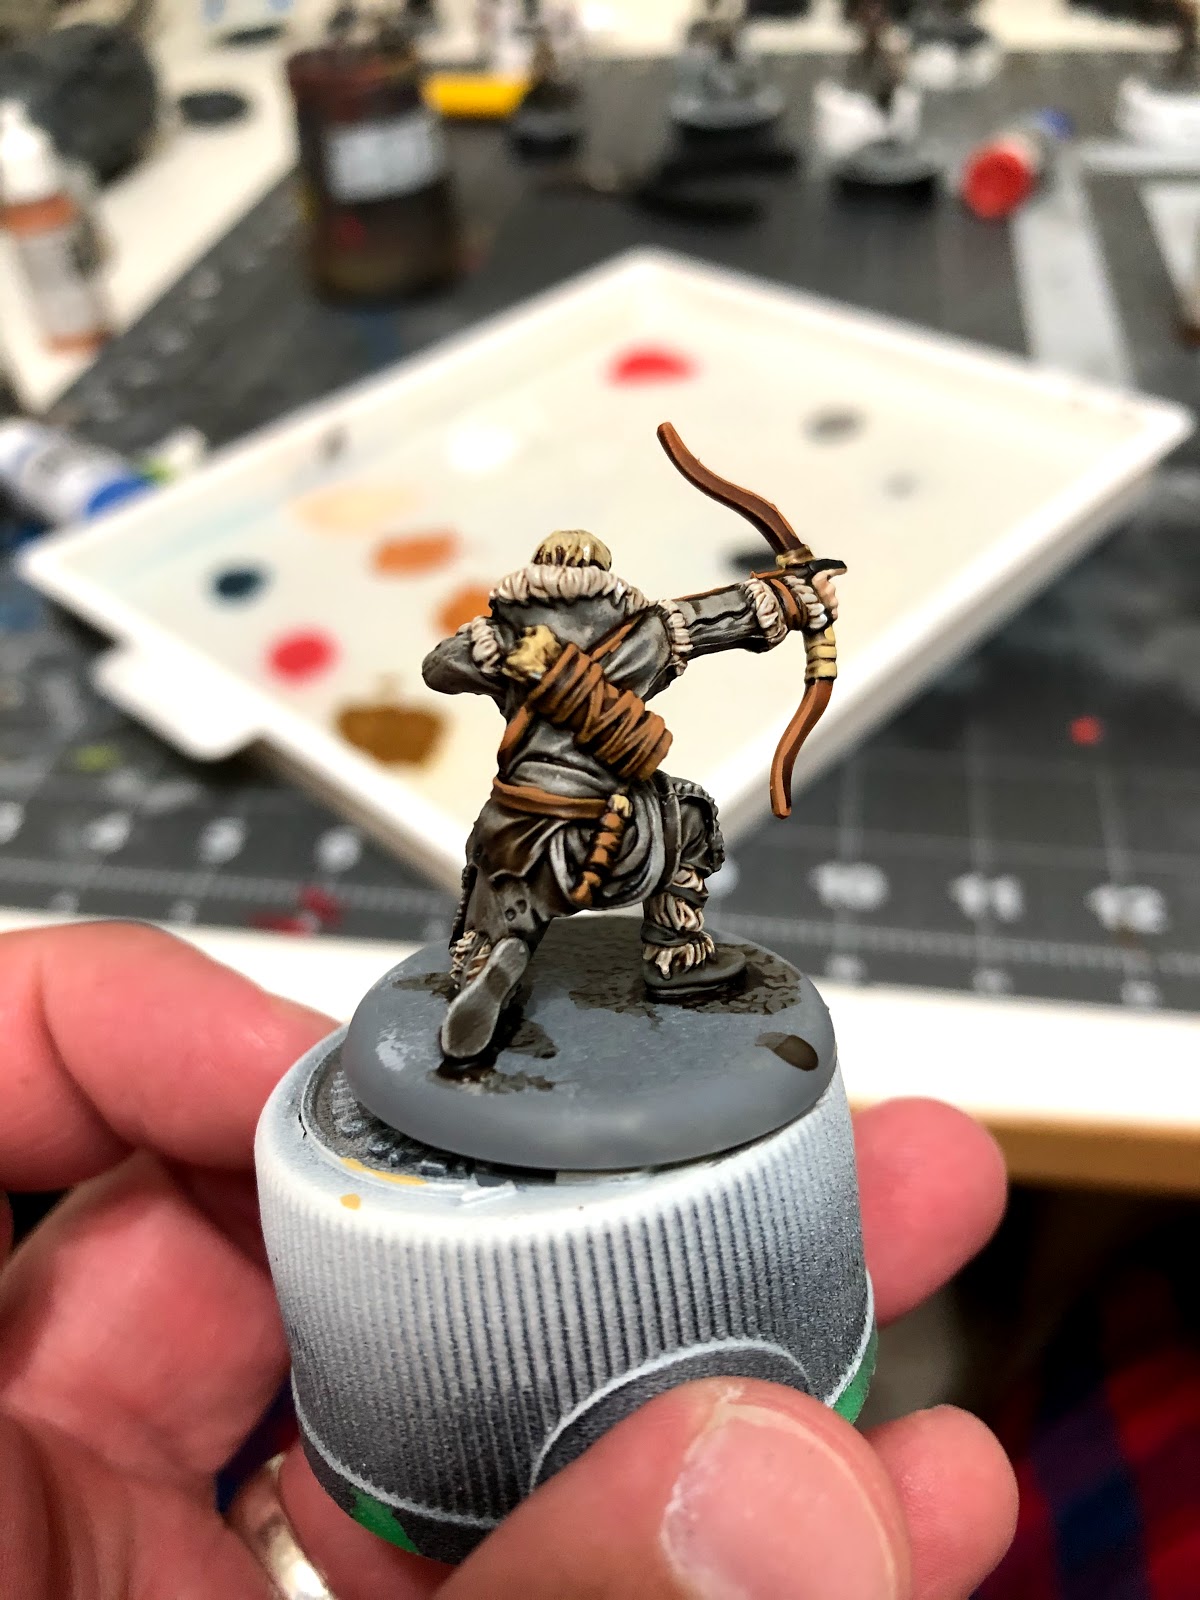
Some models, such as the trapper above, and pretty clearly wearing gloves, though, so just be on the lookout for that, and make appropriate adjustments as needed.

Now, some of the models have bone based weapons, such as this Raid Leader, and the occasional trapper. I painted those next with the dark sand. You can usually tell what's supposed to be a bone based on the shape of the handle.

The rest of the weapon handles, including the tracker's bow and lacross thingy, I painted with the brown orange. I've used this color before for the Savage Giants' clubs, and I just love it as an untreated wood look.

After that, I took the flat earth and painted all of the belts, straps, and necklaces of each model. For the spearwives in particular I painted their entire midsection, and for the bow trapper, I also painted his quiver this color.

After that, take your white and go in and paint all of the fur for all the models. Some of it is around the hood, some of it is on the shoulders, some of it lining the boots, just keep an eye out for it and paint it white.

Then, take your flat earth and paint the leather wraps and straps for each of the bone weapons.

For the non-bone weapons, I painted the straps with dark sand. I also used this color to paint the feathers of the arrows, and any trinkets or baubles the Freefolk have on their person, such as bones or animal teeth.

I also used dark sand to paint all of the stitching on the various Raiders and Trappers. It's a small detail, but it really helps to push the detail of the mini and make it look interesting.

Some of the models have stone weapon heads, such as the Raid Leader. I used german grey to paint them, so they'd look like black stone, but feel free to leave them grey if you like.

Now, take your plate mail metal, unthinned, and paint the metal portions of the models. For some this is just belt buckles, some may be spearheads, others it could the ends of a flail, like this raider. Just keep an eye out for what ever looks to be metallic and use your best judgement.

Finally, you'll want to paint the hair and beards of the models. Luckily, you'll have EVERY COLOR FOR HAIR already out, since we used them all at some point during this tutorial. If you have questions about specific ones, you can check out my blog as at some point, we've covered just about all of the hair colors.
Once that's all dry, it's time for shades!
Once that's all dry, it's time for shades!
3. Shading
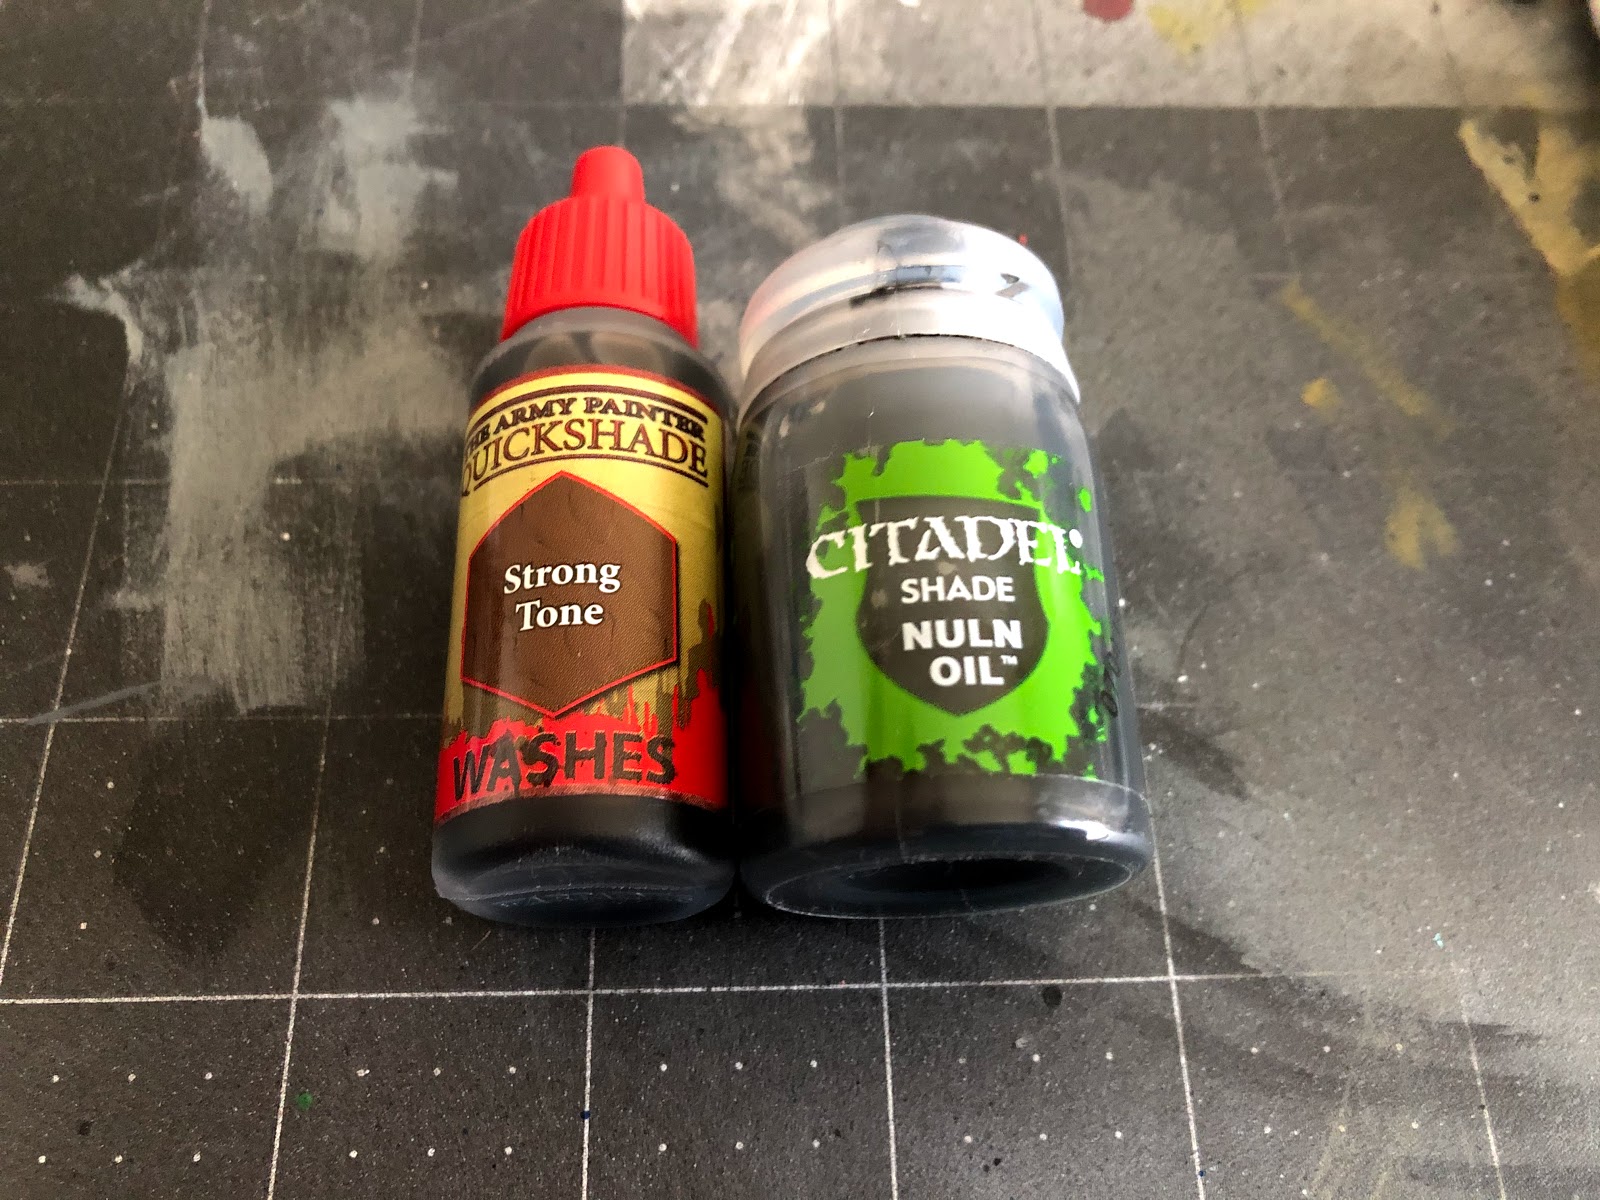
Only two today, and for some models it'll only be one. Strong Tone by The Army Painter and Nuln Oil by Citadel.

We'll start off by applying strong tone to the face, skin, and hair of each model. Normally, I use flesh wash for skin, but with the Freefolk, I wanted them to look dirty and grizzled.

Next, it really comes down to your own personal preference. You'll be applying either nuln oil or strong tone to the rest of the model. Nuln oil keeps the model looking mostly grey, but strong tone gives it a tint of brown. The above model is done with nuln oil...

While this Spearwife Matriarch was done with strong tone. It just depends on whichever you like best, but I ended up doing about half in each shade to add a little mix to my army.
Once it's all dry, it's time for highlights.
4. Highlights and Finishing Touches

The first thing you'll be highlighting will be the skin using your basic skin tone. Just paint the foreheads, noses, and cheekbones of the face before moving onto the hands and highlighting the knuckles and each finger, ignoring the deep crevasses where the shade is darkest.
WORD OF WARNING: The Spearwives faces and hands are NOT great, so you'll probably have trouble with this. Do your best, and stay patient.

After that comes highlighting all of the details of each model including highlighting the hair and adding eyebrows. You can do this in any order, but I started with everything that was painted using the dark sand. I highlighted the stitches, the bones, and the occasional wrapped weapon.
Then I got my light brown and highlighted all of the things I had previously painted flat earth, so the belts and quiver. Just a small edge highlight on most of the belts adds a lot.

After that, take your brown orange and highlight the spears/bow/lacross thing. Just a thin line long the top of the weapon would be enough to add that highlight pop.

Now comes the lions share of the highlighting. Take your white and highlight the fur. The easiest way to do this is to just paint the top of each portion as if you were looking on the model from a bird's eye view. This helps create a nice gradient where the areas of the fur that are closest to the sun are lighter.

The next bit is purely optional, but if you really want to sell the model, you can mix up some Snow by The Army Painter, some PVA glue, gloss varnish, and water until you get a nice "Toothpaste" consistency. There's really no way to say "Exactly this much of X or Y" so you gotta just kind of eyeball it.
Once you get it to the consistency you like, apply it to the model, focusing on the legs and any areas you think would hold snow. As you can see, I applied a little to all over to help give the appearance that they'd been trudging through the snow all day.
5. Storm the Wall!

That's it, Westerosi! Get those Wildlings ganging up on the rest of those civilized folk.
Again, this tutorial, like the rest of my A Song of Ice and Fire tutorials will be on my blog for future reference, and if you felt this tutorial really helped you out, I humbly ask that you consider becoming a Patron. It's only $1 a month, and every bit goes to making this blog the best it can be for my readers.
Comments
Post a Comment