Become a Patron!


 |
| by Atomic Mass Games |
"I've Got Red in My Ledger..."
I'm just going to get this out in the open. I'm not a big fan of Black Widow. It's not that I don't think she's cool, I'm just kind of surprised how ANYONE would be able to trust a FORMER RUSSIAN SPY. Mark Millar perfectly summed up my skepticism in the EXCELLENT The Ultimates 2...
Even though she's not my favorite character, she's an AMAZING model to choose for your Marvel: Crisis Protocol squad, so we're going to paint up Natasha today.

While she is mostly black, we'll be taking special care with her skin and hair to really make her pop, along with extra steps to make sure the black stays interesting.
Let's get to it!
1. Gameplan, Prep, and Prime
Okay, so again, I'll be going very traditional with this paint job, but if you're curious about how how certain angles are supposed to look on the model, I highly suggest going to Atomic Mass Games' website and checking out their gallery, as they have 360 degree images of all the models.

To emulate this look, here are the paints that I've assembled:

Vallejo
Light Flesh, Basic Skin Tone, Sky Grey, Neutral Grey, German Grey, Dark Vermilion, Amaranth Red, Bright Orange, Chocolate Brown, Flat Earth, Cork Brown, Gold
Army Painter
Citadel
Black Templar (Contrast Paint)

I haven't done a true zenithal prime on this model, just what I call a "Poor Man's Zenithal" which just uses a black primer and a shot of white primer from directly above, to really help push the contrast of the miniature.
Once that's all dry, it's time to start painting!
2. Basecoats
The first thing we're going to start with is painting her catsuit.

Taking your black templar contrast paint, apply a thin layer all over her clothing, including her gloves. A common mistake I see with contrast paint is applying too thick of a layer, but if you're using it over a zenithal prime, the thinner you apply the contrast paint, the better it looks overall.

Next, we'll use our basic skin tone, thinned with equal parts water, to paint the face and chest. You want to make sure that her face is bright, so you'll want to apply multiple coats, just make sure you wait for the previous layer to fully dry before applying another. I ended up using three in the picture above.
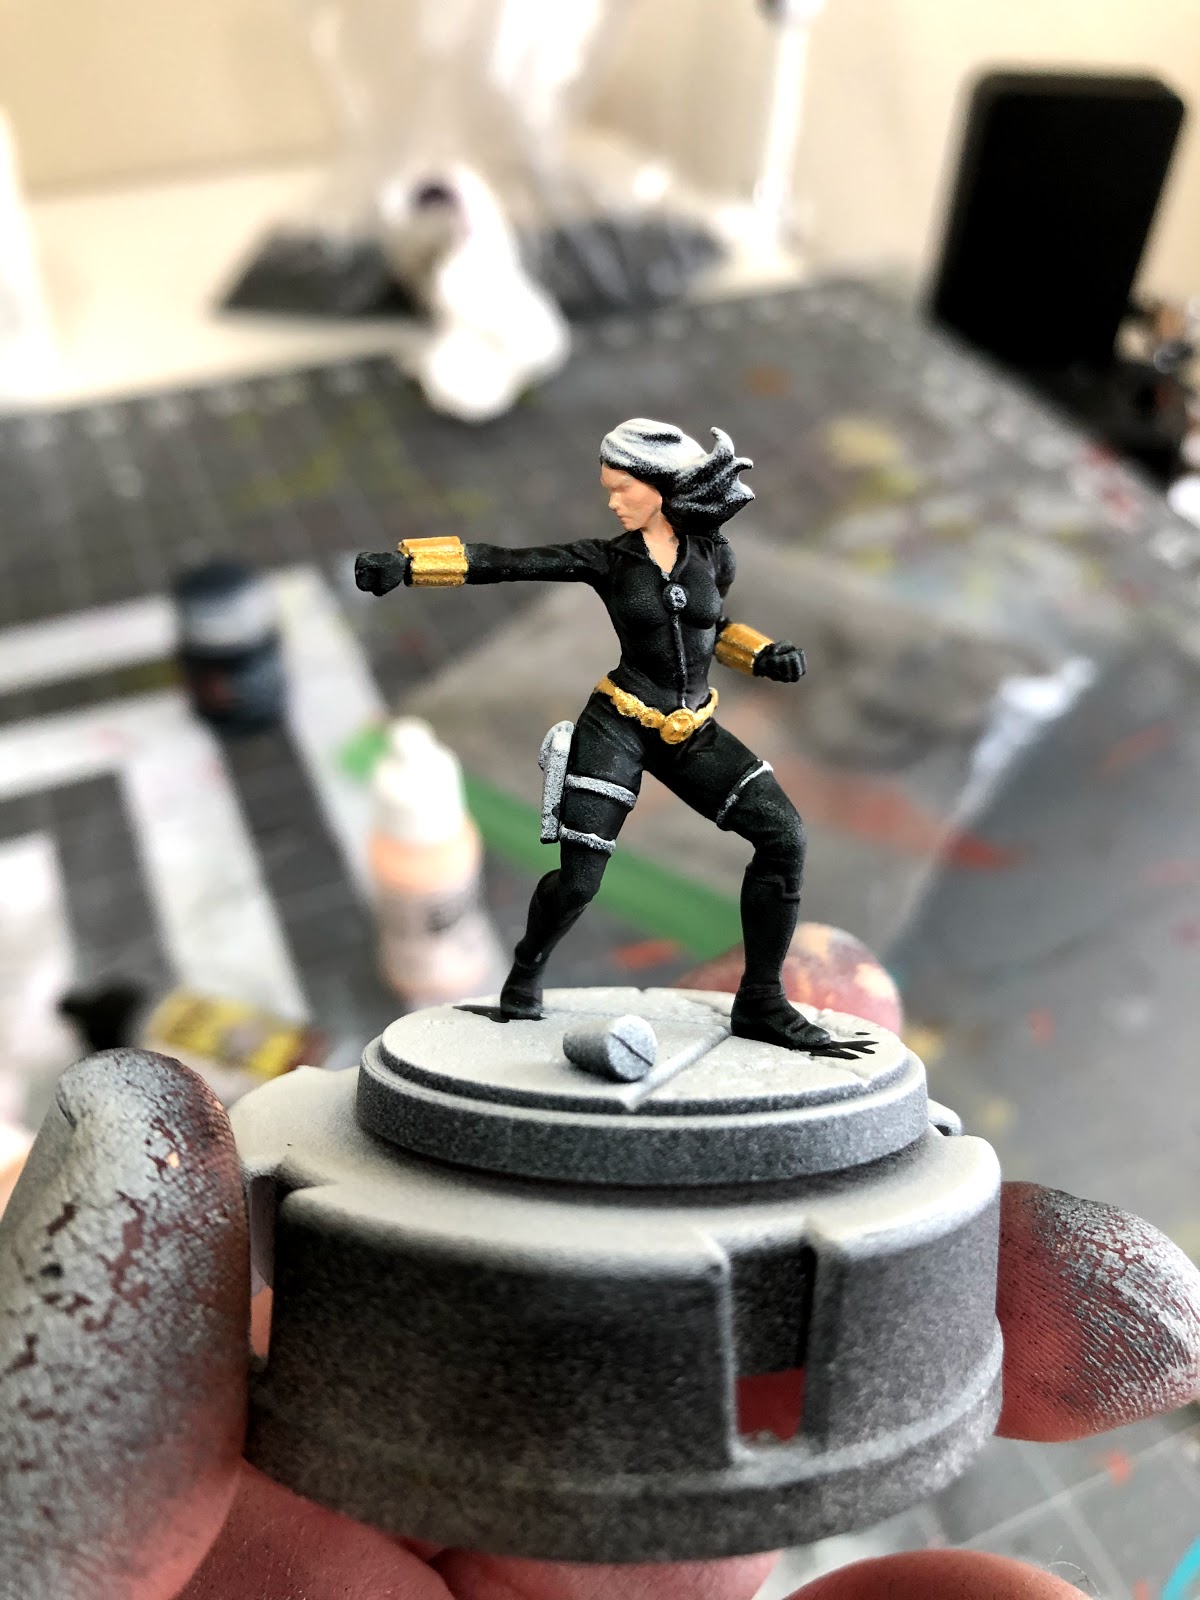
After that, take your gold straight from the bottle and paint the bracers and her belt.

Then, we move onto the holster and random strap she has on her left leg. For these, I used my chocolate brown, thinned with equal parts water.

Next, take your plate mail metal, straight out of the bottle, and paint her gun, zipper, and zipper pull on her chest. When painting the zipper, make sure you follow it up past the zipper pull, going up her collar on both sides.

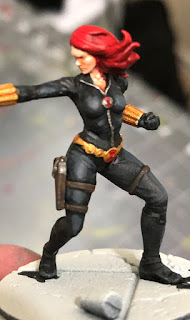
Finally, you can take your dark vermilion, thinned with equal parts water, and paint her hair. Normally, I use an orange for red hair, but we really want to push the comic book aspect of her bright red coif, so we're going with a true red. You don't want to apply TOO much paint to her hair, however, as you want the extra shading that the black undercoat is providing.
You can also use this color to add her "Black Widow Symbol" to her belt buckle and zipper pull by using your detail brush to paint two triangles meeting in the center of each accessory. This is also the time to take your contrast black and paint the side of the pistol handle if you like.
Once it's all dry, time to move onto shading.
3. Shading

So, here are the washes we'll be using to throw shade at Natasha: Light Tone, Flesh Wash, and Red Tone by The Army Painter, along with some Nuln Oil by Citadel.

Start off by applying the flesh wash to the skin. Nothing too heavy, just a thin layer to give her face and chest a little depth.

After that you can add some red tone to the hair and some light tone to the gold bracers and belt. It doesn't matter which order you do this in, but you'll want to control any excess red tone by wicking the excess off with a dry brush.

The last thing you'll add will be a little bit of nuln oil to the gun, holster, strap on the right leg, and the zipper and zipper pull. Be VERY careful when applying this near her skin, so make sure that you're using VERY LITTLE amounts of nuln oil to do this.
Once it's all dry, time for highlights!
4. Highlights and Finishing Touches

The first thing we'll be highlighting will be the face. We'll be using our basic skin tone to paint the forehead, cheekbones, nose, chin, and along the jaw line.
You should also paint the back of the neck, and the collarbone on her chest, remembering to paint the lighter portions of the model, leaving alone the portions of the model that are darker because of the shade.

Next, mix in a bit of light flesh to your basic skin tone and add a secondary highlight to her skin, painting just the middle portion of the sections you've already highlighted. If you're unsure, you can follow the green colored portions pictured above.
When you're finished, it should look something like this:

Moving on, we'll be spending a LOT of time focusing on the black catsuit, and getting that painted up properly, but we'll be using a LOT of the same techniques that we did in my Venom tutorial, so if you need additional help, make sure to check that out.

We're going to start off with the german grey. You'll follow the portions of the mini that are left lighter from the contrast paint, such as the front of the right leg, the left thigh, the top of the shoulders, arms, and hands, her chest, left hip, and her toes.
This also includes all of the folds of her clothing on her back and her right calf.
Next we'll add a second level of highlights using our neutral grey, and painting the center portions of what we've already highlighted black, similar to what we did with Natasha's face.
You can see the portions of neutral grey pretty well in the above image.

After that, mix in some sky grey to the neutral grey and add a third level of highlight in very select places, such as the chest, the hips and the thighs. Again, you can get a pretty good idea of where to place the highlights from the picture above.

Moving on from the catsuit, we move to the hair. Taking your dark vermilion and apply some highlight to the hair, following each defined lock of hair, moving to the tip, and sticking to the front and top of the hair. Again, make sure to avoid the darkest recesses of the sculpt.
You can also use this color to add eyebrows and paint her lips. For the lips, aim for the center of each of her lips and you'll get enough color to paint both of them.

After that, take your amaranth red and give her hair some top down highlights, only painting what you can see from this angle, and staying within the boundaries of what you'd just highlighted on her hair.
You can also use this color to add a TINY highlight to her lower lip by painting a small dot in the very center of her lower lip.

Next, take your bright orange and add a third level of highlight just to the very top and center of each lock of hair or tip of hair.

Now we move onto the holster and straps, using our flat earth to paint a little edge highlight on the holster, and a small highlight on the front of each strap.

After that, take your cork brown and paint ANOTHER edge highlight over the holster, staying within the bounds of what you'd already painted with your flat earth, and mostly sticking with the top and front.
For the straps, within the portion that you've already painted with flat earth, try to paint a TEENY TINY "T" shape to add that extra level of pop.

If you're feeling particularly sadistic, you can also add in some TEENY TINY eyes to the model similarly to what we've done with previous MCP models (I did) but it's INSANELY DIFFICULT on this particular sculpt, and with her pose tilting her head downward, leaving it as is totally works.

We're going to start off with the german grey. You'll follow the portions of the mini that are left lighter from the contrast paint, such as the front of the right leg, the left thigh, the top of the shoulders, arms, and hands, her chest, left hip, and her toes.
This also includes all of the folds of her clothing on her back and her right calf.

Next we'll add a second level of highlights using our neutral grey, and painting the center portions of what we've already highlighted black, similar to what we did with Natasha's face.
You can see the portions of neutral grey pretty well in the above image.

After that, mix in some sky grey to the neutral grey and add a third level of highlight in very select places, such as the chest, the hips and the thighs. Again, you can get a pretty good idea of where to place the highlights from the picture above.

Moving on from the catsuit, we move to the hair. Taking your dark vermilion and apply some highlight to the hair, following each defined lock of hair, moving to the tip, and sticking to the front and top of the hair. Again, make sure to avoid the darkest recesses of the sculpt.
You can also use this color to add eyebrows and paint her lips. For the lips, aim for the center of each of her lips and you'll get enough color to paint both of them.

After that, take your amaranth red and give her hair some top down highlights, only painting what you can see from this angle, and staying within the boundaries of what you'd just highlighted on her hair.
You can also use this color to add a TINY highlight to her lower lip by painting a small dot in the very center of her lower lip.

Next, take your bright orange and add a third level of highlight just to the very top and center of each lock of hair or tip of hair.

Now we move onto the holster and straps, using our flat earth to paint a little edge highlight on the holster, and a small highlight on the front of each strap.

After that, take your cork brown and paint ANOTHER edge highlight over the holster, staying within the bounds of what you'd already painted with your flat earth, and mostly sticking with the top and front.
For the straps, within the portion that you've already painted with flat earth, try to paint a TEENY TINY "T" shape to add that extra level of pop.

If you're feeling particularly sadistic, you can also add in some TEENY TINY eyes to the model similarly to what we've done with previous MCP models (I did) but it's INSANELY DIFFICULT on this particular sculpt, and with her pose tilting her head downward, leaving it as is totally works.
5. Engage in Espionage!

That's it, True Believers! Spray her with some matt spray and get her on the battlefield!
As always, if you ever need to come back to this, or ANY of my tutorials, they can all be found here on my blog. And if you've found this, or any of my other tutorials helpful, I humbly ask that you consider becoming a Patron. It only costs $1 a month, and every dollar goes to helping me create quality content for you, my readers.
Comments
Post a Comment