Become a Patron!


 |
| by CMON Games |
"You Know Nothing, Jon Snow..."
Fast Fact: Jon Snow is my favorite character on Game of Thrones. I have my reasons. He's a classically "Good" character with humble beginnings and a sense of justice and honor that would make Ned Stark proud to call him son, bastard (or nephew) or not.
The fact that I may or may not have based the look of my LARP character, Prince Iain Stormbreaker, off of him may also be a non-zero sum factor, but who's to say...

So, today on Painting Poorly, we're going to be tackling the man who SHOULD be king: Aegon Targaryen Jon Snow.

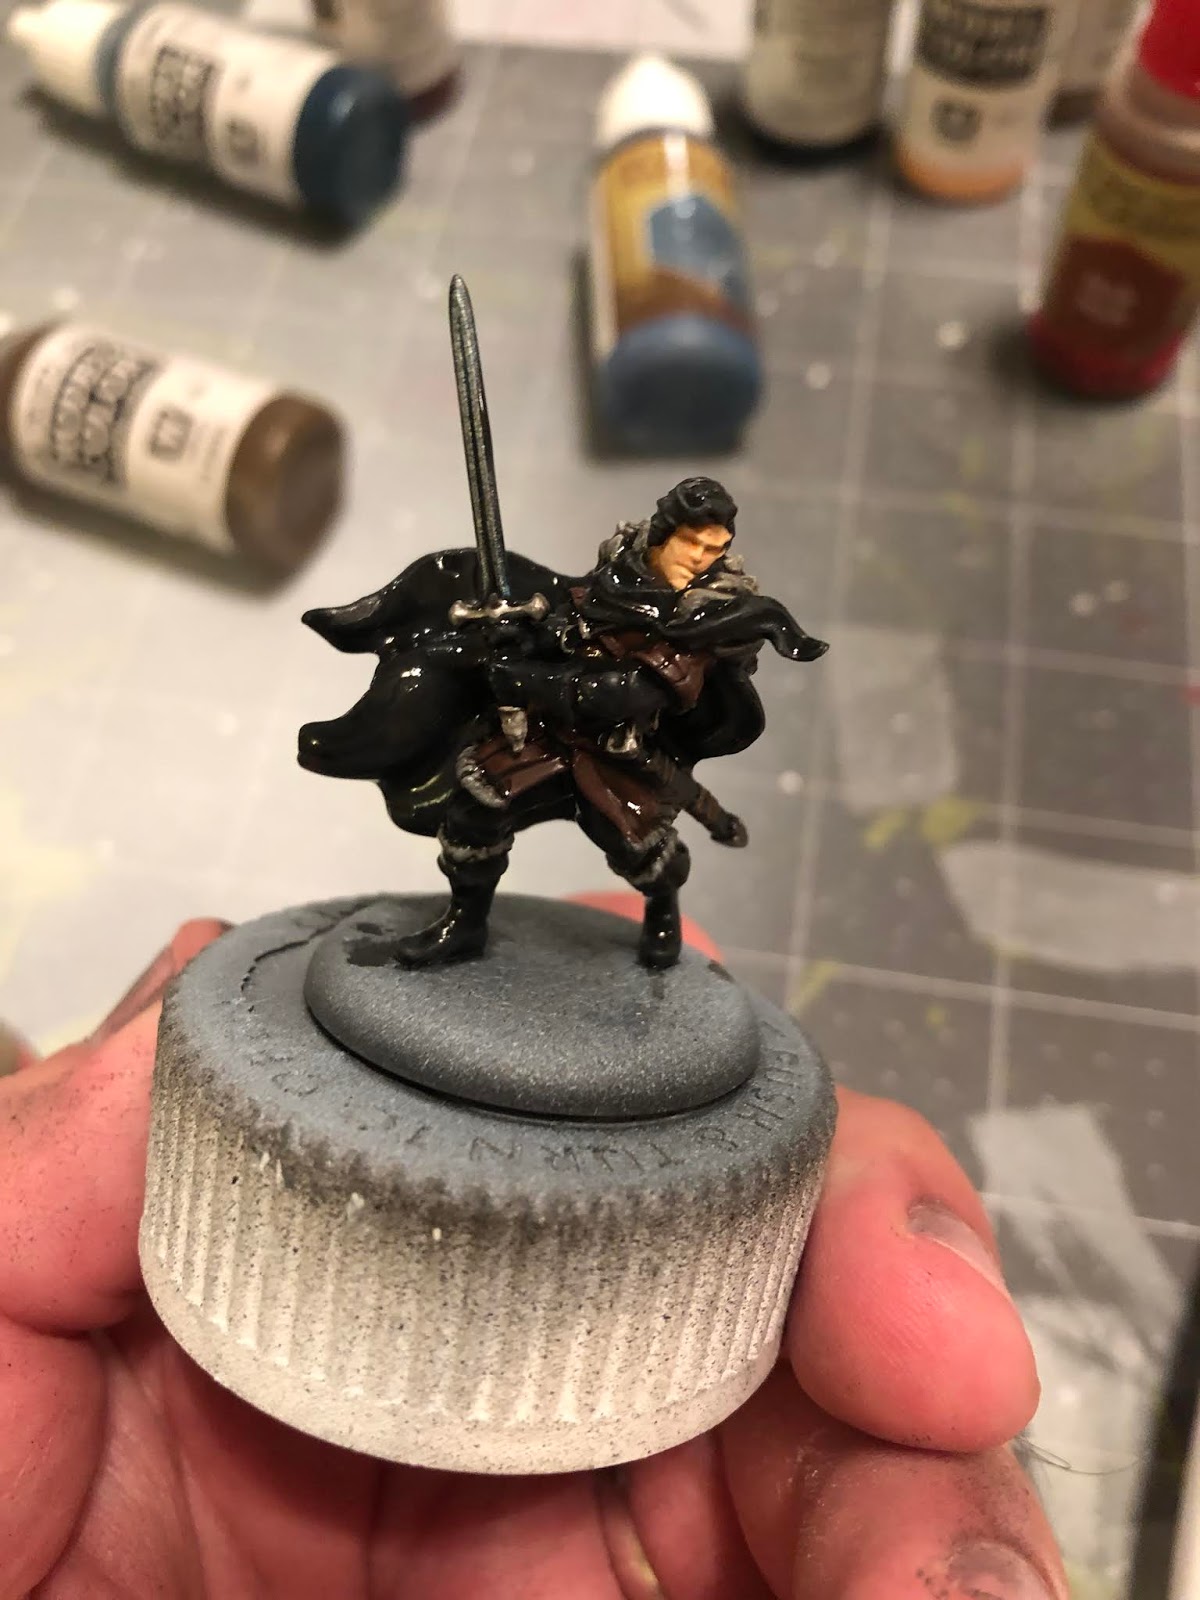
This is the first of the Night's Watch set that we'll be painting, and due to the fact that they're called "Crows" for a reason (wearing all black) we're going to be trying to incorporate as much color as we can while still remaining true to the character.
Let's get to it.
1. Gameplan, Prep, and Prime
So, it should come as a surprise to absolutely no one by now that I base as many of my paint jobs for these minis off of the HBO series, and Lord Snow is no different.

As you can see, his leathers are not COMPLETELY black on black on black. There are some dark reddish browns in there.
These are the colors I've assembled to help with the task:

We've got Hull Red by Vallejo, which is a VERY dark reddish brown, Flat Earth, Basic Skin Tone, and Gunmetal Blue by Vallejo. You may also see Chocolate Brown up there, as well, but I ended up not actually using it.
By The Army Painter I chose Plate Mail Metal and an ironically named Wolf Grey, and then from Target and the craft store, I have a standard grey and black and white.
I did also use some Necron Compound by Citadel, which is not pictured here, but you could just as easily use the Plate Mail Metal.

Since I got my airbrush at Christmas, I decided to use a zenithal highlighting pattern to prime Jon, since the character is going to wearing mostly black. This technique is also very useful if you are having trouble seeing what you should and shouldn't be highlighting, like a few of my followers have told me. It's actually a good idea to take a picture of your figure at this stage to reference.
You can of course prime completely in white, or completely in black, either would be fine, but if you prime in black, you'll have to put on multiple coats for his face, as the black is hard to cover up with lighter paints.
2. Basecoats
The first thing you're going to do is take your standard grey and paint the fur on the back.

Just a nice even layer, and don't forget the bits of fur that come over the shoulders in the front, either. You'll also want to take this time to paint the tufts of fur on the boots and trim of the his jerkin (shirt).

Once that dries, take your white and drybrush across the top of the fur. This will give it a nice highlight and you won't have to highlight it again in the end.

Now take your hull red and paint the tunic/doublet/jerkin. The nice thing about if you did a zenithal highlight is that his undercarriage is black, and you won't have to paint it at all!

After that, take your basic skin tone and paint the face. As I said earlier, you may have to do two or more coats of this color, especially if you just did a flat black prime.

Now it's time for the heavy lifting. Mix up your 50/50 black/white mix and start painting just about everything else, starting with the cloak and Jon's hair.

In the front, you'll notice that Jon has a few locks of hair that are brushing in his face. Don't ignore those. They help with the detail of the figure, so make sure you use your detail brush and paint those. You'll also want to get the gloves, sleeves, pants, boots, scarf, and scabbard. You can touch up the belts across his chest and waist as well, but leave the wrapping on the scabbard unpainted if you can.

Here's where things start to get a little weird. So, this model of Jon Snow is very clearly wielding Longclaw, the Valyrian steel blade given to him by Jeor Mormont. In the books, Valyrian steel is described as having distinctive rippled patterns, similar to actual damascus steel. So, in order to give it the look of being special when compared to other swords, and because this is fantasy after all, I'm going to basecoat the blade with gunmetal blue, which is the same metallic blue I used on the Tully Sworn Shields.
We will get to the ripple effect once it dries...

In the meantime, take your plate mail metal and paint the hilt of the sword along with any of the buckles on Jon's belts and the metal portions of his scabbard.

Now, take your white and paint the wolf's head pommel of the sword. This may take a few coats to get it even if you've primed in black.
This would also be the time when you paint the wrapping on the scabbard with flat earth. Try to leave a few gaps in the wrapping, where the black scabbard shows through.

The blue blade should be dry by now, so we're going to take that Necron Compound I mentioned earlier, and we're going to drybrush that across the blue blade, making sure to only go in one direction, perpendicular to the blade.
Do this for the front, back, and sides and it should leave little blue lines embedded into the blade itself, simulating the rippled look of Valyrian steel (well, to me it does).
3. Shading
Just like his basecolor scheme, Jon's washes are simple as well:

Flesh Wash and Dark Tone, both by The Army Painter.

We'll start off with the flesh wash, just apply a small amount to the face. We don't want to have too much because, well, Jon's kind of pale... Just enough to add depth to his features.
Next, you'll apply the dark tone to everything else. The sword, the tunic, the cloak, the fur, the hair, the boots, all of it.
Be careful when applying it to the sword blade, however, as you don't want it too dark that it covers up the blue in the blade.
Once that's all dry, it's time for highlights!
4. Highlights and Finishing Touches
I typically start off with highlighting the faces of my minis, and Jon's no exception.

Using your basic skin tone and your detail brush, highlight the forehead, nose, cheekbones, and chin of Lord Snow.

Now, mix in a little bit of your standard grey into your hull red. This will provide us with a slightly lighter tone, but not a pink tone like if you mixed in pure white.
Use this lighter hull red to paint the tunic/jerkin. Try to pick out the ridges and folds in the fabric, and if you ever get confused, try to remember the portions of the model that were white after you zenithal primed it.

Speaking of standard grey, next you'll take that and just barely highlight the fur trim around the boots and bottom of the tunic. Try to leave the darkened recesses to keep the fur detail.

Now use your white to highlight the pommel. Paint a little white "U" on the top of the wolf head, and dab a little white on the tip of the snout. This will help keep the illusion/shape of the wolf head a little better than just a flat panel of white.

For the black highlights, we're actually going to be mixing in a drop of wolf grey into our 50/50 black/white mix. This will give it a SLIGHTLY bluish tint to the highlight, but nothing that's going to look cartoony or anything like that.
Using this mix, start applying highlights from the top down to the hair, cloak, sleeves, and gloves. Again, if you get mixed up, try to remember which areas were white after you zenithal primed the figure.

You'll also apply this highlight to the front of the figure on the knees, fingers, and any folds on the boots, cloak, or sleeves. Remember to focus on the areas that billow out, or stick out due to bunching.

Okay, so this next part is completely optional, but I did it because, well, Kit Harrington...
Taking your original 50/50 black/white mix, you'll paint on the eyebrows, but also a small beard that forms like a goatee around the mouth, and a thin line along the jaw. Again, completely optional.

The last thing we're going to do is add a little weathering to the cloak, just like we did with Jaime Lannister, Maimed Hostage. Using some Vallejo Dark Earth, just apply it to the bottom portion of the cloak in a thin layer. This will give the illusion that the cloak has been drug through the mud (and snow).
You can even mix up some snow base, like I describe in my Outriders tutorial, and apply it to the cloak, knees, or anywhere else that Jon would have been snowed on... Which is to say EVERYWHERE...
5. Battle Like a Bastard!

There you have it! The first commander painted from the Night's Watch Set!
As always, this, along with all my other A Song of Ice & Fire tutorials, can be found on my blog page here, and if you have been finding these helpful, or if you've wanted to have some say in what units/subjects I'll be tackling in the future, please consider becoming a Patron. Every dollar helps deliver quality content to you on a weekly basis, and takes steps towards making this blog AD-FREE!
I hope you enjoyed taking the black with me, and make sure tune in next time as we see how the other side lives... and pillages... and murders...
Remember to Share, Comment, and Subscribe!
If you like what I have to say, consider becoming a Patron,
If you like what I have to say, consider becoming a Patron,
Comments
Post a Comment