Become a Patron!


 |
| by CMON Games |
"First Time You Seen a Giant...?"
A Song of Ice & Fire (and Game of Thrones the HBO series by extension) are typically what I like to call "Low Fantasy". Yes, it's knights and realms and kings and queens and all that, but you're not going to find anything even close to Gandalf fighting the Balrog within the pages of this George R. R. Martin joint.
That's why whenever there IS something that reminds you about the fact that we're in a fantastical world, it's all the more cool. With the release of the Free Folk faction, the ASoIaF Miniatures Game has given us the first taste of the high end of "Low Fantasy" with the Savage Giants.

These guys have become something of a fan favorite from the series (RIP Wun Wun), and I"m absolutely STOKED to be able to paint them up.
WARNING: This tutorial we will be using some more advanced techniques, so prepare yourself. These guys might be a little more labor intensive than you're used to with my typical Painting Poorly posts.
1. Gameplan, Prep, and Prime
As you all know, I base all of my paint schemes off of the HBO series, and as such, there's one giant who's my hands down favorite. He's more loyal than Ghost, because he actually showed up to the Battle of the Bastards...
 |
| Good job, Wun Wun. You just keep ripping that guy in half and putting him back together... |
But, there are two different sculpts, so I'm also going to be looking at Dongo the Doomed here:
 |
| I'm not kidding... That's actually his name... |
His coloring should fit right in with the bald giant.
Because these are larger miniatures, we're actually going to be using some more advanced techniques to make them look a little more interesting. And because these guys are SO massive, it'll give us good room to practice in case you want to use some of these techniques in the future on more standard size minis. Due to this, we've got a LOT of paint gathered:

Most of these are going to be coming from Vallejo, but there are a few exceptions. We have Rose Brown, Dark Flesh, Basic Skin Tone, Chocolate Brown, Hull Red, Orange Brown, Flat Earth, the hilariously racistly named WWII Japanese, and Dark Sand, all by Vallejo. Realistically, though, you can think of this as 3 progressively lighter shades of skin colors, 3 progressively lighter shades of brown to tan, and a few different colors of brown to break up the monochromatic look.
I've also gotten Plate Mail Metal by the Army Painter and a white and standard grey from the craft store and Target.
For the priming, I'm going to be using zenithal highlighting on them both, just like I did in my Jon Snow tutorial.

This can be done with three separate spray on primers, such as the kind that the Army Painter makes, but I'm using my airbrush and the Stynylrez airbrush primers. You can see that it creates a great template for shadow and highlight, and we'll be following that template when we paint.
2. Basecoats
Always remember, unless I tell you otherwise, make sure to thin all of your paints 50/50 with water.

We're going to start off by painting the hair. For Wun Wun, I'm using chocolate brown, and for Dongo I'm using standard grey.

Make sure to get all the chest hair, back hair, and the hair running down the arms to the hands.

Next, we're going to take our rose brown and do a basecoat on all the flesh. If you've thinned your paints properly, you should still be able to tell the difference between the black, grey, and white portions of the flesh from the zenithal prime. This is important because we're going to be painting by numbers from here on out.
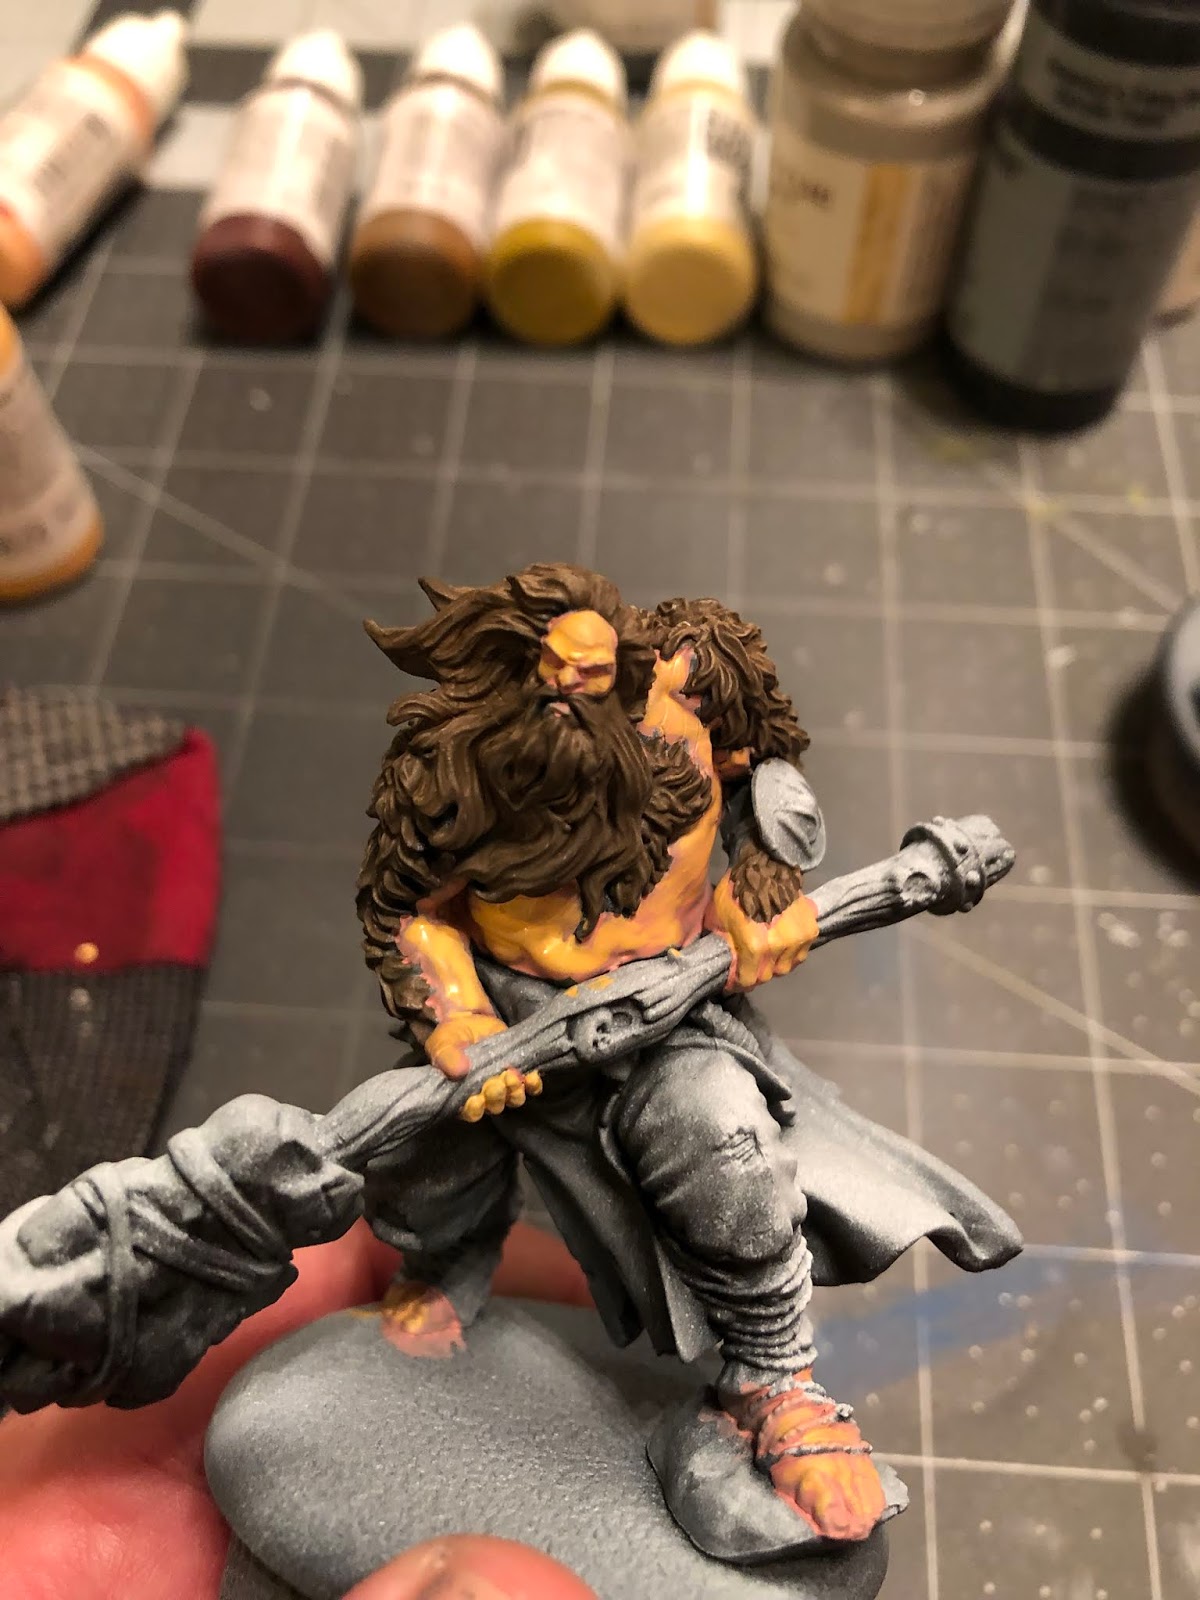
Taking your dark flesh, you'll go over most of what was already painted with the rose brown, leaving the recessed portions. Use the lighter sections from the zenithal highlight as a guide, and if you get into trouble, just think that we're adding highlights, which can be done from the top down for an easier time of it.
Now, with our basic skin tone, we're adding ANOTHER layer to the skin. You'll be highlighting about 70% of the dark flesh, which should only be about 50% of all of the skin surfaces, including the cheeks, nose, top of the head, knuckles, and each individual toe. This early highlight will increase the depth of the skin in a way that'll be superior so simply using one color of flesh and highlighting after a wash, though you can definitely do that if this is too intimidating to you.

Next, using your zenithal highlight as a guide, anywhere on the pants or skirt that is colored black, you'll paint that with your flat earth. Don't be afraid to go over into the gray portions, because that will actually help with the blending.

After that, using WWII Japanese, you'll paint all of the portions that are grey, leaving the white portions unpainted for now. As you can see, this is already starting to create a depth and shadow.

The last thing you'll paint on the pants will be the white portions using your dark sand. Again, don't worry too much if you get some color overflowing in different sections, as it'll help with the blend.
When you're working on the more difficult portions, like the shin wrapped in rope, just try to create a nice gradient by painting the outer portions flat earth, then moving to WWII Japanese, and leaving just the very front/back dark sand.
Here's an example of what Wun Wun will look like from the back for reference:

Don't worry too much about how stark some of the lines appear between the gradients of the pants/skirt or the muscles on the back. We will blend them all together later.
Dongo will look something like this when you're done:

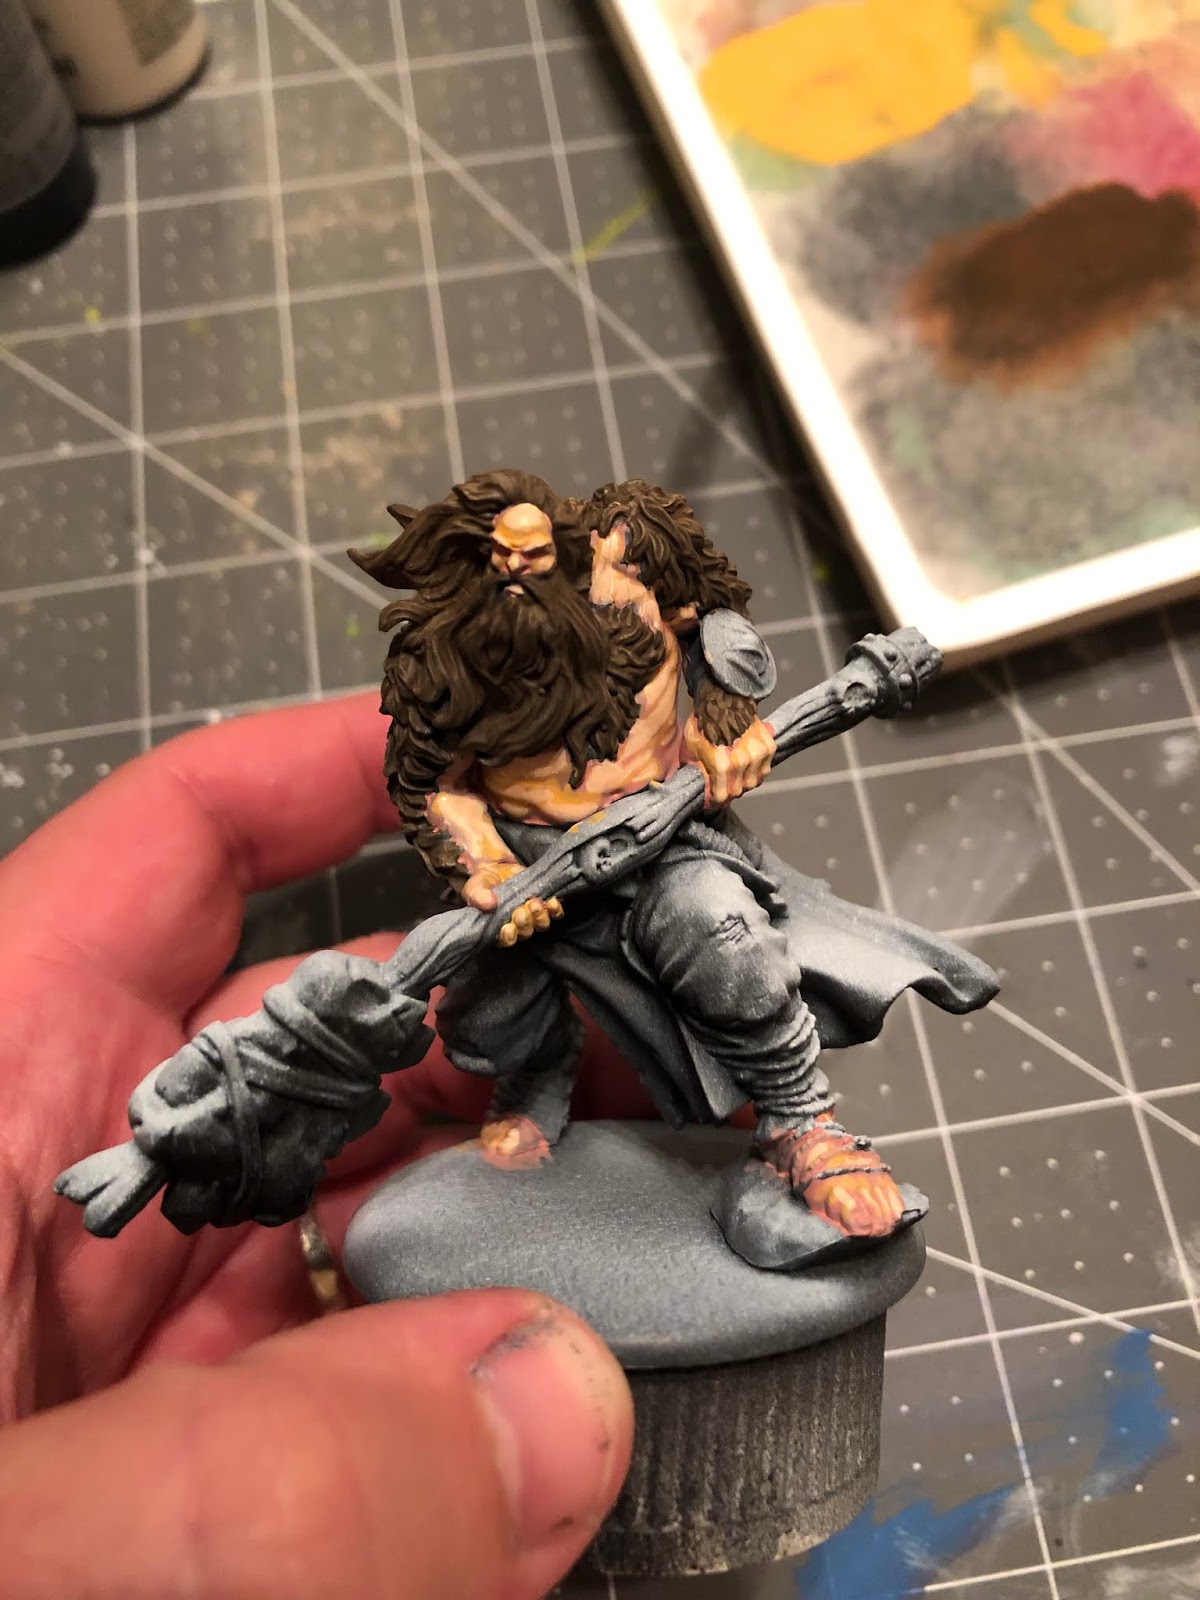
Now, you'll take your orange brown and paint up the wood.

For both giants, this will include their clubs, but for Wun Wun, it also means the wooden shield strapped to his right leg. I really love this color for a wood base, as it just helps break up the monotony of most of the Free Folk colors.

Now, take some of your dark sand and paint the tusks hanging around Dongo's waist, along with the random bones strapped to Wun Wun's left hip. Dongo also has what appears to be a necklace of teeth dangling by his butt, so don't forget that as well.

Once that's all dry, take some white and highlight the middle portions of the tusks and bones to give them some depth and differentiate them from simply being folds in the fabric.
Since you've already got your white out, you can also take this time to paint the tiny mouse that's making his home in Wun Wun's club.

After that, get your standard grey and paint the stone portion of Wun Wun's club, along with the rocks that both the giants are stepping on. In regards to the rocks they're stepping on, you really only have to paint the tops of them, as the zenithal highlight effect will work fairly well for the sides and under portion.

Next, bust out your plate mail metal UNTHINNED and paint the shield strapped to Wun Wun's left arm, the metal portion of his club, and the metal banding of the shield strapped to his leg.

This next part is one of the trickier parts of the process, and requires a lot of patience, and a fairly small brush. Take your hull red and paint all the ropes around their legs, holding the shields to their arms and legs, and leather straps binding the stone to the club. For Dongo, this also includes the beads in his beard.
Just go slow, and try to be as accurate as possible. The more accurately you can paint the ropes, the better it'll look in the finished product.
Once that's all dry, we're FINALLY done with basecoats and can move onto shading.
3. Shading
One of the unifying themes that I'll be trying to incorporate into my Wildlings is only using a Strong Tone as a wash, to help give them a dirtier look than the rest of the Westerosi we've been used to seeing.

We'll see if this continues, but for the savage giants, it's going to help blend our color gradients in both the skin and pants.

We're going to be applying this to the whole model, skin, club, pants, mouse and all. When it dries, we'll move onto highlights!
4. Highlights and Finishing Touches
The first thing we'll be highlighting will be the hair.

You're going to be using a simple drybrush to apply some flat earth to the hair on Wun Wun, which will be nice and subtle.

For Dongo, go ahead and use white to drybrush over his grey hair in order to really make it pop.

Next, take your basic skin tone and highlight the skin once more. But try to stay in the center of the portions that you've previously colored with the basic skin tone. When this is over, you'll have three levels of highlights on the skin that is blended together quite well.
Dongo's model would look similar to this:

After that, we'll highlight the stone portions of each model.

Mixing together some white and your standard grey to make a slightly lighter grey, you'll highlight the stone from top down, only really applying the highlight to what you could see from a bird's eye view, while avoiding any crevices or cracks in the stone surface.

For the next part, you'll take your dark sand and apply a highlight to a small portion of the sections you've already painted this color, such as the top of the pants, the bones and tusks, and the folds in the skirt.

With Dongo's right thigh/knee, try to draw small horizontal lines across the thigh, leaving the creases darkened if you can.

Now take your orange brown and simply apply some topdown highlights to the wooden clubs of the giants.

For highlighting the leather straps and ropes, mix together some rose brown and hull red to get a slightly lighter version of the color and apply a little bit of from the top down on the leather straps and in the very center of the ropes.

The last thing you'll be highlighting will be adding a little bit of white to the tusks, bones, and mouse. Just a thin line along the length of all of the aforementioned items will be enough to give them a nice ivory look.
5. Crush Some Puny Crows!

That's it for the giants (that is until Michael Shinall gives us that Mag the Mighty, Mammoth Rider Solo Unit). You can look up the steps I use to mix up this snow mixture and apply it to the figures at the end of my Stark Outriders tutorial, and this, along with all of my tutorials can be found here.
If you found this, or any of my tutorials, useful, please consider becoming a Patron. Every dollar helps me to provide quality ad-free content on a weekly basis.
I need to get these painted. After Dice Tower West.
ReplyDeleteLets see some stark trackers! Great job as always
ReplyDeleteI'd like to see some Kickstarter Terrain tutorials Mike!
ReplyDeleteHmm... that will require some practice and experimentation, since I’m not really a terrain guy...
Delete