Become a Patron!


That's pretty much it! Base your figure however you like, spray it with your matt finish, and The Mountain is ready to wreak havoc across the country side!
Again, I'm not going over basing yet, as I'm still learning how to do that myself.
 |
| by CMON Games |
No One Could Ever Withstand Gregor...
Not many characters are as simultaneously awesome and despised as The Mountain Gregor Clegane. He's intimidating and cool, but just SO EVIL and heartless. So, of course that makes me want to paint him!

Ser Gregor is appropriately large, but not quite big enough to be considered a BIG FIG by me, so I won't be using any of those techniques, but he presents a number of challenges unique to himself in spite of his relatively simple color scheme. So, let's get started!
1. Gameplan, Prep, and Prime
So, one of the biggest travesties of the HBO series is that Hafþór Júlíus Björnsson has never worn The Mountain's trademark yellow and black, as such, I will not be basing my gameplan on him, but instead trying to duplicate the AMAZING in game art:

While keeping in mind that the Clegane house colors are black hounds on a yellow field, and I have my gameplan, choosing the following colors:

Goldenrod and gray from Target, and Gunmetal Grey and Flat Earth by Vallejo, with a little Plate Mail Metal by the Army Painter for good measure. For the black hounds, I actually won't be using black, as it doesn't shade very well, but I'll be using a 50/50 mix of black and white, both from the craft store. This will help show off some of the details a lot better than simply using black. Prime your mini Mountain with some Matt White spray primer by the Army Painter and you're ready to go!
2. Basecoat
The first thing to start off with is the rock that Ser Gregor is standing on with your standard gray. Originally, I had waited until the end to paint this part, but it proved to be VERY difficult to do without getting gray over everything I had already painted given the weird angles, so, I'm telling you guys to do it first.

Next, we'll move onto the armor. Using the Gunmetal Grey, thinned about 50/50 with water, and get good coverage on the legs, elbow armor, shoulders, helmet, and chainmail around upper chest and back.
Next, we'll move onto the armor. Using the Gunmetal Grey, thinned about 50/50 with water, and get good coverage on the legs, elbow armor, shoulders, helmet, and chainmail around upper chest and back.

This also includes the metal banding around the shield, and the hilt and pommel of the sword. This should really only require a single coat, as gunmetal grey is a pretty heavy pigment, but you may need to touch up on areas that are thinner than other.
Next, you'll use your goldenrod, again thinned 50/50 with water, on the tunic, sleeves, and shield. Yellow goes on pretty well, but you may have to do additional coats where the gunmetal gray got onto the tunic, so be prepared for that.

Mix up a 50/50 black/white mix, which is then thinned with water (so I guess 25/25/50 black/white/water) and hit the belt, gloves, and hounds on the shield.

This detail work will probably be the hardest thing you do on this figure. Use your detail brush and go as slowly as possible, and try to not only cover the front of the hounds, but also the ridges, as they are three dimensional, and you don't want the tops of your hounds to be yellow. You can use the side of your brush to do the raised detail of the hounds, like I describe in my post about finishing touches, and that will make your time spent on details much less frustrating.
Once you're done with that, you finish the belt buckle, studs in the belts and right glove and sword blade with some Plate Mail Metal.

The last thing you'll do is painting the handles of the sword and shield brown.

In general, this figure has SO much surface area at so many different angles, that you should be prepared to go back in and touch up and mistakes you've made at this point, because there will probably be quite a few.
3. Shading
There are actually only two washes that I'm using to apply shade to Ser Gregor: Dark Tone and Soft Tone, both by the Army Painter.

Starting with the dark tone, or black wash, cover all of the armor, the sword, the gloves, the belt, the metal banding on the shield, and the rock The Mountain is standing on.

Be careful on the shield and belt as you don't want the black wash to get onto the yellow, but when you're finished, you'll notice how it really darkens the gunmetal grey, giving it that blackened steel look that is just SO intimidating.
Now, you'll take the Soft Tone, or brown wash, and cover the tunic and the face of the shield, including the hounds.

You can be a little more liberal with this, as the Soft Tone won't affect the areas already washed with the Dark Tone. Once this is dry, you're ready for some highlights!
4. Highlights and Finishing Touches
Once again, just like in my guide for Jaime Lannister, you won't have to highlight any of the metals, and for Ser Gregor, you won't be highlighting the yellow of his shield. But starting off, we want to highlight the rock he's standing on, of all things. I actually ended up choosing a much lighter gray than I had chosen originally for the basecoat:

It's ALMOST white, but not quite. And for the rock, you'll just drybrush that on directly, unthinned, using your wedge or chisel brush. Use a smaller one if you have it, and make sure you don't go crazy with your brush strokes, because you don't want to get any on The Mountain's tunic, which is easy to do.


It's ALMOST white, but not quite. And for the rock, you'll just drybrush that on directly, unthinned, using your wedge or chisel brush. Use a smaller one if you have it, and make sure you don't go crazy with your brush strokes, because you don't want to get any on The Mountain's tunic, which is easy to do.

Just a little bit of this will pick up the edges of the rock, and really make it pop.
Now, move on to some top down highlights for the tunic.

Using the same yellow that you used for the basecoat, use your detail brush and paint the folds of the back skirt of the tunic and the sleeve, remembering to keep the brightest color at the highest peaks of the figure, and gradually pulling the color down to the darker recesses, avoiding the darkest portions. You'll want to thin your paint for this, so you will also probably have to apply multiple layers to get an even application. When you're done, it should look something like this from the top:
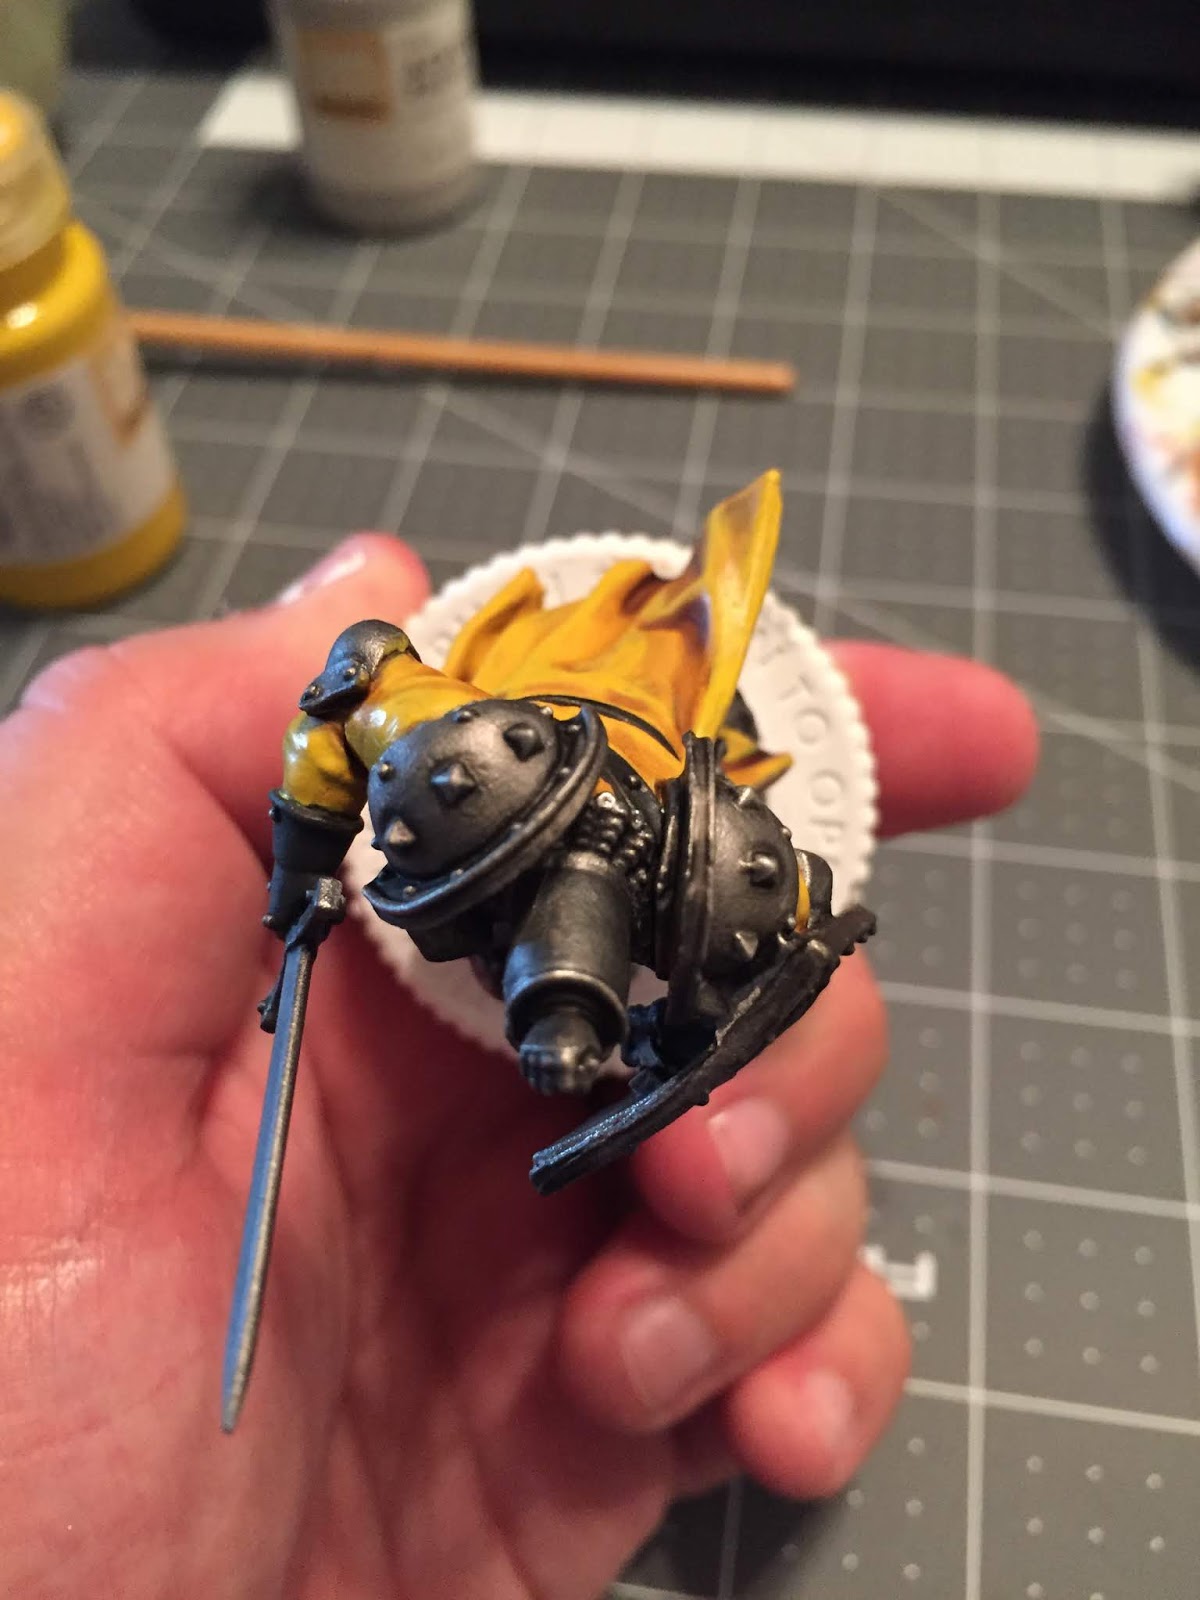
And like this from the back:

As you can see, there are additional sections to highlight, such as the folds of the tunic where it blouses above the belt, so make sure to do that as well, but you can leave the front portion of the tunic that hangs to his left alone if you want, as that portion wouldn't receive that much light due to the shield.

The last highlight you'll be adding is on the gloves and the belt. Whereas before, you used a 50/50 black/white mix, you're going to be going slightly more white, so 1/2 mix of black/white (again, thinned with equal amounts of water). Using your detail brush, simply add a little highlight to the top of the glove, the bands of said glove, and the ridges of the belt, as seen above. You can also use this to add some highlight to the hounds on the shield by painting a small line on the top of the head and back of each hound and their legs.
Finally, there's a TINY dent in the shield, add a TEENY TINY amount of plate mail metal, and call it a day!
5. CRUSH SOME SKULLS!

That's pretty much it! Base your figure however you like, spray it with your matt finish, and The Mountain is ready to wreak havoc across the country side!
Again, I'm not going over basing yet, as I'm still learning how to do that myself.
Hopefully, you found this guide useful. You can find all of the painting tutorials for A Song of Ice and Fire HERE. Be sure to check back soon, because just like in Westeros, alliances may shift like the changing wind...
I'm having a heck of a time finding Target's Goldenrod. Any recommendations for a substitute in the GW colors?
ReplyDelete