Become a Patron!


 |
| by CMON Games |
"There is a Beast in Every Man, and it Stirs When You Put a Sword in His Hand..."
Well, it's Valentine's Day, and I have my Targaryen Starter that needs to get painted up, so I figured I'd show you guys how to paint the character who EVERYONE can relate with in A Song of Ice & Fire, whether you're a man, woman, young, or old.

He is 100% proof that sometimes, they just don't like you that way, regardless of how devoted, attentive, or bad ass you are. It's okay, we've all been there, Ser Jorah, just keep your head up, and who knows what the future holds! I mean, I got married to the one who Friendzoned me 17 years later, that could be on the horizon for you, too. Your happy ending could be right around the corner!

Oh... Well, um...
Let's get to it!
1. Gameplan, Prep, and Prime
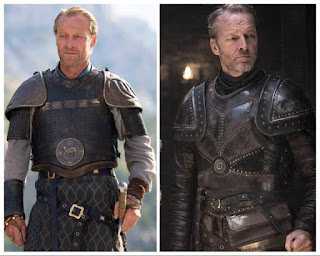
Okay, guys, y'all know that I prefer painting my armies so they look similarly to their HBO counterparts, with a few exceptions. Well, for Jorah Mormont, I'll be basing his appearance off of what I feel is his most iconic look:

In addition, I found a great picture of him fully armored:

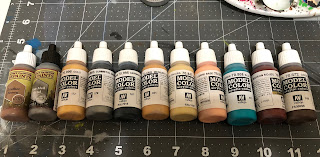
So, between these images, I've got a fairly good idea of how to proceed, and I've assembled the following paints to help:

Vallejo
Medium Flesh, Basic Skin Tone, Gunmetal Grey, Gold, German Grey, Dark Sand, Chocolate Brown, Hull Red, Blue Green, White (not pictured above)
Army Painter
In regards to priming, I'm going with the same idea as with Khal Drogo, using a zenithal highlight to help hide any missed spots, but also keeping the undercoat bright for the colors to pop.

To get this effect, I use my airbrush and Stynylrez primers, but feel free to use various rattlecan primers to the same effect.
Once that's all dry, it's time for basecoats!
2. Basecoats
Here is your mandatory reminder to thin all of your paints with equal parts water unless I tell you otherwise.
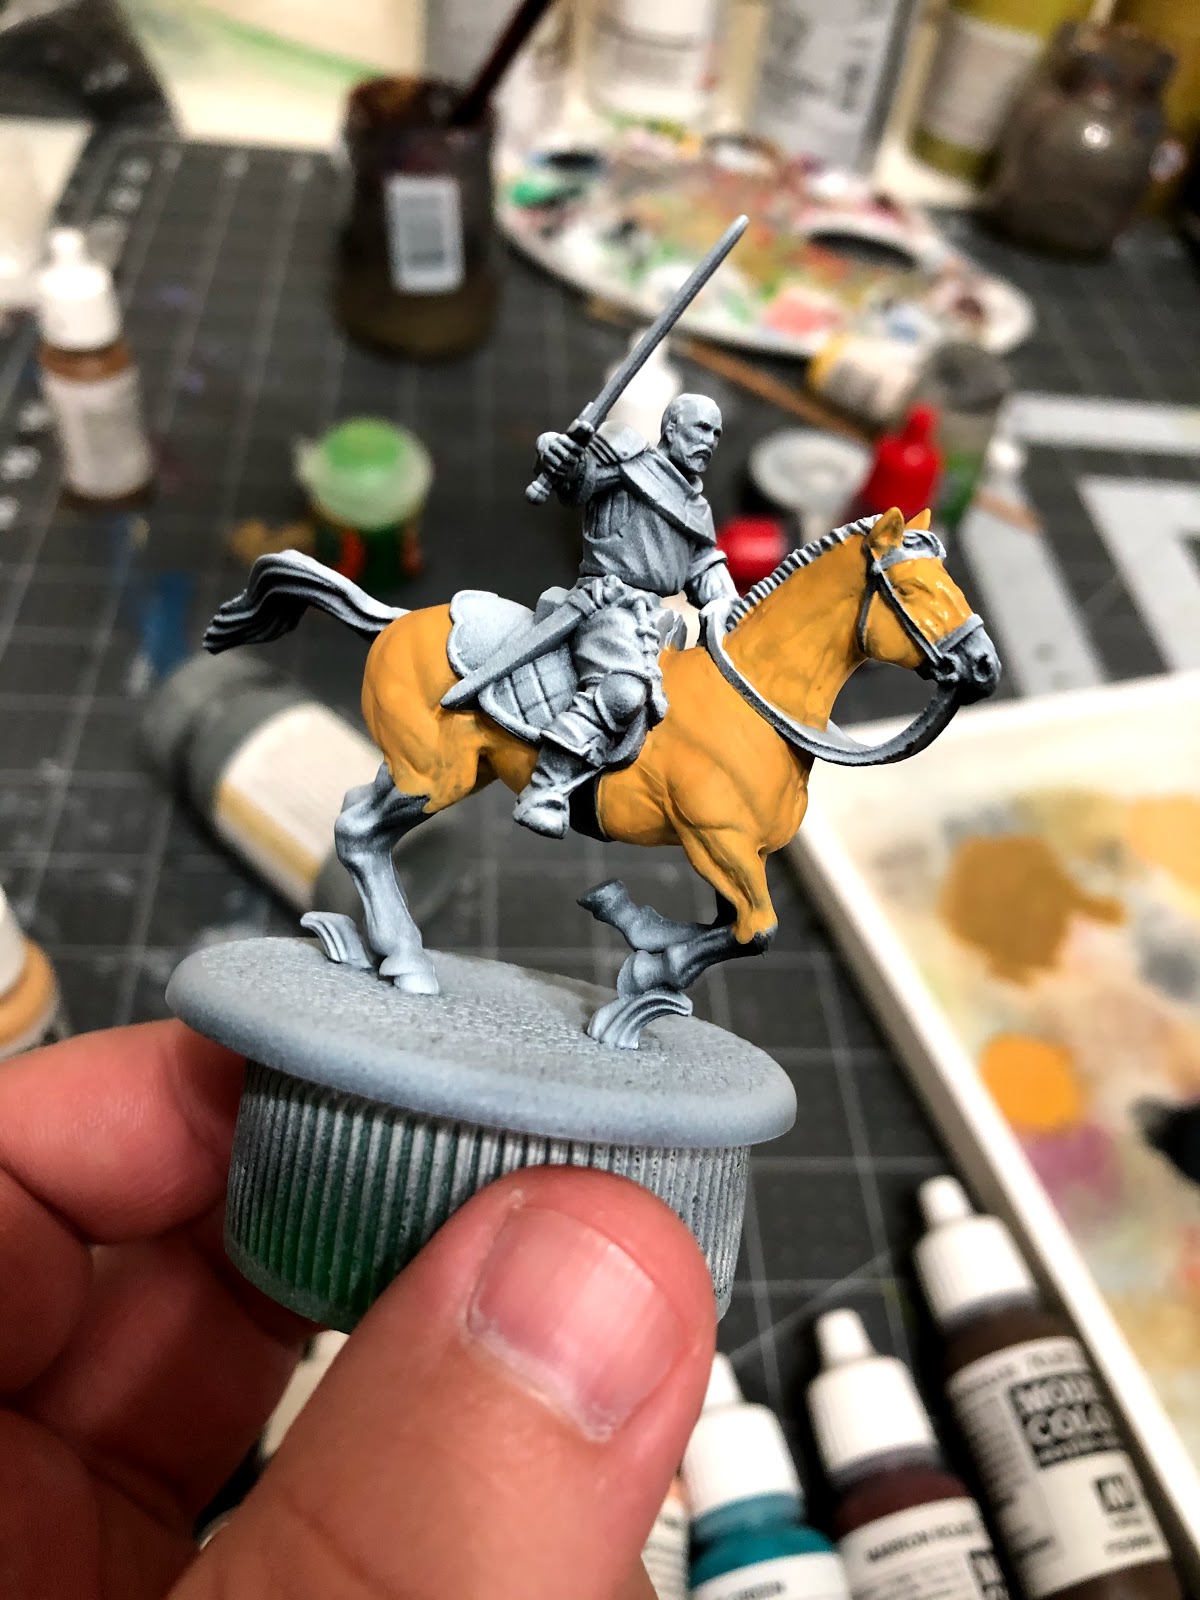
The first thin we'll be doing will be painting the main body of the horse with our medium flesh. Paint all the way down to about the knees, and you'll probably want to apply two coats with this paint. As the second coat is still wet, rinse out your brush...
Quickly apply some German grey to the legs, and again, while the paint is still wet, rinse out your brush, dry it off so it's still moist but not soaking, and brush along where the German grey meets the medium flesh color. This is a technique known as wetblending and creates a nice smooth gradient between the two colors.

Finish up with the German grey by painting the mane, mouth and nose, and tail.

After that, take your basic skin tone and paint Jorah's face and hands.

Next, take your dark sand and paint the model's shirt, including the portions of his sleeve that show through under his armor on his forearms.
You'll also paint his hair and beard this color as well.
Again, due to this being a lighter color, you may want to apply two coats of this color in order to get even coverage.

Then, take your chocolate brown and paint his boots and the wrap around his upper chest, being sure to leave the collar unpainted.

After that, take your leather brown and paint his pants.

Now, take your gunmetal grey, unthinned, and paint the armor on his shoulder, knees, and forearms.

Then we're going back to our German grey and using that to paint all of the leather straps on Mormont himself. This includes his scabbards, belt, armor beneath his tan shirt, and the straps of his forearm armor.

At this time, you can take your blue green and paint Ser Jorah's collar. Use your detail brush to make sure you paint this as cleanly as possible and don't get any stray paint on the face of the model.

Next, take your gold, unthinned, and paint the handles and hilt of the sword and dagger, before you take your plate mail metal, also unthinned, and paint the blade of the sword and the metal portions on the scabbards along with the stirrups.

Once that's done, take your hull red and paint the horse's rigging. This includes all of his bridle and saddle.

The last thing we'll be basecoating will be the metal portions of the saddle, along with the rings in the horse's bridle, and we'll be using gunmetal grey to paint these, unthinned.
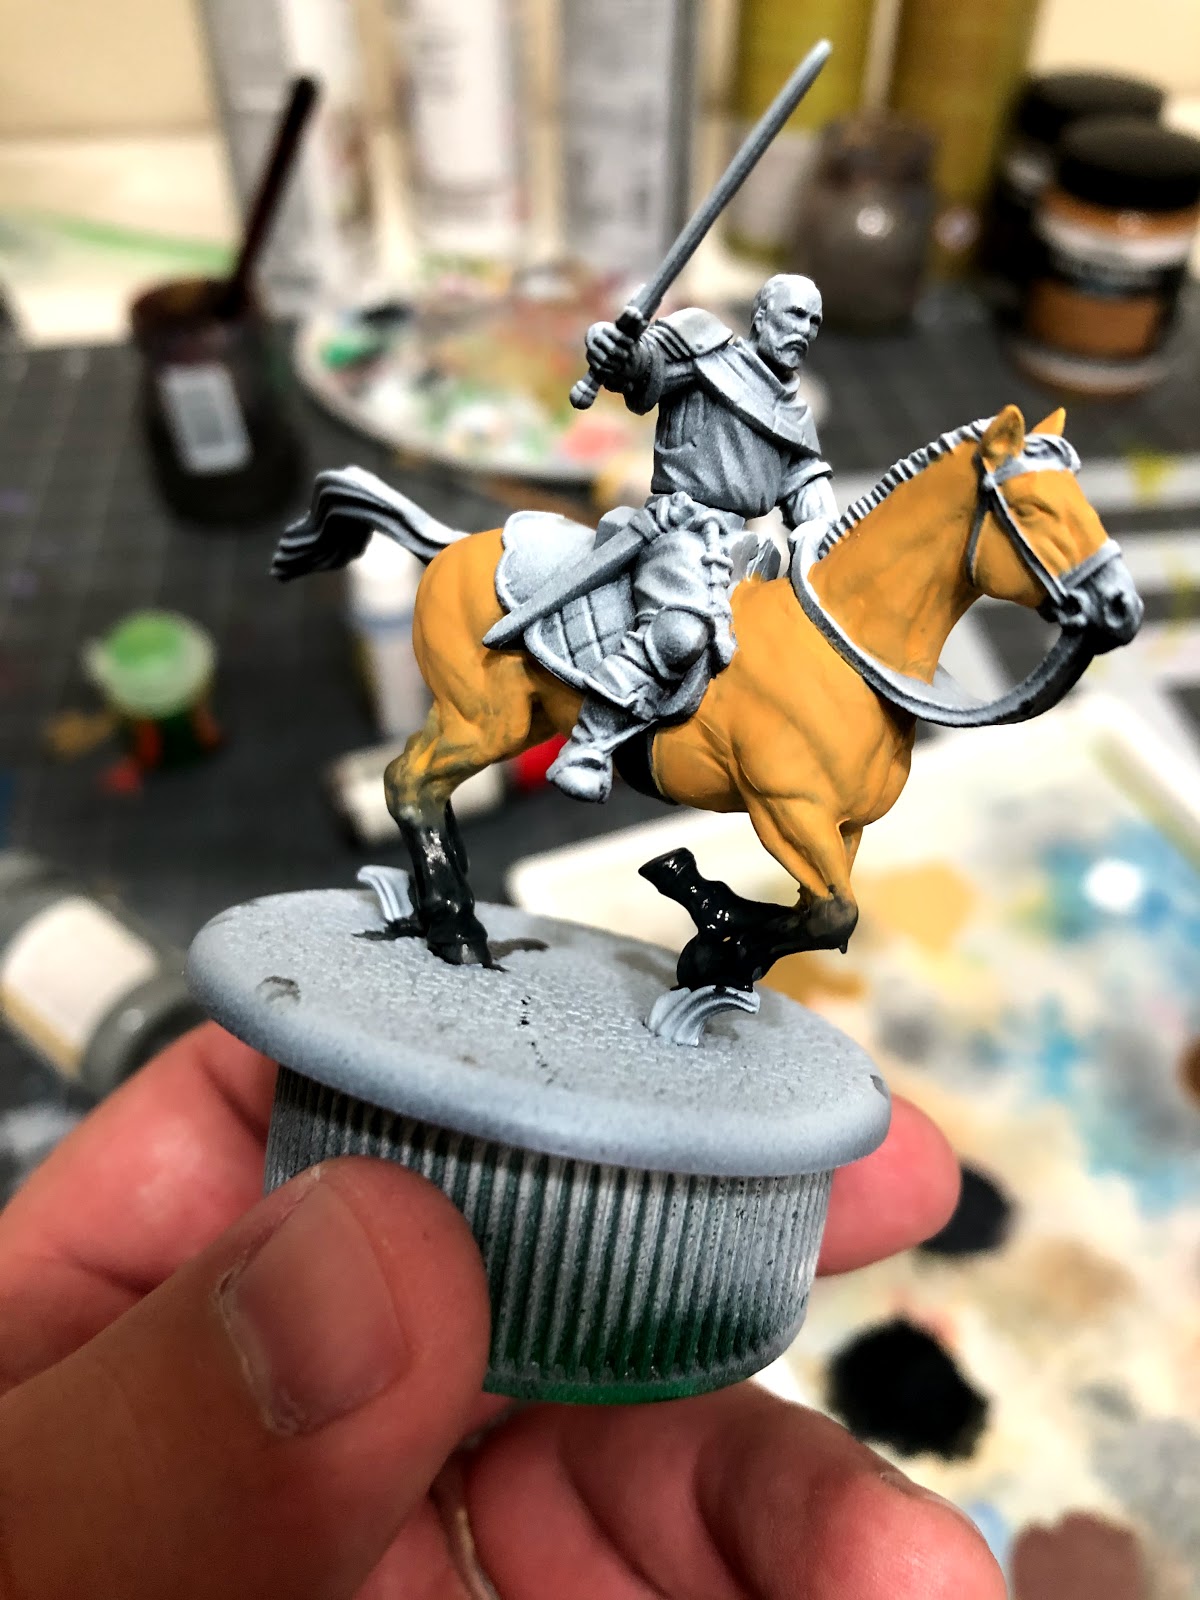
When that's dry, it's time for shades!
3. Shading

Today we're using Light Tone, Soft Tone, Dark Tone, and Flesh Wash, all by the Army Painter.

The first thing we'll be applying will be the light tone all over the body of the horse. My advice would be to go section by section, for example, start with the head, then move to one leg and haunch before moving to the next. This way, you'll minimize your chances of missing a section and having to apply more wash once it's already starting to dry, which can lead to blotches in the application.

Once you're done with the horse, apply the same light tone to Jorah's shirt.

Next, move onto the flesh wash, applying it to the face and hands.

After that, apply your soft tone to the hair, beard, and blue collar. Use your detail brush so you don't get any of this darker wash on the skin.

Next, you'll apply the dark tone to all the other portions of the model. Jorah's pants, boots, armor, and chest mount, along with his sword, scabbard, belt, and knife.
In regards to the horse itself, apply the dark tone to the mane and tail, but also the rigging and saddle.
Once it's all dry, it's time for highlights!
4. Highlights and Finishing Touches

The first thing we're highlighting is that horse. Take your medium flesh and highlight all of the bulging muscles, similar to how you see above.

After that, we'll take our dark sand and highlight Jorah's shirt, specifically where the fabric billows outward, and painting an edge highlight along the arm hole.

Next, take your basic skin tone and highlight the face and hands. For the face, paint the forehead, cheekbones, and nose. If you've got pretty good brush control, you can also try to brighten up the lip as well.
For the hands, try to highlight each knuckle and the thumb.

After that, we're going back to our dark sand and using that to highlight the hair. Once you're done with highlighting that, you can use a TEENY TINY bit of white to add some age around his temples if you like.

Once you're done with that, mix some leather brown with some chocolate brown and highlight the folds in the boots and his shoulder/chest wrap thing.
At this time, you can also mix some dark sand with some leather brown and use that color to highlight the pants by painting all of the folds in each pant leg.

After that, you can mix some dark sand and hull red together and use that color to highlight the saddle, specifically painting little arrows along the top of each of the diamond imprints in the saddle itself.
You can also use this color to paint an edge highlight along the top of all the straps of the horse's rigging.
Now would also be the time when you'd mix together some white with your German grey and paint a few highlights along the tail and mane, but mostly doing an edge highlight along Mormont's scabbard and the straps to his forearm armor.

The last thing you'll do is mix some white and your blue green together to get a SLIGHTLY lighter blue green and just paint a thin edge highlight around the collar.
5. Ride Straight Into Her Friendzone!
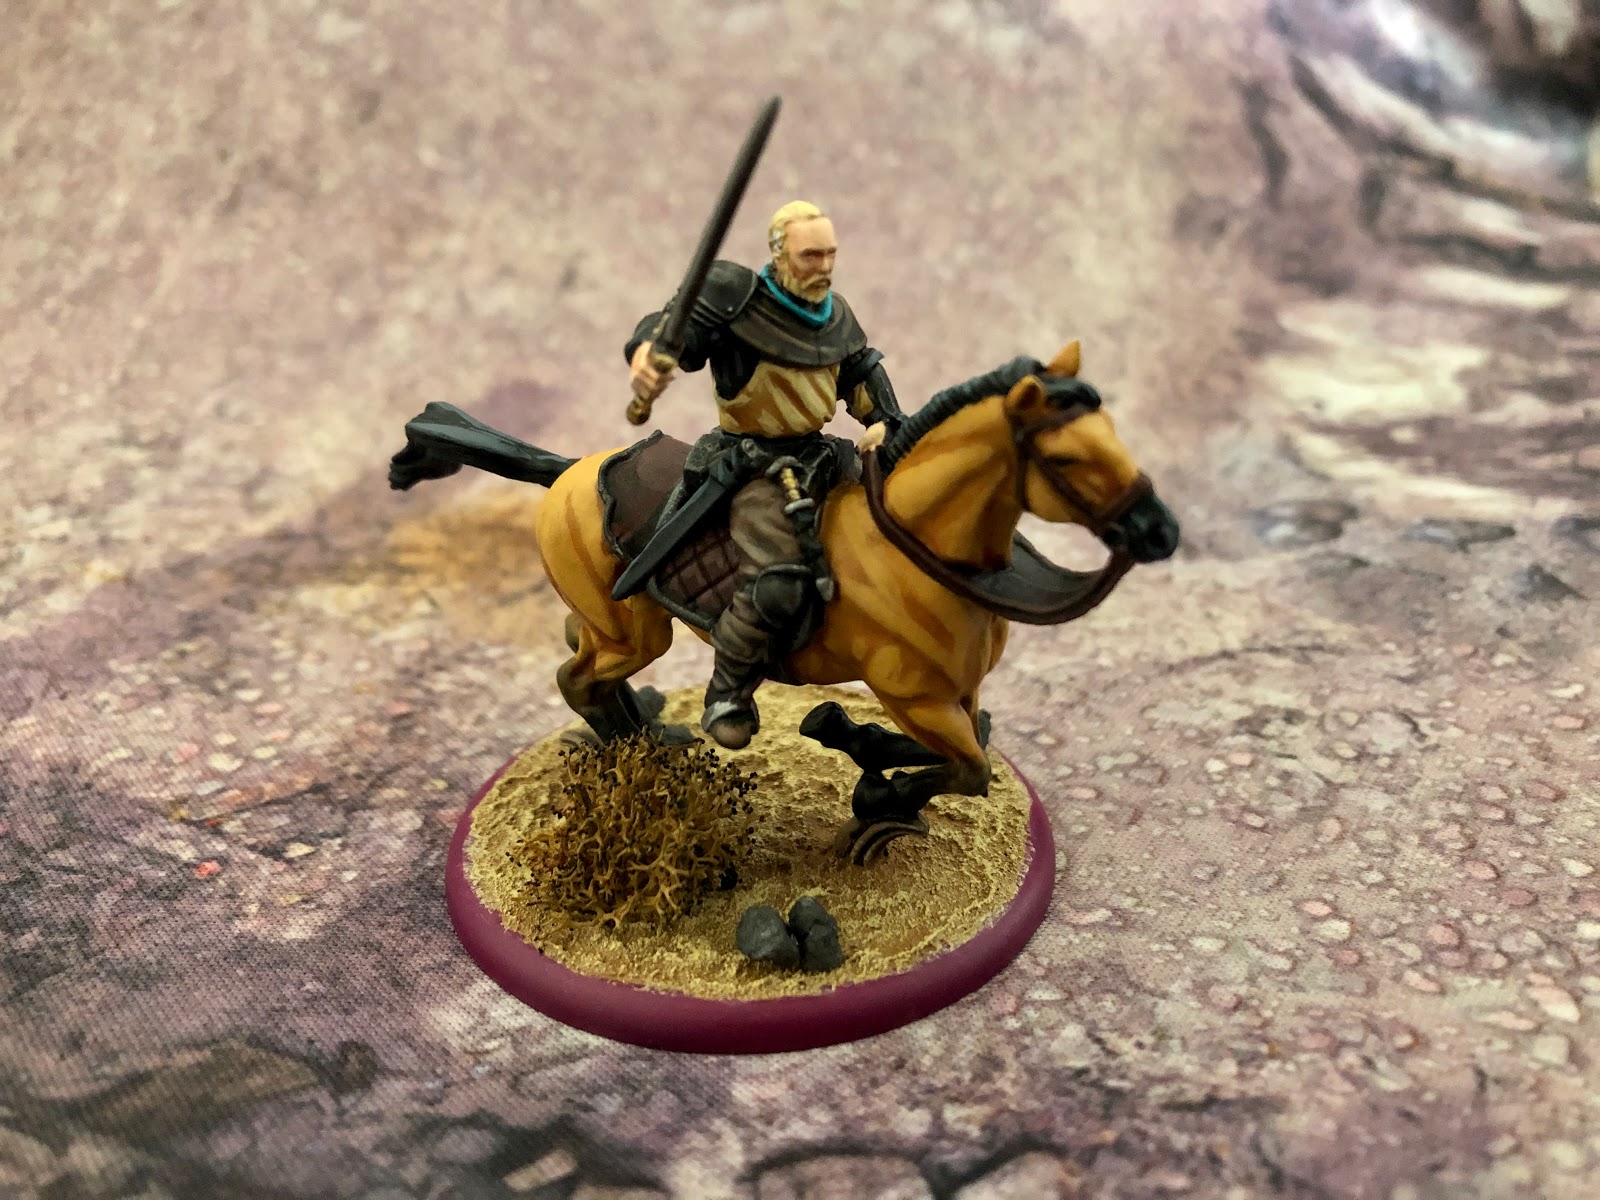
That's it, Westerosi! Spray him with your matte spray and get him riding in the vanguard!
Hopefully you found this tutorial helpful, and remember that this, along with all of my A Song of Ice and Fire tutorials can be found on my blog.
And if you REALLY thought this was helpful, I humbly ask you to consider becoming a Patron. Every dollar truly does count and helps me to provide quality content to you on a regular basis.
Comments
Post a Comment