Become a Patron!


 |
| by CMON Games |
"A Woman Can Rule as Wisely as a Man..."
Look out, y'all! It's Mama Bear! That's the best way to look at Catelyn Stark in my mind. She's the kind of lady who seems just so docile, and motherly, but if you mess with her children, she will gut you like a fish! And that's AWESOME. So, today, we're taking a look how to paint this cunning she-wolf.
Let's get to it, shall we!
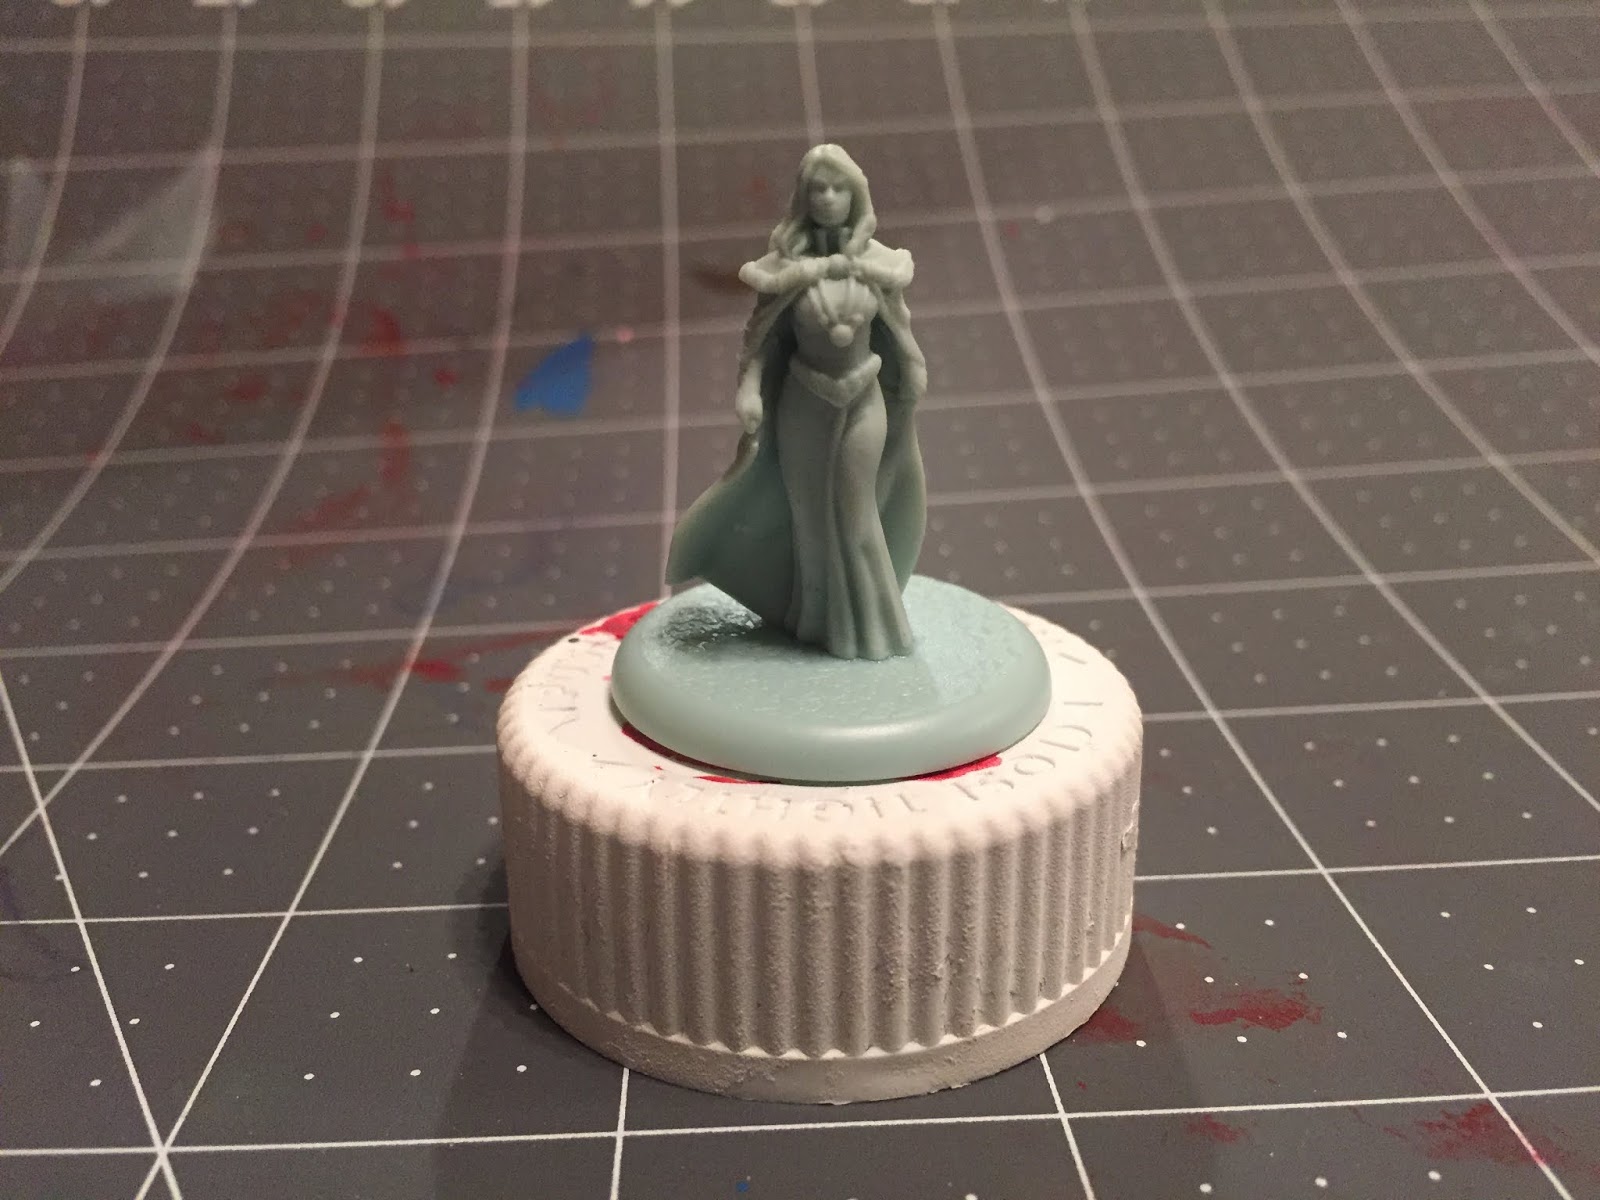
1. Gameplan, Prep, and Prime
Okay, so if you are looking for a book-accurate or in-game art interpretation of this figure, you have come to the WRONG place, because as most of you know, I base most of my work off of the HBO series, and in particular for Catelyn, the gorgeous green dress that the lovely Michelle Fairley wore in season 1.

So, attempting to emulate these colors as best as I can, I've chosen the following colors:

From Target, I got a brownish orange, and pistachio green, while I've also collected my black and white from the craft store. From The Army Painter, I've chosen Angel Green, though any dark forest green will work, and from Vallejo I've assembled Basic Skin Tone, Dark Sand, and Copper. I originally chose Brass (as pictured above), but changed my mind halfway through the paint as it wasn't the right color for what I was looking for.

I also ended up using emerald green, which was the same green I used for Sansa's sash, and I wanted to give you a heads up to pull it now.

I also ended up using emerald green, which was the same green I used for Sansa's sash, and I wanted to give you a heads up to pull it now.

Like always, I've primed with The Army Painter spray on Matt White primer, and we're ready to start painting!
2. Basecoats
The first thing you'll want to start on is the cloak. In the series, she wears a black cloak with whitish fur trim, so you'll want to mix up your 50/50 black/white mix and start working on the cloak. Remember, unless otherwise noted, all of our paints for basecoating are thinned with equal parts water before we apply them.

You'll want to make sure that you avoid the fur trim of the cloak, keeping that white.

Next, we'll use the Angel Green on the dress. There are some tricky parts between the chain of the necklace and the trim of the dress near the "V", in addition to her high collar. Don't be afraid of using your detail brush to get some of these tricky areas.
This may require multiple coats in order to get the coverage that we want, just remember to wait until it's dry before applying a second or third coat, otherwise it will smudge.

Don't forget that with the style of dress Catelyn's wearing, the sleeves don't stop at the wrists. They come down, almost to the knuckles, and cover most of the back of the hand.
For the "V", use your pistachio green. Nothing too fancy, and since we primed white, it should only require one coat.

Moving onto the face and hands, use your basic skin tone, and make sure that you get the neck in between her high collar. You can also use this time to clean up the edges of the sleeves where the dress stops and the hands continue.

Onto the hair, apply the burnt orange, and again, you may have to apply multiple coats to get the even coverage that we're going for.

Using your dark sand (or just TAN) paint the belt, the necklace, and the trim of the dress around the "V". For the necklace and the trim, you'll do well to turn your brush, and use the side of the brush to get the raised edges, similar to how I describe painting the hounds on The Mountain's shield or Greatjon Umber's eyebrows.

The last thing you'll basecoat will be the metal pendant and clasp for the cloak. I used copper because I liked the contrast between that and the green, but feel free to use whichever metallic you'd like.
Take this time to use some white to touch up the fur on the cloak, and you're ready to shade once it's all dry!
3. Shading
I will be using the following washers from The Army Painter:

Flesh Wash, Strong Tone, Green Tone, and Red Tone. First, we'll apply the green tone to the dress, though, honestly, the order you apply these doesn't really matter that much.

Make sure you also apply some to the "V" and the high collar.

Then, I applied strong tone to the fur and the cloak. This will not only intensify the darkness of the cloak, and give it a nice tint, it also colors the fur to give us a natural looking texture. You'll also want to use the strong tone for the belt and necklace/pendant and the trim around the "V".

Now, add some flesh wash to the face, neck, and hands. If it pools around the neck, that's alright, actually, and it will just really add some good depth to that area.

And the last bit of shade will be some red tone on the hair, which will give it that red tint, matching the color we've been using for all of the Starks, from Robb to Sansa.
Once it's all dry, we're ready to highlight!
4. Highlights and Finishing Touches
So, the first thing we'll be highlighting is the dress.

Using your detail brush, and your emerald green, thinned 50/50 with paint, you'll highlight where the dress bustles outward. This includes the left thigh and hip area, and any fold in the bottom. I also highlight the front of the sleeves and hit just a little of the highlight on her bust and stomach. With those rounded areas, make sure to paint mostly in the center, leaving the edges darkened.

After that, take your basic skin tone, and paint the center of her forehead, her chin and cheekbones, and the bridge of her nose. You can also do the front of her hands, but that is less necessary.

Now, you'll add some top down highlights to the hair using your burnt orange. Remember to just look at the mini from the top... down, and paint what you can see, this includes the very top of the head, and some of the tips of the hair around the shoulders, but avoid the center part.

Using your dark sand/tan, add just a TINY line of highlight over the top of the belt. Nothing fancy here, just run the brush over the ridge of it so that it catches a little bit of paint.

Now, apply some top down highlights to the fur using your white. Don't go crazy, just add a little bit of white around the top of the fur, similarly to how the tan was applied to the belt.

The last highlight you'll add will be to the cloak. Using the same 50/50 black/white mix, just add a little highlight to the parts of the cloak that are billowing outward, the tops of the shoulders, and the folds near the arms. Start off at the most outward portion of each fold, and paint down towards the darkened recesses as the brush starts to run out of paint, but avoid the actual darkened recesses. This creates a nice subtle gradient in the dark cloak.

Finally, you'll add both eyebrows, using the burnt orange, and the lips. For the color of the lips, I actually used a dark red, the exact color I put on Cersei's lips, as that reads a more mature woman than a lighter red, but it's up to you.
For the lips, aim for the middle of both lips, as opposed to trying to paint them individually, and remember, for both eyebrows and lips, don't load up too much paint on your brush. It's better to have to little and go over it a few times than too much and have to repaint her face.
5. Rally the Bannermen!

That's it! Base her how you like, spray her with your matt spray finish, and she's ready to take it to the Lannisters in her own way.
If you've been following along, you should now be finished with all the CHARACTERS from the Stark vs. Lannister starter! Congratulations! If you haven't, you can find all my tutorials for A Song of Ice & Fire here.
But we're not done! Check back soon, as we continue painting our way through this game, and there may even be some special announcements on the horizon!
Comments
Post a Comment